I have been powering along through my two bees, the Aussie Modern Instabee and the Quilty Sisters Instabee…. and as it turns out I have three of the Triple Star blocks to make in a row.
When I made it previously, I worked out improved cutting sizes to reduce the massive amount of wastage when you are trimming up your half square triangles.
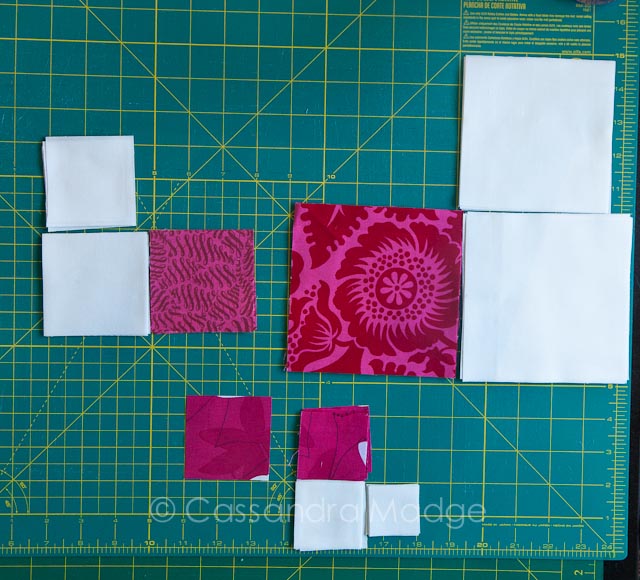
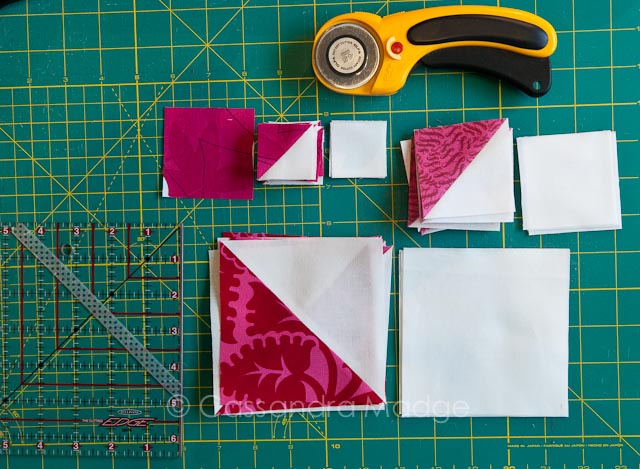
Background cutting requires 4 each of 1 1/2″, 2″, 2 1/2″, 3″, 4 1/2″ and 5″ squares, which means 24 squares in total, at 6 different sizes.
Each star round requires 4 squares each of 2″, 3″ and 5″. As well as the centre square, which lends itself beautifully to fussy cutting, at 2 1/2″ square.
To work this out, you simply use the “HST Principle”…. add 1″ to your FINISHED required size, and cut 2 squares accordingly. Joining them together in the usual manner of 2 seams 1/4″ each side of the centre line, then trim up to the UNFINISHED SIZE which is 1/2” larger than your finished requirement.
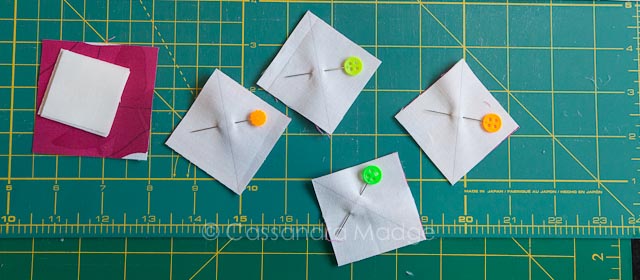
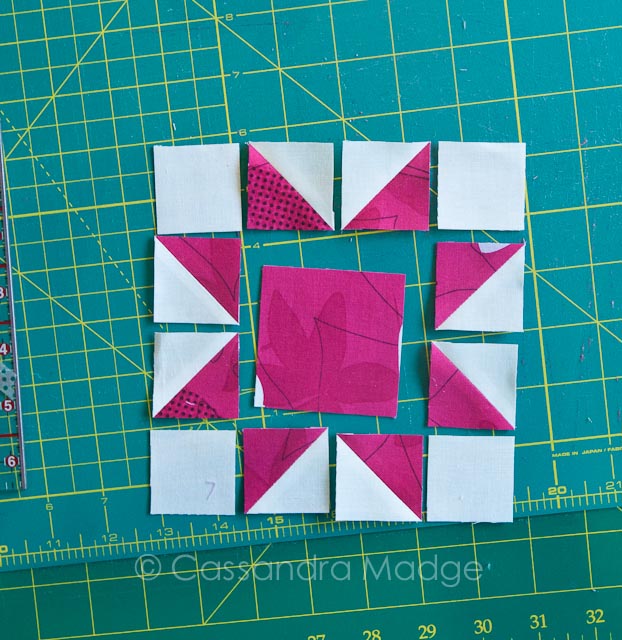
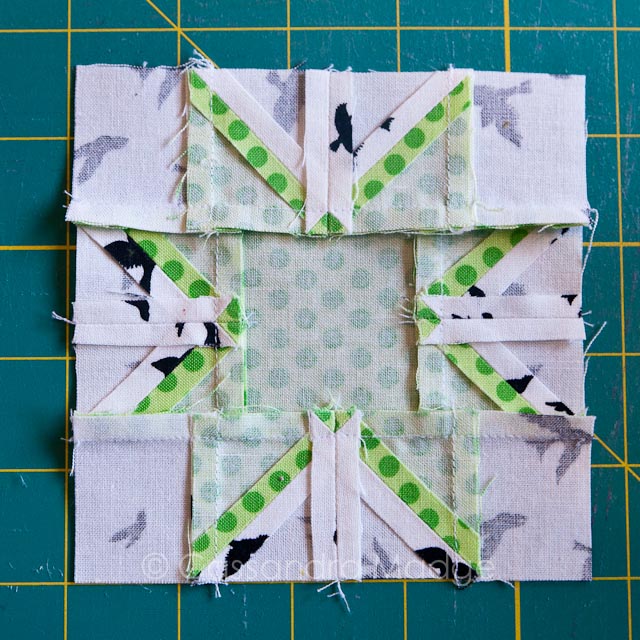
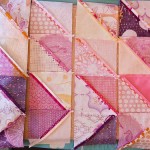
Here are all the star points matched up and ready for stitching
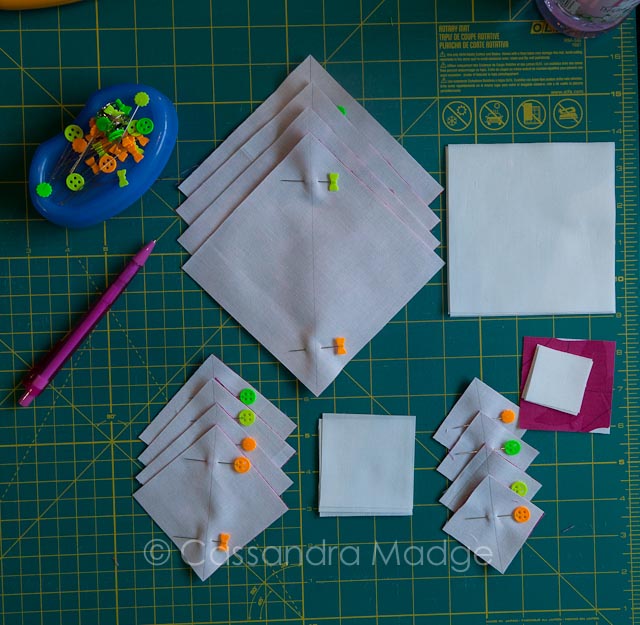
The baby sized star points in the first round trim up to 1 1/2 inches… as you can see here, there is much less wastage than the original size in the pattern.
Once you have trimmed all 24 half square triangle blocks up, it’s very easy to see how the different sizes we originally cut now fit neatly together.
For the next step, I have found success in carefully pressing the seams in order for each star to nest together.
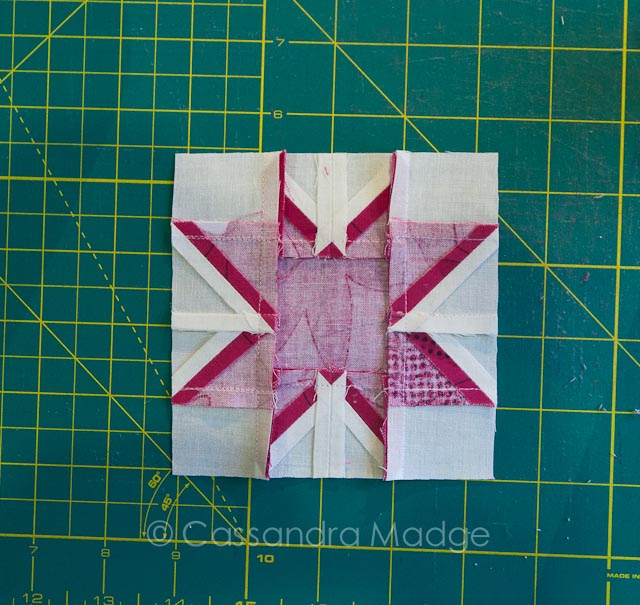
This can be a seriously bulky seamed block, so press open wherever possible, otherwise the intersections will become unstitchable.

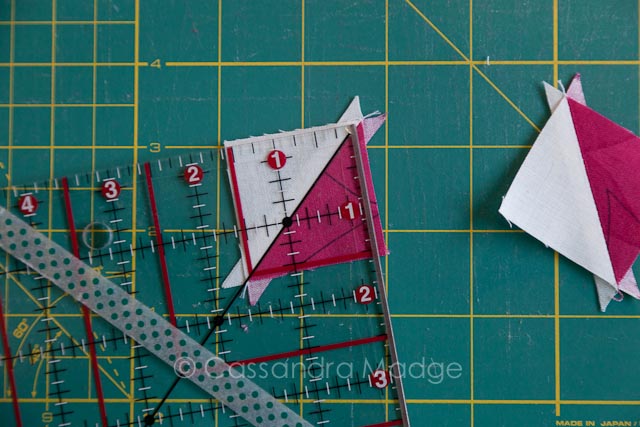
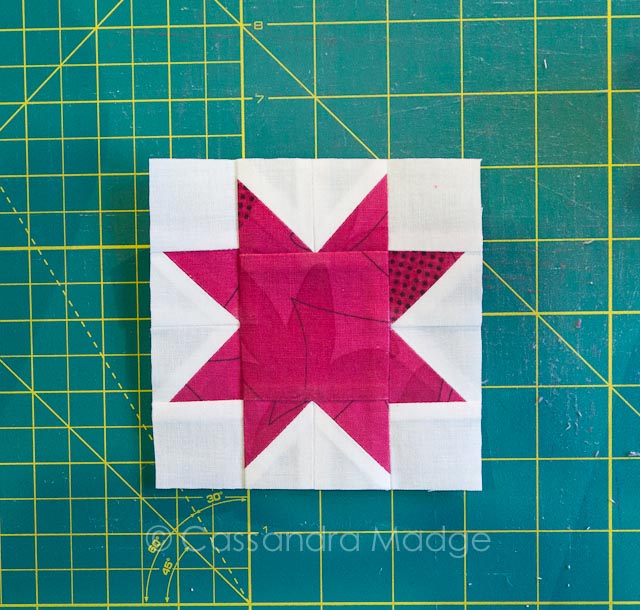
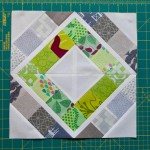
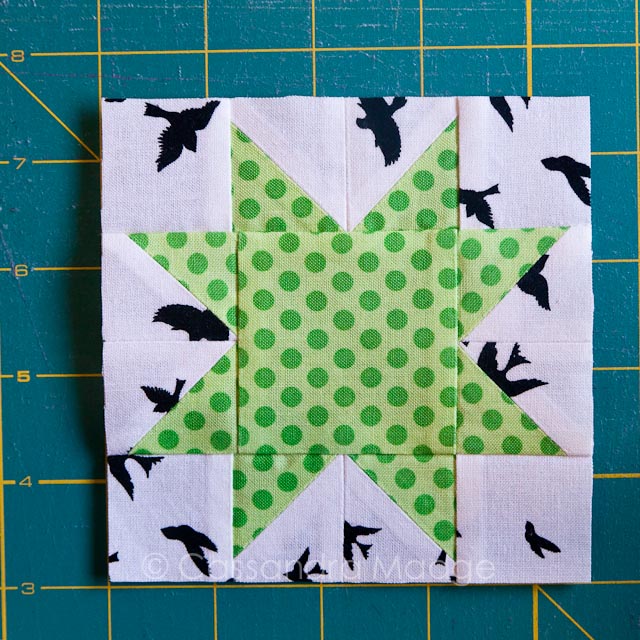 You will notice from the inner star block above, my final step before joining on the next round of points is to carefully trim the block up to 4 1/2″. This gives you nice straight edges to work from, otherwise any slight un-evenness could be compounded each round!
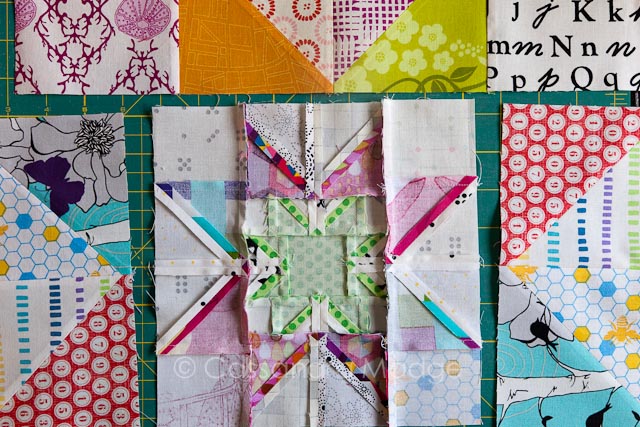
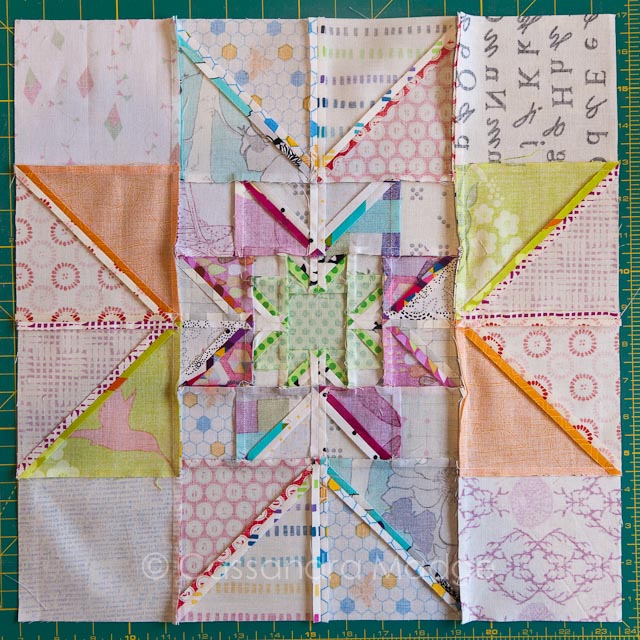
Here showing the further rounds of this block, you can see the seams and how the points created so much bulk, even with pressing them open where possible. I posted this beautiful scrappy block off to Katherine, for the Aussie Modern Instabee last week.

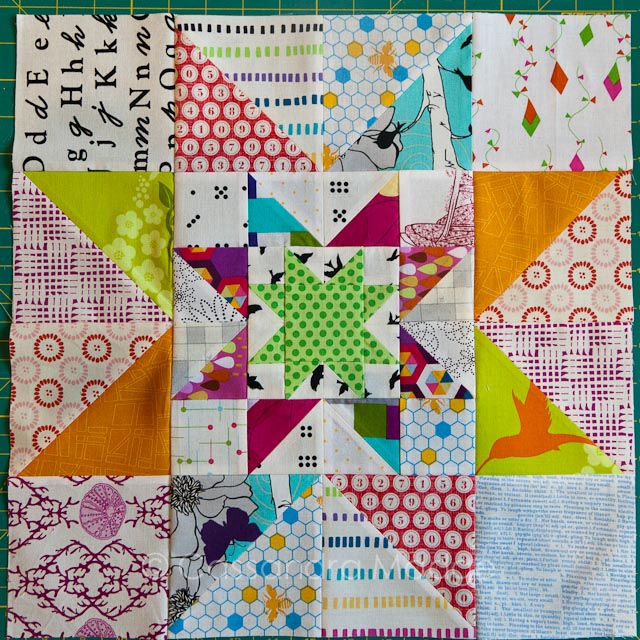
This beautiful Raspberry block belongs to Julie, part of the Quilty Sisters Instabee and was given to her this past weekend, during her visit (which is another blogpost entirely) while she was attending the AMQF (Australian Machine Quilting Festival), which is definitely another blogpost!
I hope these hints have helped you with this tricky block. You will see that not all my points or edges are 100% perfect, and I’m ok with that. I’d also like to note that I do not own the rights to this pattern, designed by Elena Roscoe, and I have only published this information in an effort to help with reducing the wastage in cutting and helping out my fellow bee members.
If you have any questions or need some closer pictures, please shout it out in the comments. I’d be more than happy to help solve any problems you are having with this block.
Please be aware that there may be affiliate links in this content. Your support allows me to keep creating for you!

Ms Midge
Ooh! I’ve been seeing these everywhere and wondering where to get a tutorial! Thanks!
Cassandra
Hope it helps 🙂
Alison
Ooh how do you get involve in the Aussie modern instabee? The blocks are gorgeous 🙂
Cassandra
Hi Alison! The bee has been going for a few months now, but there is definitely talk of some people wanting to start again as soon as this one is over early next year. Lisa Chambers organised this one, keep an eye out on Instagram for signups!
Angie @ GnomeAngel.com
Great tutorial. This was one of my favourite blocks to put together for the Bee – so much potential for fun. 🙂
Cassandra
It’s a really great block, and not as hard as it looks!
Johanna
Lovely block! I can’t resist a star, and here you’ve got three!
Cassandra
Thanks Johanna! I wish I could take credit for the design, but I was just simply trying to help out with the issues some Bee members were having with it 😀
Katharine
Absolutely love my block…..colour, prints, immaculate construction…you are a clever woman. I also applaud your generosity with your informative tutorials.
Cassandra
Katharine, it was my pleasure. I’ve appreciated all the work and beauty you have put into this bee so far also 🙂
jean ward
I did Something wrong my 2nd round no off. Iim confused about Hst add 1″
Cassandra
Hi Jean. Thanks for reaching out for help. I’m sorry I don’t quite understand what your problem is with your second round without a bit more information. As regards your second question, regarding the HST formula, it really deserves a blog post of it’s own, which I will try very hard to get photographed and written before we move!
Jess @ Scrappy n Happy
Glad I found this, I’m just about to make 3!
Stella Singleton
Hi This block is gorgeous! What’s the block size?
Cassandra
Hi Stella 🙂 It’s been a while since I made this tutorial, I believe the block is 16″ finished size.