I have to admit to having some Obsessive Compulsive tendencies when it comes to scraps. Whether it’s scrap wool, quilting fabric, backing fabric, or even batting. Whenever I trim up a fresh quilt, I keep all the off cuts stashed into a plastic bag. Eventually they get unpicked as necessary and split into fabric and batting. Only sometimes they are an inch or two wide, which is too small to join into more batting, even for me! But what do you use all those strips of batting for I hear you ask?
Firstly, I keep a container of batting strips next to my longarm. They make fabulous instant dust cloths, great for gathering up stray lint and thread when I wipe down my machine and table. I’ve even been known to wipe over the skirting boards with them.
Secondly, I have used batting folded or cut up as stuffing for pincushions. You can see one of my pincushions in this post. It’s surprising how much stuffing goes into one, you can use up a lot of scraps this way.
Finally my latest experiment was with making covered coathangers. I know, it sounds completely granny, but I LOVE my padded hangers, and there is nothing better than seeing your handmade clothes hanging on them. They help stop the corners of hangers stretching or distorting your clothes, as well as keeping open necks or loose straps on the hanger.

These three tops are all made by me, and here are hanging now on their own padded coathangers.
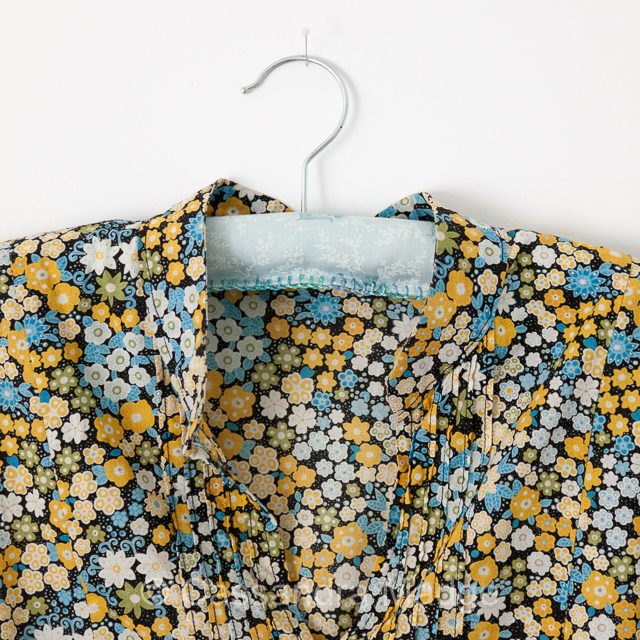
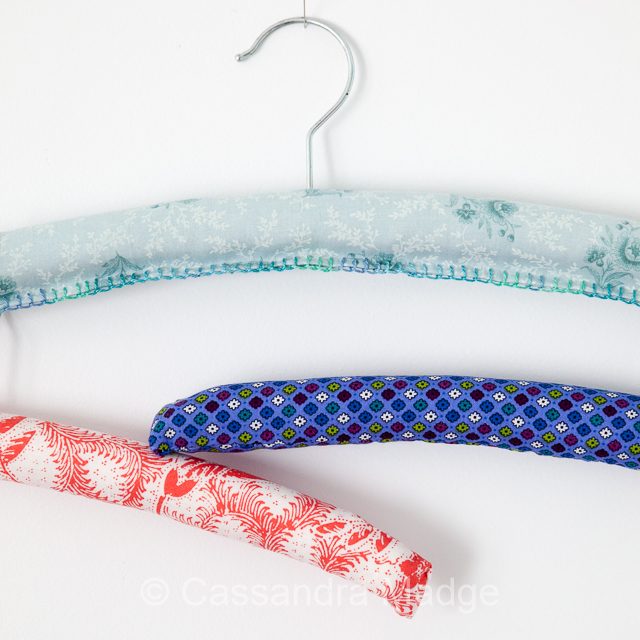
Hanger one – while I was still working out the dimensions, the fabric cover on this one came out a little big, so I added a row of blanket stitch with a variegated cotton along the bottom for a little extra flair. I definitely think we could have that particular accident again, the finished result is too cute!

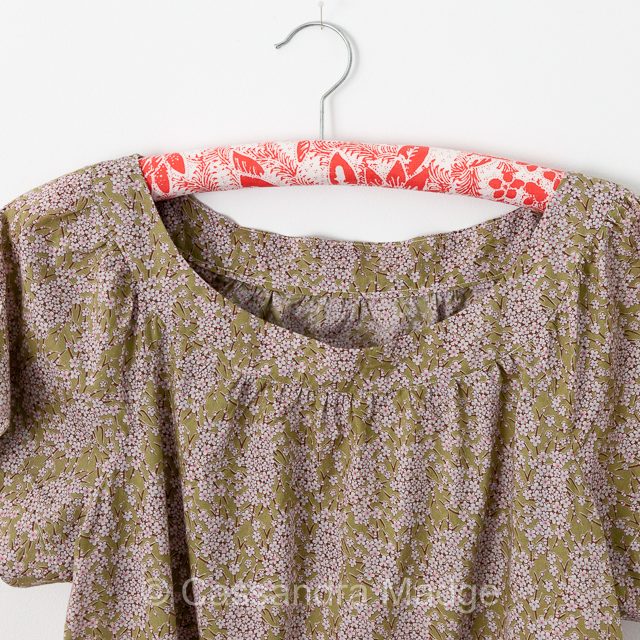
Hangers 2 and 3 were a perfect snug fit, with the seam along the bottom edge held together with an invisible ladder stitch.

Each hanger has a longer strip of wadding wound closely around the hanger from end to end, with a small overhang to cover the wooden ends. I found I needed a few stitches to hold down some of the edges. Next I lay flat a second strip of wadding from the top and down each side of the hanger. I used a little drizzle of white glue to hold this layer in place, while I stitched the bottom edges along each side. While I could still find it, I used a sharp pointed pair of scissors to snip a tiny hole in the batting layers where the metal hook screws in.
Each piece of fabric has a machine stitched eyelet in the very centre, which I then opened up with a seam ripper. This was fed onto the metal hook at the screw end, then screwed down into the hanger. As I had previously already stitched each end of the fabric together, as well as pressed a seam allowance in on each side, it was then simply a case of easing the fabric over the padding, then using a strong thread to stitch the long seam underneath together.
I really am so excited to have another excuse perfectly valid reason for all my scrap hoarding tendencies. As a bonus, these hangers are a great way to use up some pieces of fabric that were languishing at the bottom of my ugly fabric bin. So I count that a win all around!
Do you hoard your batting scraps? What other uses have you come up with for them?

Please be aware that there may be affiliate links in this content. Your support allows me to keep creating for you!


Kathy E.
Cassie, as a fellow scrap-keeper, I applaud you in finding a cool way to use up the batting scraps! Padded hangers are such a luxury, so to make your own using scraps is a double bonus! A while back, I read about a blogger who throws all of her scraps and batting into an old pillow case. (She uses the pillow case like a trash bag in a wastebasket.) When the case is full, she sews the ends together and takes it to the humane society for a lucky dog to lay on. Ever since reading that post, I do the same. My scraps aren’t going to the land fill anymore, but will give comfort to an animal. P.S. I’d love to see a step-by-step on how you make your padded hangers. I’m so visual and would love this!