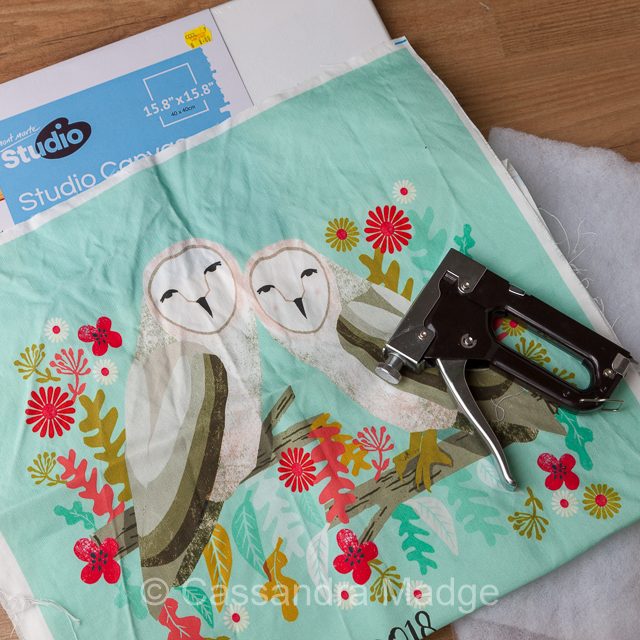
Everyone loves those words – simple and quick, but this is genuinely one of the quickest and easiest DIY gifts I’ve ever made. No sewing needed, just a bit of glue and a trusty staple gun. I used a Linen/Cotton Canvas teatowel from Spoonflower, but you could use any fabric that you really loved.
You will need:
- Canvas of the correct size. This teatowel was a bit over 40cm wide, which gave me enough print to wrap around the edge of the canvas. I had a choice between a shallow edged canvas and one with quite a deep edge, and I chose the shallow one for reasons of space.
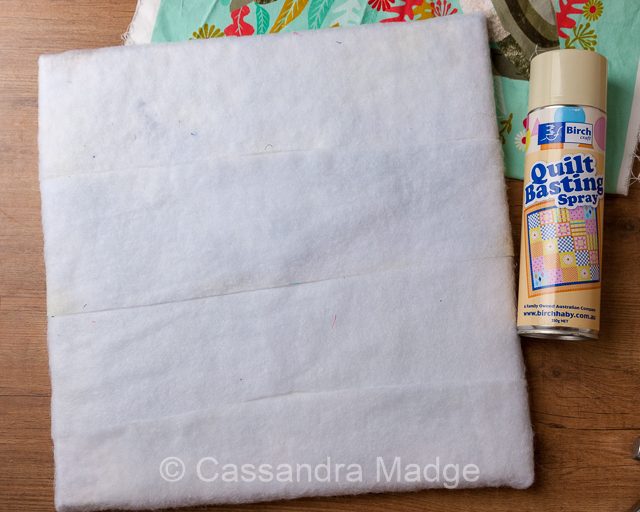
- Polyester or cotton batting (scraps are fine)
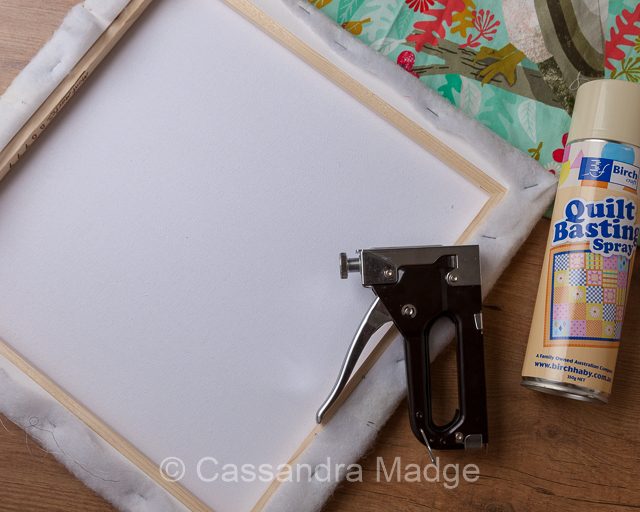
- Heavy duty staple gun with staples
- Cord to hang the canvas (optional)
- Basting spray glue (optional)
- Fabric of choice. This should measure at least 1 inch further around the canvas face, plus the depth on either side. For example – a 16″ Canvas with a depth of 3/4″, your fabric should measure at least 19 1/2″
Step one
You need your batting to be at least the size and depth of your canvas, plus an inch for overlap and stapling on the back. For example this frame was 16″ square, plus approximately 3/4″ deep (x2), plus overlap would require batting at least 19 1/2″ square.
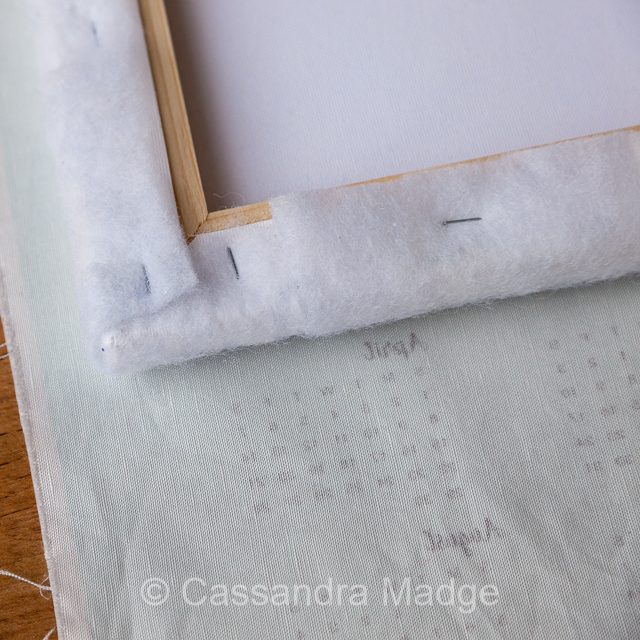
Because I was using scrap strips of polyester batting, I gave the front and edges of my canvas a light spray with the basting glue. This helped me to position them and hold in place while I wrapped them around to the back. A little extra glue was needed on the batting to fold over the back of the frame, and I added staples to secure the strips and neatly fold in the corners. If you were using a single piece of batting, you could easily skip the spray and staple in the same manner described for the fabric, starting in the middles of opposite sides, and working out to the corners.

Step two
Lay the batting wrapped canvas in the centre of your pressed and starched fabric. As the top picture shows, you may need to make allowance for your print to wrap around the sides of the canvas to avoid a white gap showing.
Once you have the canvas positioned where you want, put a staple in the middle of the top, then pulling lightly, add one in the middle of the bottom, opposite the first staple. Repeat for the left then right sides, always stretching but not to the point of distortion.
After these first four staples are in, you can flip the canvas over to double check your positioning. This is the ideal time to move it around if needed, as you have only a small number of staples to remove. If you are happy with the placement, then go ahead and start filling in towards the sides, always stapling opposites and gently stretching as you go. Stop a couple of inches away from each corner, ready for the next stage.

Step three
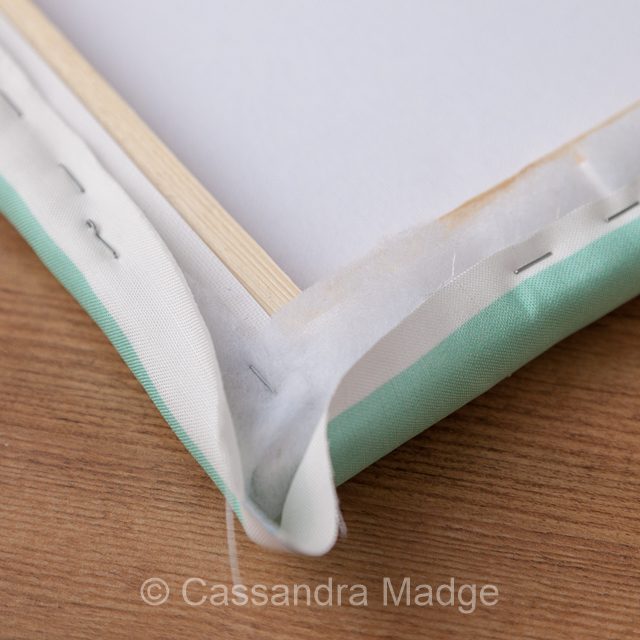
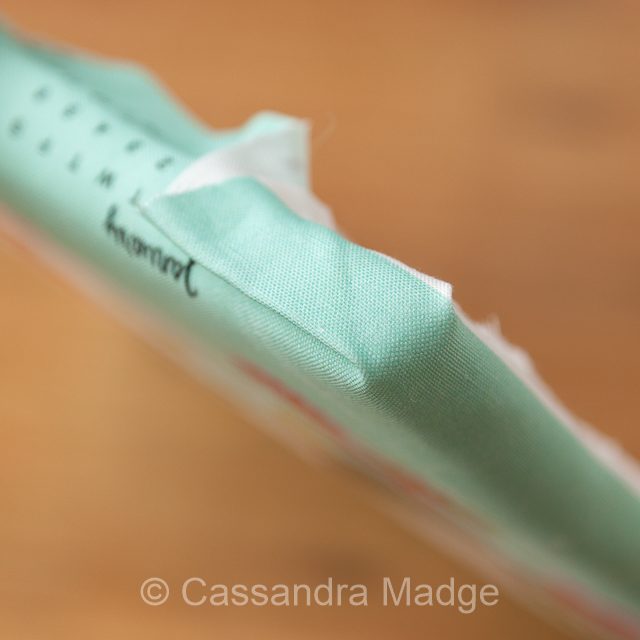
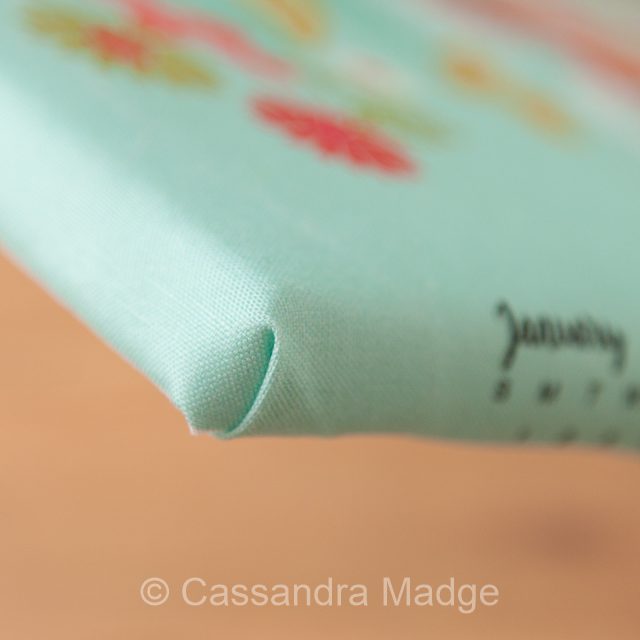
Stop stapling a couple of inches short of the corners, to give yourself some fabric to fold and manipulate. I didn’t use an “official” mitre for these, I actually folded them the way I was taught to tuck in sheets, to achieve the old-fashioned “hospital corners”. They give a lovely neat finish and are quite easy to achieve. We are going to break it down into two stages.
Firstly, stretch and staple the SIDE EDGE right down at the bottom of the corner. (Picture two above.)
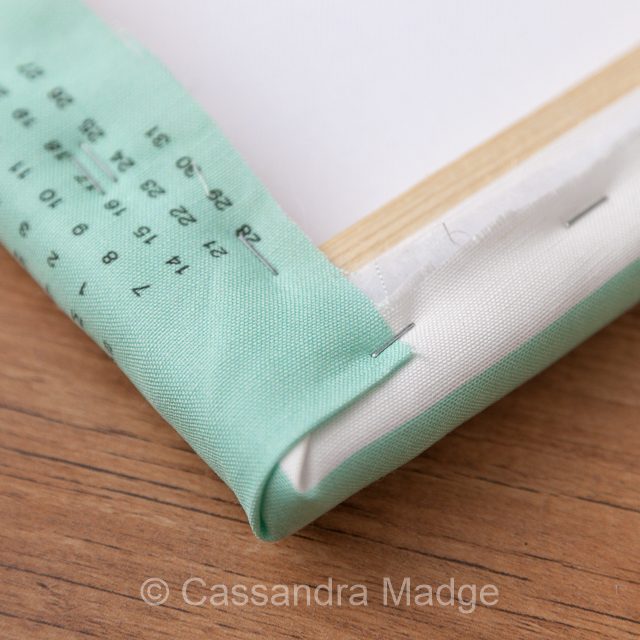
Next, you want to keep working the side fabric, folding it down and around the bottom edge, so the fold is straight along the front of the canvas. Add a staple to keep this in position, but careful not to catch the bottom piece of the canvas in it. Pictures three and four will show you how this stage should look from the back and the side of the frame corner.
Step four
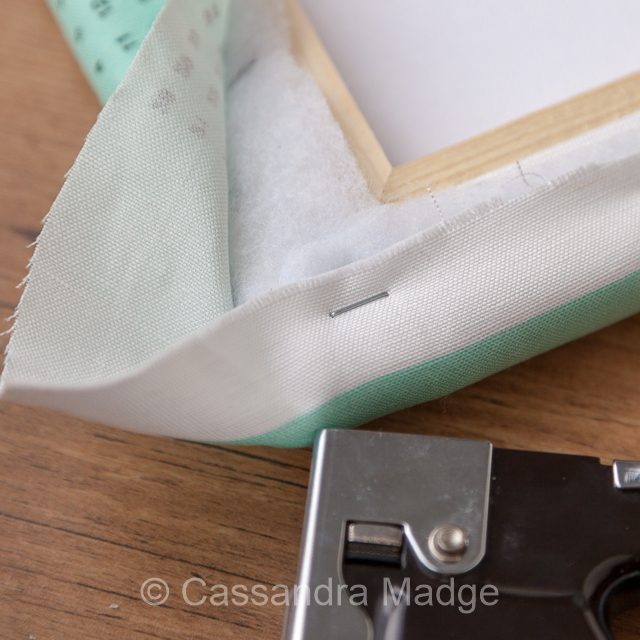
Once the side piece of the corner is safely secured, fold the bottom section to the back of the frame – over the previously stapled side, pulling tight and stapling. Now you can fill in any gaps nearby with staples. Repeat for the other three corners, making sure to secure the side first, then the top or bottom piece. This ensures that the folds appear on the top and bottom where they are less likely to be noticed, and gives you lovely clean sides.
Optional step five
Using your staples, attach picture cord across the frame, measuring a matching distance from the top on both sides.
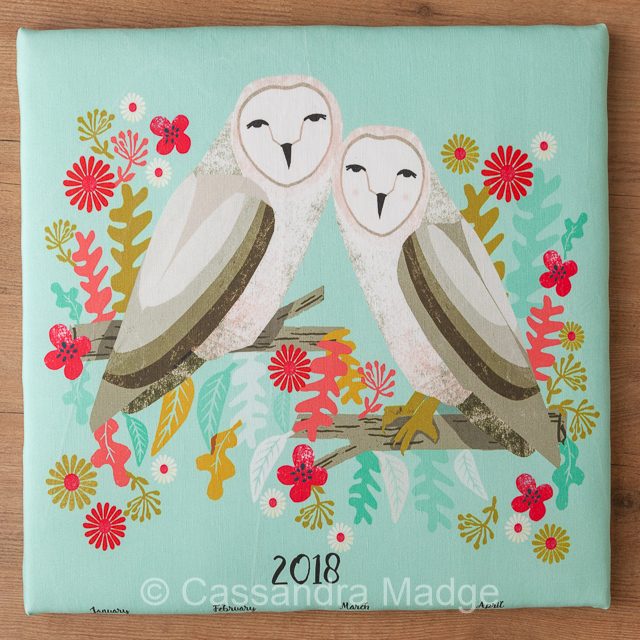

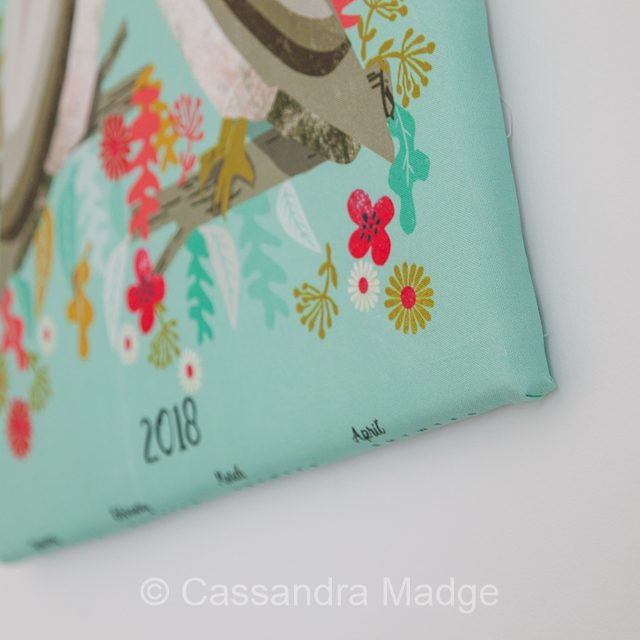
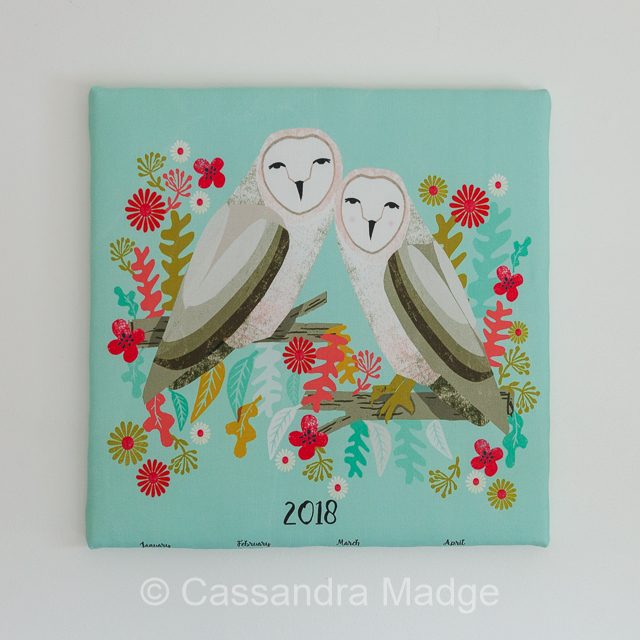
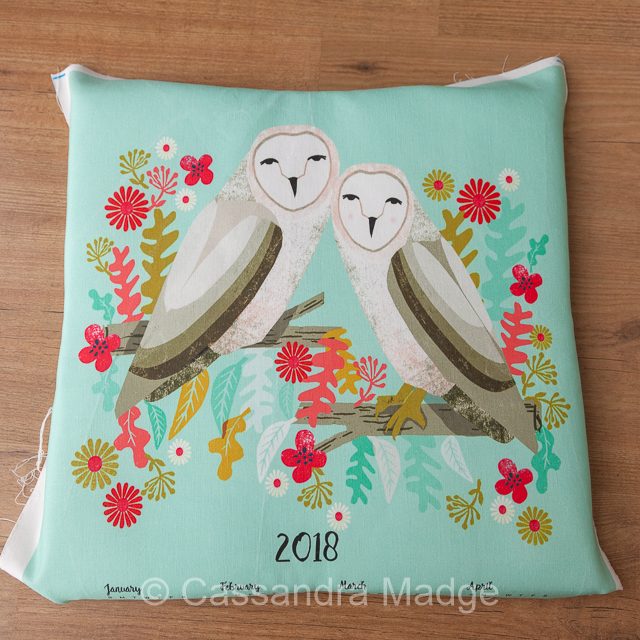
If you are interested, the owl artwork that I used is the Barn Owls Tea Towel calendar by the artist Andrea Lauren – I just love her work and have a second canvas in the works to show you some fancier tips and tricks. I did follow Spoonflower’s recommendations as to a prewash for this fabric, then gave it a thorough starch and press on the wrong side before using.
What fabrics can you imagine using to decorate your house with? something that is just too beautiful (or precious) to cut up?

Please be aware that there may be affiliate links in this content. Your support allows me to keep creating for you!

Janice
Beautiful project, Cassie! The designers work that you picked is really fun! I am looking forward to seeing the next project you have to show!
Weaveron Textile
very good idea for give gift …..