For today we have block number 6, April from the Farmer’s Wife 1930’s Sampler Quilt – the fabulous quilt along being brought to you by Angie from Gnomeangel, the Fat Quarter Shop and Marti Michell.
The Farmer’s Wife 1930s Sampler Quilt: Inspiring Letters from Farm Women of the Great Depression and 99 Quilt Blocks That Honor Them by Laurie Aaron Hird for Fons & Porter/F+W; RRP $28.99 – Click here to purchase.
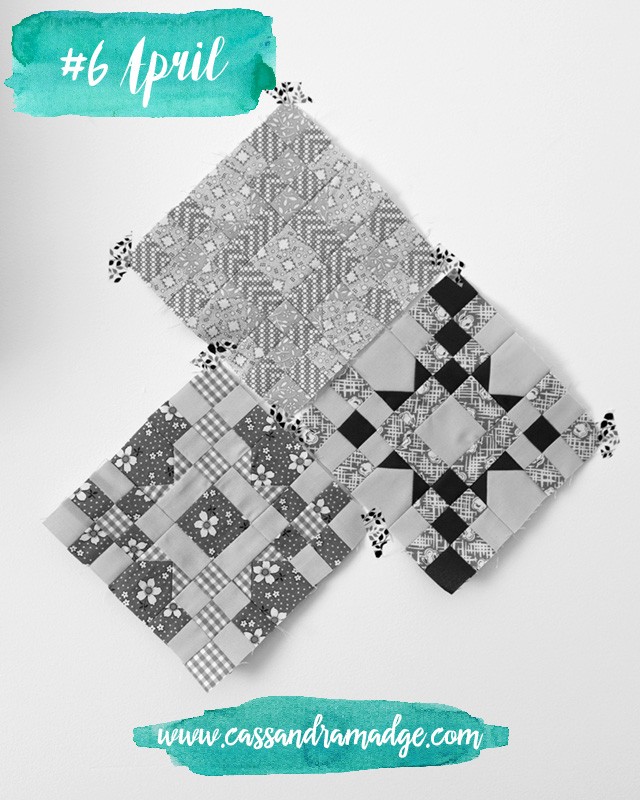
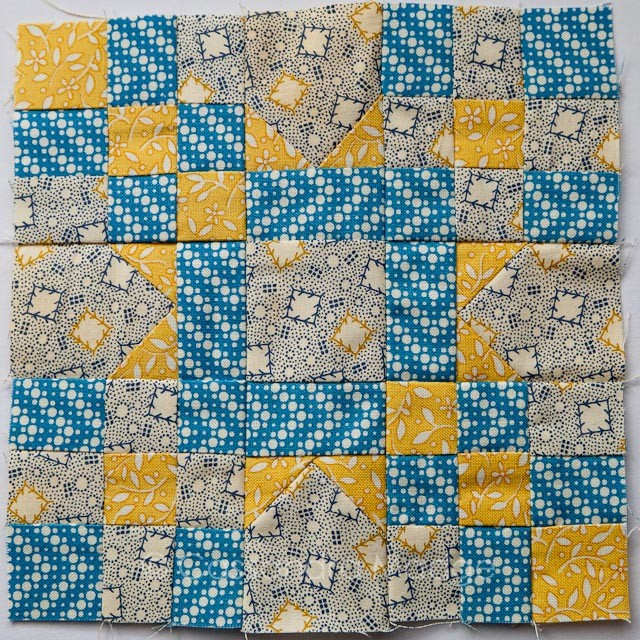
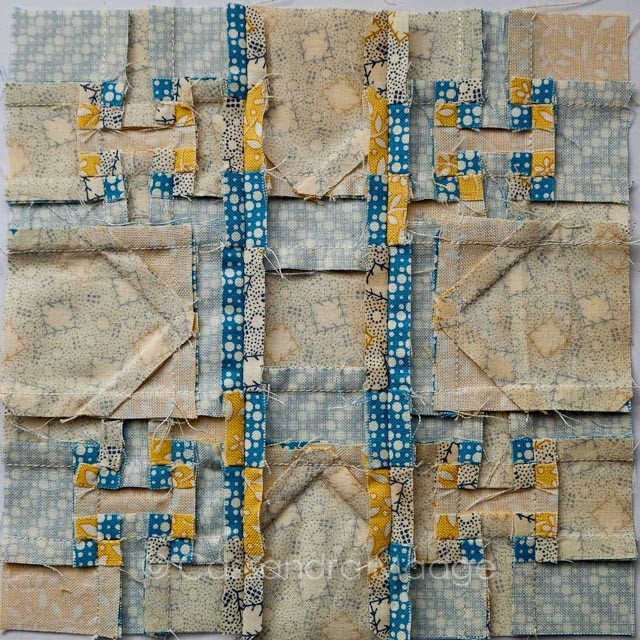
Do not adjust your computers, tablets or other devices, yes, the picture above is in black and white! When I was starting to create my version(s) of April I was really taken by the possibilities within this block. Do you see a star? Do you see a strong diagonal line through the block? Do you see a frame or possibly even a zig-zag design?
The way April is designed, it can be any or all of these things. I chose and arranged the fabric combinations in order to illustrate to you a very important lesson when quilting – how the contrast in tone or value (lightness or darkness) of your fabric colour choices will make a huge difference in what you see.

There are also lessons here in contrast of pattern, scale and how warm colours come towards the viewer while cool colours recede, but for today we are going to focus on VALUE
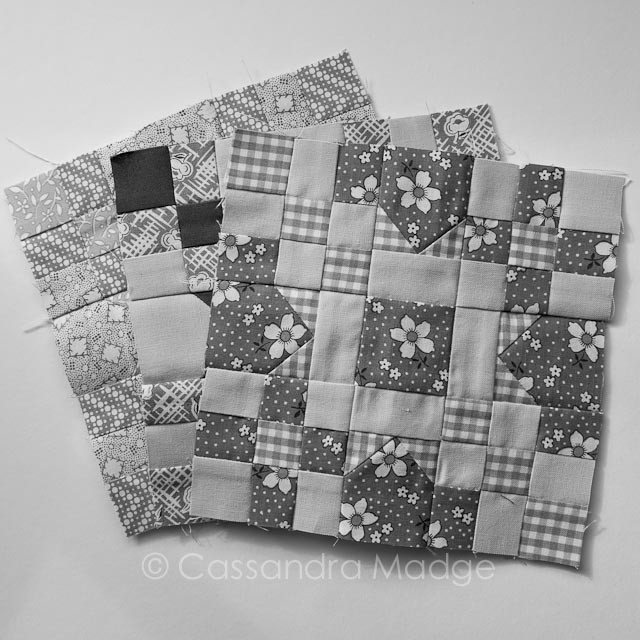
There is some ambivalence in definition – however I am referring to value when determining the lightness or otherwise of a colour. So when the colour is removed from the equation, the pale mint above appears almost white, similarly the dark forest green appears almost black. This contrast in value helps to define the shapes that you see within the parts of the block, as well as helping your eye move through the block space.
There is no right or wrong way to approach this, just as there is no right or wrong fabric colour to use. This is simply a tool to help you get the most out of your quilting, and hopefully get you thinking outside the square just a little bit.
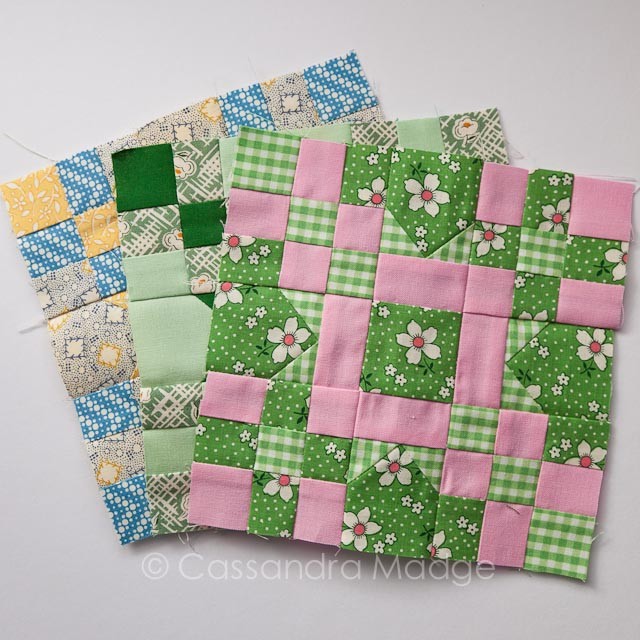
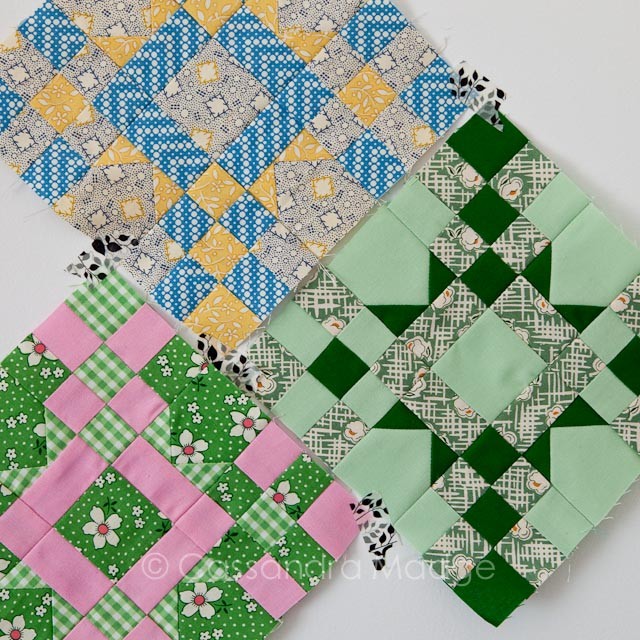
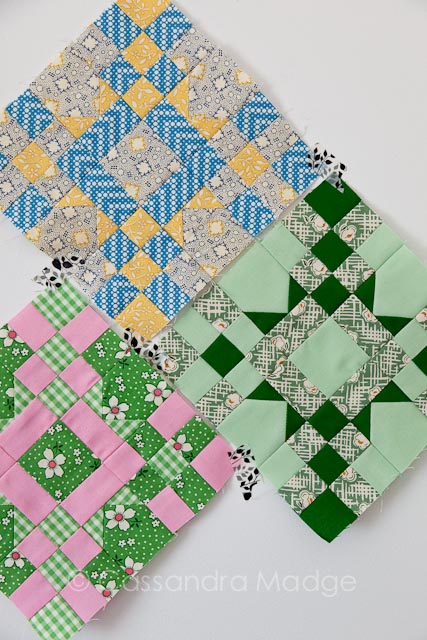
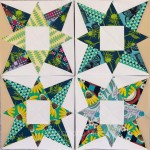
To complete these blocks, I assigned a value, either light, medium or dark to the three fabrics that Laurie used in her original April block. My first block was made using a similar representation, matching the pale blue template to the light green fabric, the yellow template to the medium value green print, and the dark blue template to the dark green fabric.
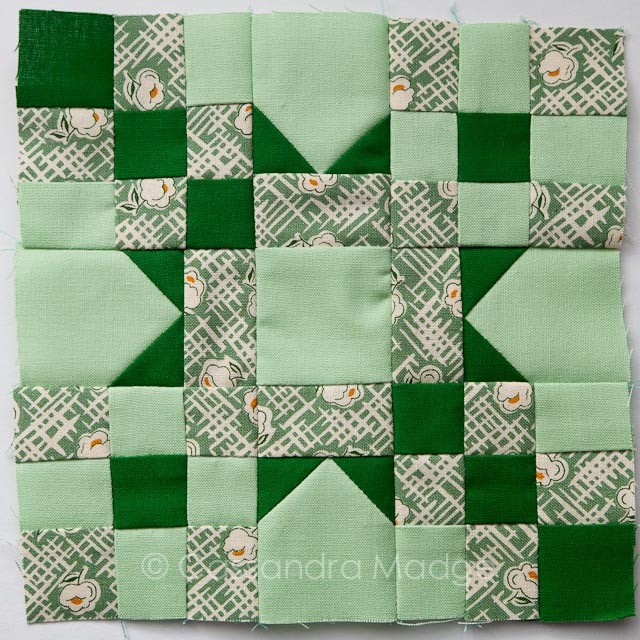
Although not identical to the original, I found it very interesting how strongly this layout emphasised the diagonal lines through the 2 opposite nine-patch blocks, as well as the star points around the centre frame.
Next I substituted the reverse combination – the lightest colour became the bright green print, the darkest colour was replaced by the lighter green gingham, while the medium tone fabric (pale pink) remained in the same position.
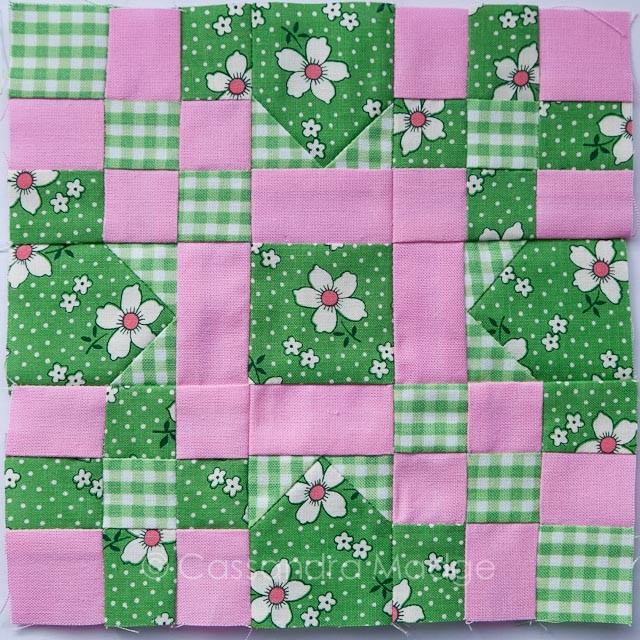
I think this variation would have been a lot more effective if the green gingham didn’t blend so effectively into the green floral. However the aim to make a completely different looking block was still fulfilled.
For the third version, I substituted a dark print (the blue dots) for all the medium tone prints, moving the medium value (the antique blue and yellow print) to the lighter position and the lighter yellow print then became the diagonal line and star points.
This block illustrates another important consideration when selecting prints for a block, which is contrast in scale as well as colour and value. The scale of all three prints is small, so I am disappointed that there simply isn’t enough variety. However, for the purposes of this exercise it did produce another change in appearance of the block.
For assistance in creating your own version of April, you can refer to Angie’s tutorial for foundation paper piecing April HERE, or the Marti Michell template version HERE. I used the Marti Michell templates with some small changes. I didn’t have the log cabin ruler that she used, I simply followed her instructions in step 1 to cut those strips to 1 1/4″ wide.
There is a small error on her pdf, which in step 2 reads: “There will be 2 colour 1 strips left and used in step 4” when they are actually used in step 5. Just to keep things straight.
I found it very easy to cut the house shaped units and matching triangle corners following Marti’s instructions.
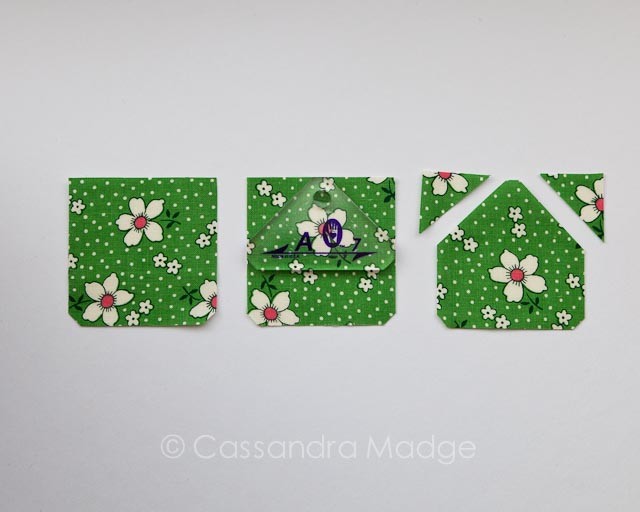
Cut 4 squares using the A5 template, and engineering only the bottom two corners. Line template A7 up with the top and two sides of the square, trim off the outer corners and discard. The remaining shape is the perfect fit for April 6C.
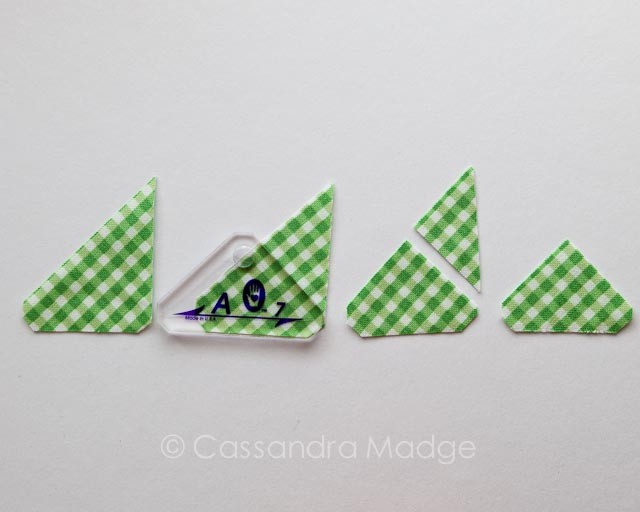
To cut the triangle points for April 6E, Marti explains (illustrated above) how to use your A7 triangle template to cut the right size triangle. To save time, I didn’t engineer the top corner, as it would only be cut off. I found I could comfortably cut these in two stacks of 4 and it took no time at all.

Again, as I didn’t have a Log Cabin ruler, I used the spare strips from Step 2 (see my correction note above) and, using my A5 template for width, cut the required four April 6B pieces quickly and easily.
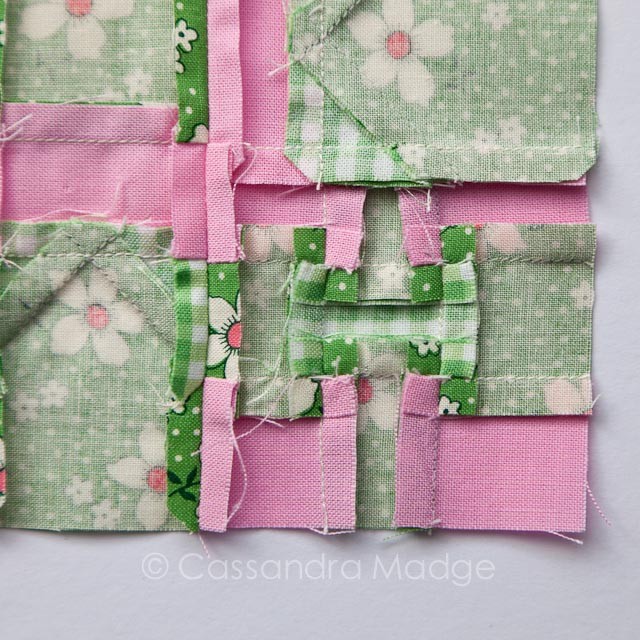
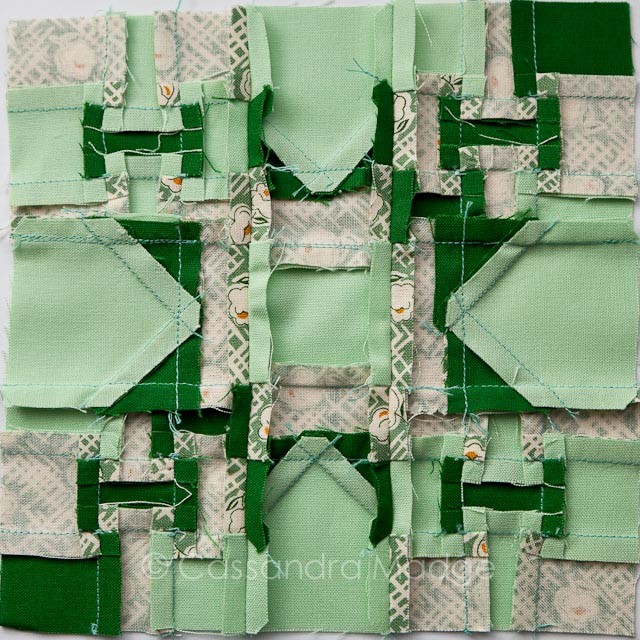
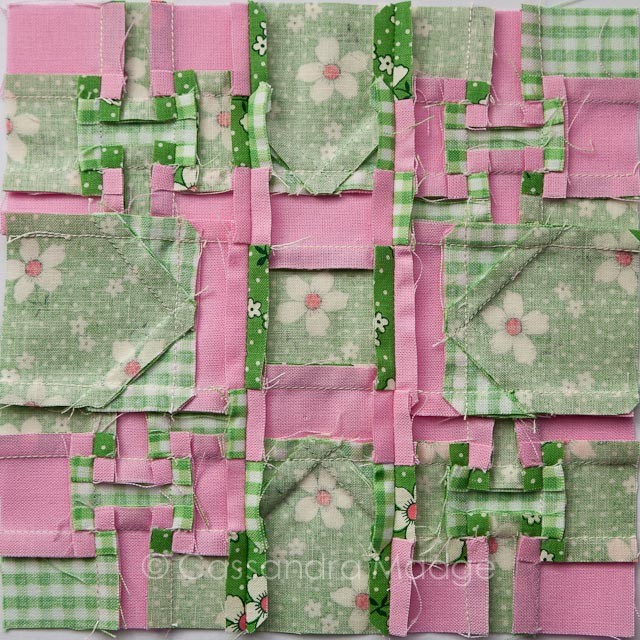
If you follow the pressing notes that Marti has provided in Step 2 of her pdf, you will find that the nine patch units all nest together perfectly. I found that I could even “spin” the tiny seams at the back, allowing me to press this block so beautifully flat. For more information on NESTING seams, please see my Patience tutorial, and for instruction on how easy it is to spin your seams, HERE is a tutorial I wrote to help you.
I hope that you have enjoyed seeing the amazing variety that a couple of simple changes can make to this block, and it has given you some ideas on how you can use value to move focus around your next quilt block. If you have any questions, please let me know in the comments. I’m always happy to hear from my readers!
**Disclaimer** I received the Marti Michell templates as part of my participation in the sew along – all opinions are my own.

Please be aware that there may be affiliate links in this content. Your support allows me to keep creating for you!

Leave a Reply