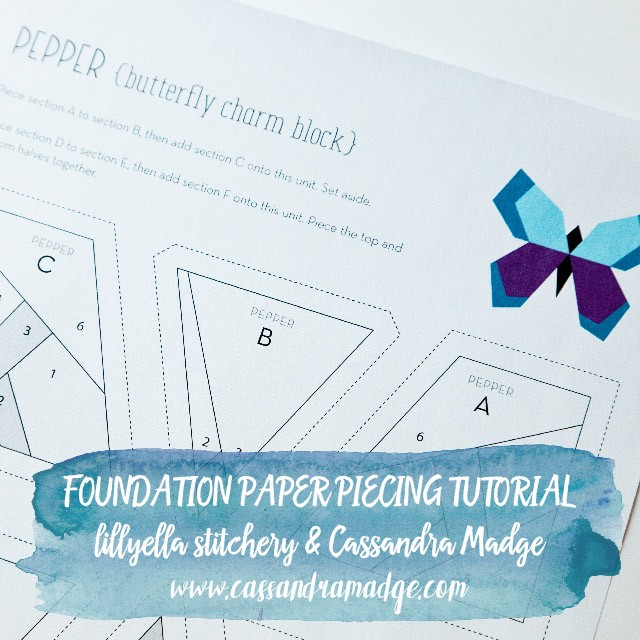
I gratefully acknowledge Nicole Young, of lillyella stitchery, for graciously allowing me to use her Butterfly Charm Block for this tutorial. Best of all, the pattern is FREE, so you can go and grab your own right now, download it and sew along with me. We will be stitching her butterfly called Pepper today. If you need help on printing your pdf out to actual size, my Mac tutorial is HERE.
This is a picture heavy tutorial, so please be patient.
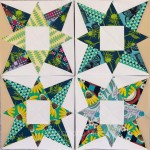
This tutorial will take you through step by step how to start foundation paper piecing and some tricks that I’ve learnt along the way. Part 2 tomorrow will teach you how to join up your pieces to make a complete 5″ (finished size) butterfly block.
To start foundation paper piecing all you need are some fairly simple requirements. Obviously, your printed paper and your fabric – you only need a few scraps of coloured fabric for the wings, two body pieces and the rest is background fabric. You need a sewing machine, needle and thread – a size 90 needle is ideal, but a size 80 is perfectly good too. 50 weight or finer thread, don’t use thick thread for this. You can colour match your thread to one or other of your fabrics, I usually use a light grey as a neutral. Do not use your 1/4″ foot for the initial sections. It is only needed for the final joining together, and even then you don’t have to use it as all your sewing lines are printed right in front of you!
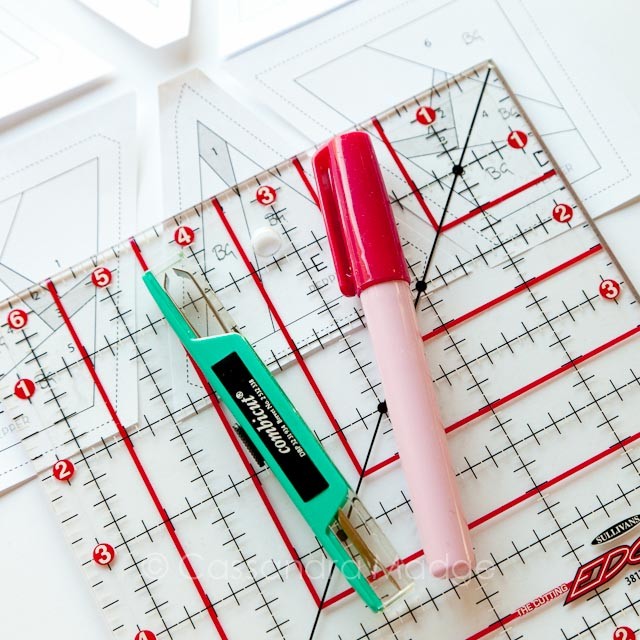
You will find useful a glue stick – this is a sewline one, but a washable school glue stick works fine too. Also a seam ripper, although we try to avoid that if possible, and a ruler that has 1/4″ clearly marked along the edge is essential.

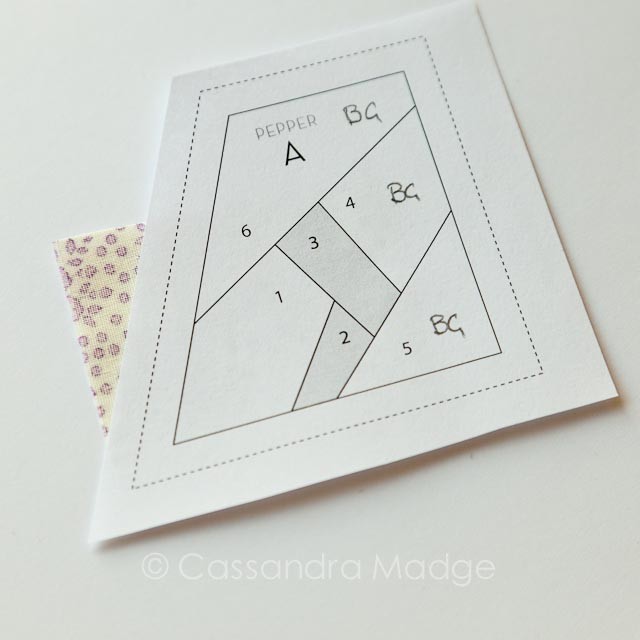
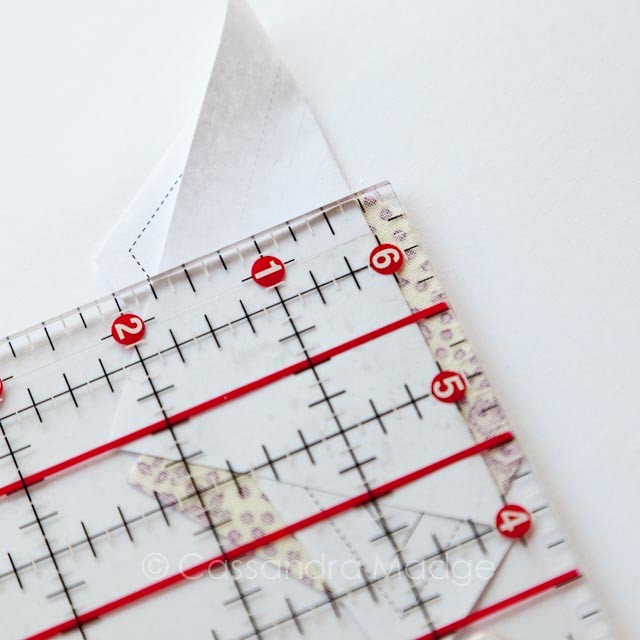
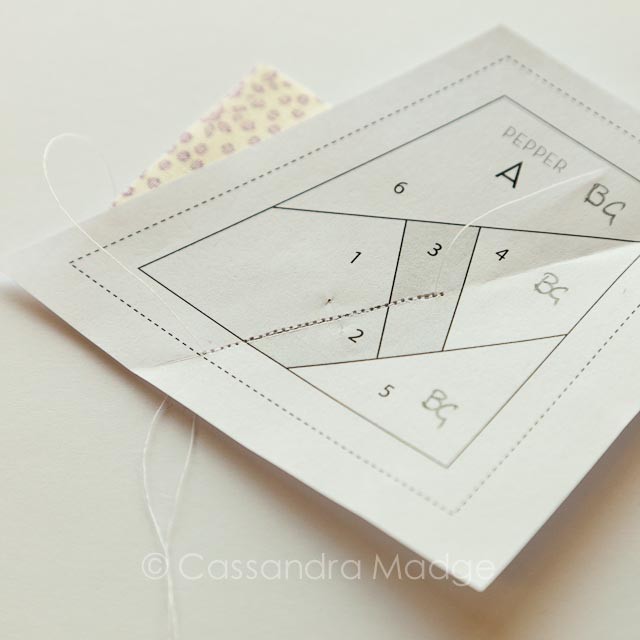
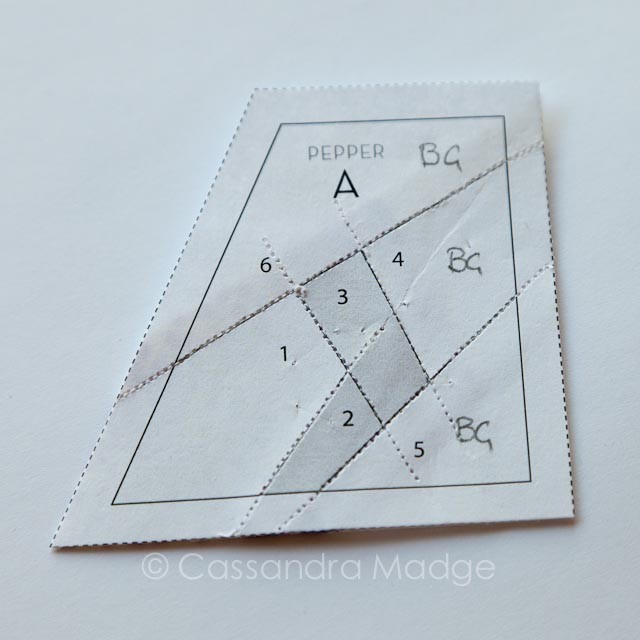
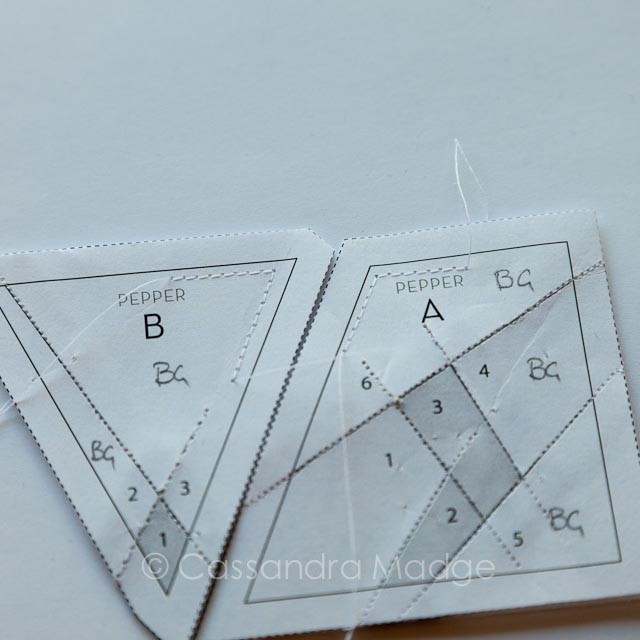
To check your printout is the correct scale, measure across the solid line at the bottom of piece A – it should be 2 1/2″ across.
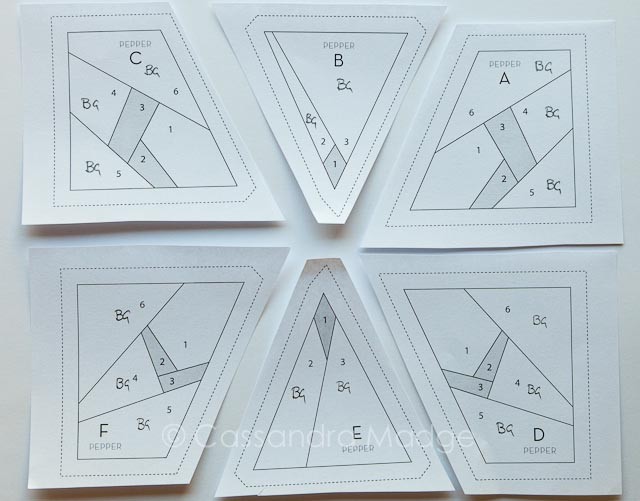
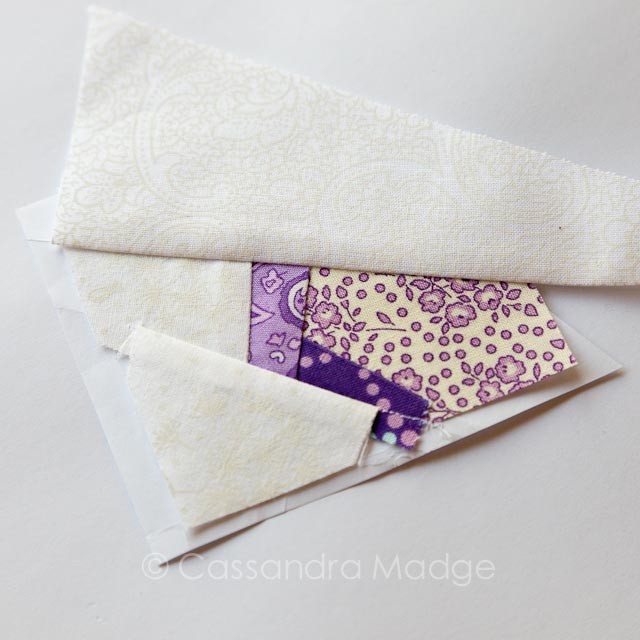
Cut the individual pieces roughly apart, do not trim onto the lines at this stage. You will probably find it easiest to mark on your pieces key parts of information such as background areas, specific colours or fabric selections etc. See THIS TUTORIAL by Cath at Wombat Quilts on using coloured pencils to help keep track of your paper piecing.
IMPORTANT NOTE. Your final block is a mirror of this printed side, so if specific elements are right/left critical, take that into account when colouring in.
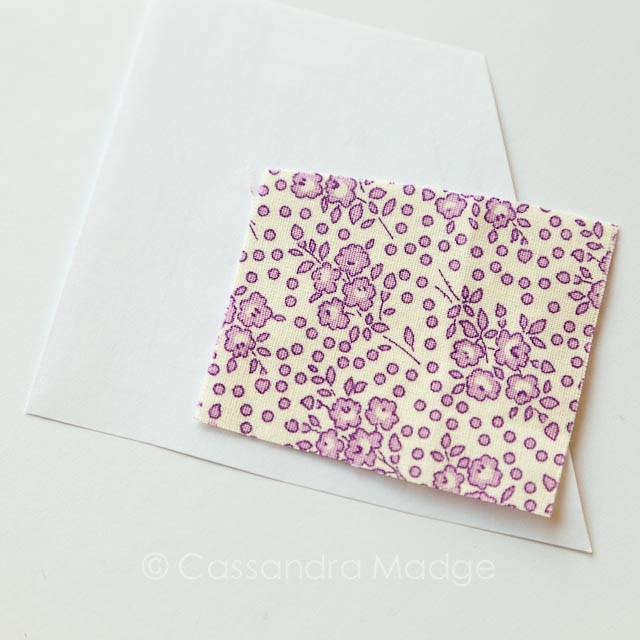
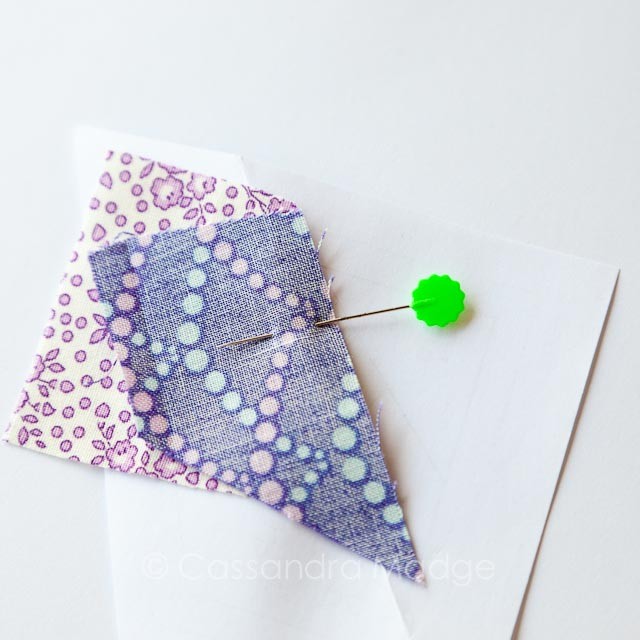
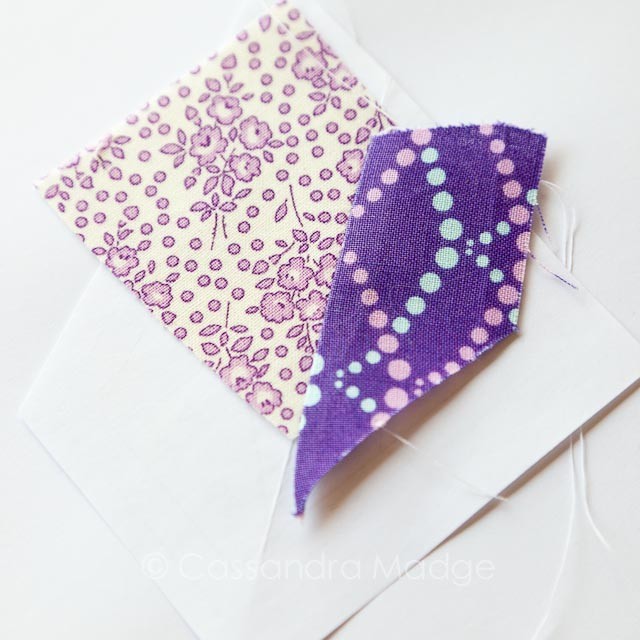
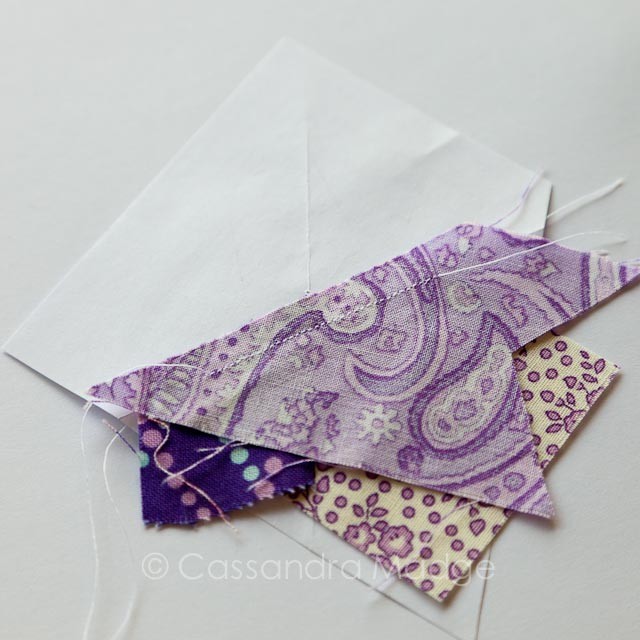
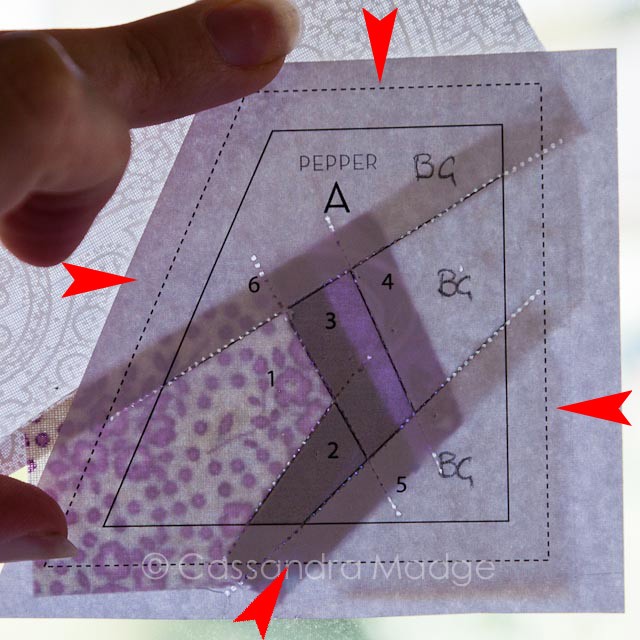
Starting with section A, we are going to put the fabric for the 1st part RIGHT SIDE UP on the back of the paper. Use a pin or a dab of glue to hold it in position.
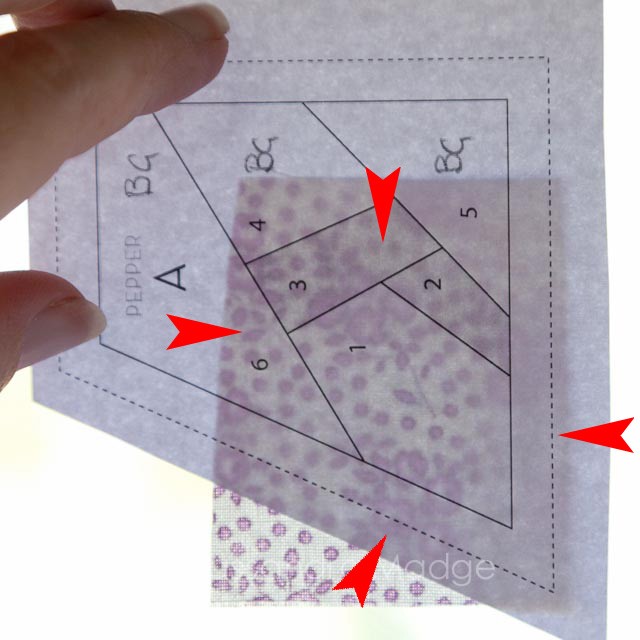
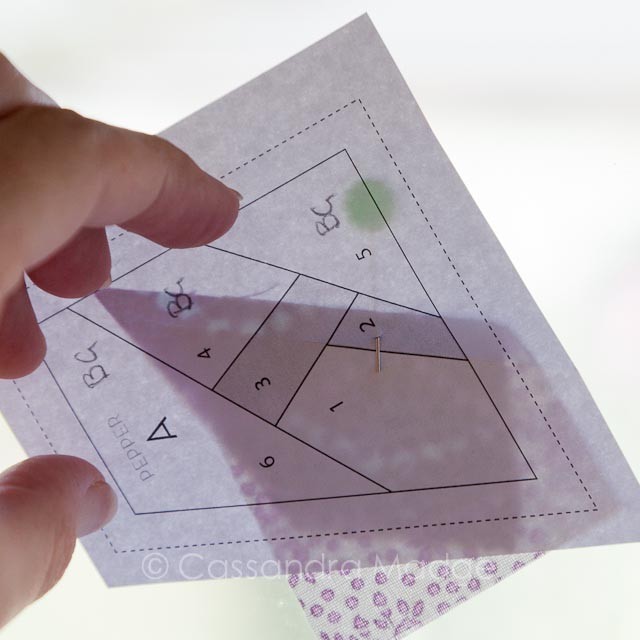
It is critical that your pieces cover the surrounding areas and seams by at least 1/4″. Use a light box or a window to ensure good coverage of these key areas before proceeding. You can see from the arrows above that my piece is sized generously.
Once you are satisfied with the position of piece 1, you will crease the paper backwards over the seam line separating 1 and 2. Lining up the 1/4″ mark on your ruler against this crease, use your rotary cutter to trim the fabric back along this edge. If you are doing a lot of paper piecing, a specialty ruler such as an “Add a quarter” ruler will be useful to speed this process up. Carol Doak calls this step TRIM.
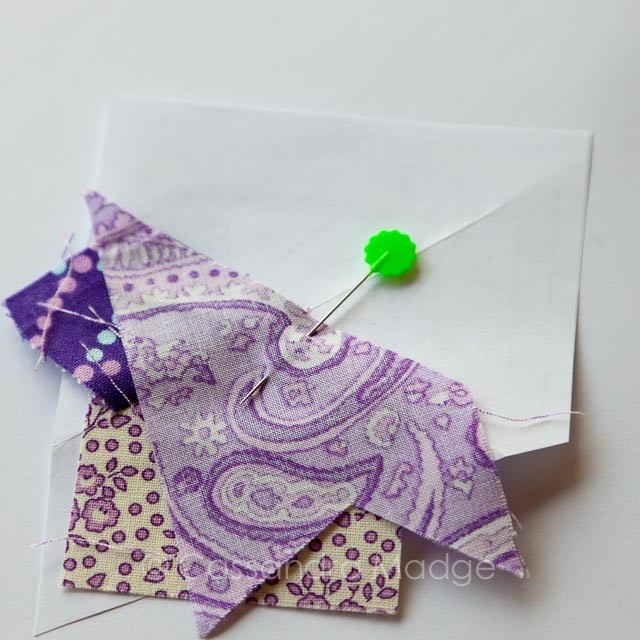
Opening your paper back out, align your fabric for piece 2 right sides together along the edge you just cut. It should be wider than the printed edges of piece 2 by at least 1/4″ so that when you continue adding pieces you have adequate fabric for the seams. I use a pin to hold it in place and stop it from shifting as I am starting to sew the seam, however do not try to stitch over your pin as with such a tiny stitch length, you will almost inevitably hit the pin. You can see I put the pin in with the head to one side, so I can quickly slip it out before the needle gets to it.
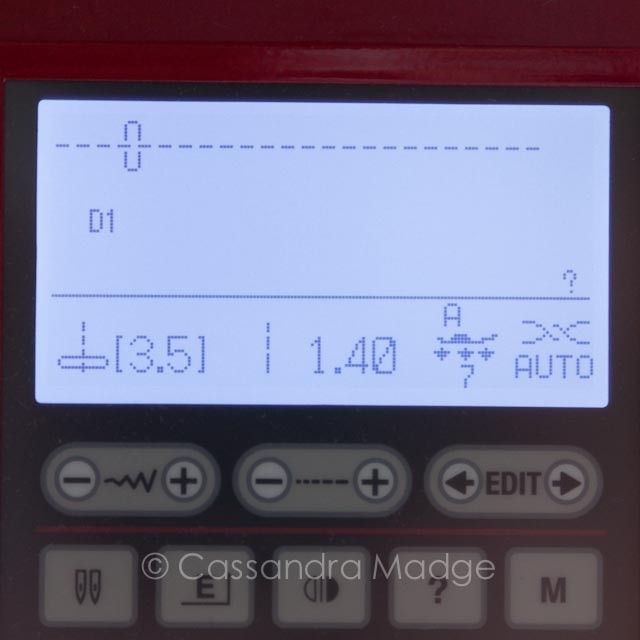
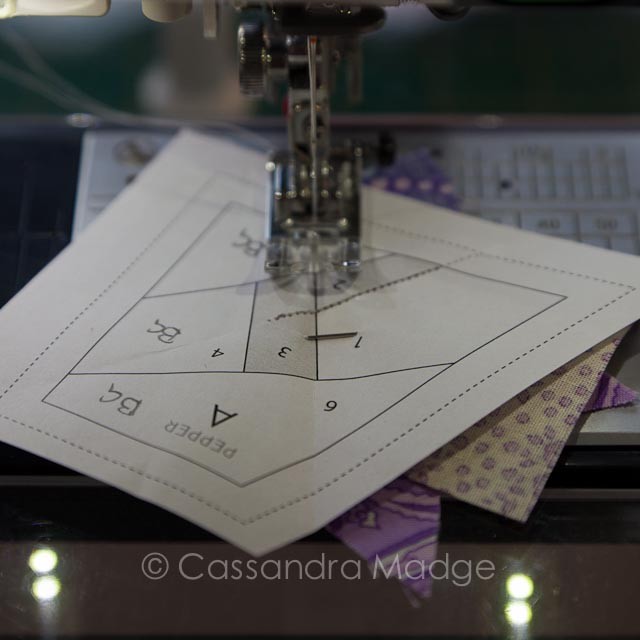
Using a very short stitch – on my Janome 7700 I select a stitch length of 1.4 to 1.5, you will sew along the line between 1 and 2. Extend the line in your mind, start before it, and keep sewing after it for a small distance. BE CAREFUL as you lay the fabric down under the machine presser foot that your fabric doesn’t accidentally fold or flip under. You can see that I stitched from the dotted line around A, all the way to nearly across piece 3. These extra parts are important for the stability of the seams and sections. You have now completed step SEW .
Take your section to the iron, press briefly with the seam closed (this helps set the seam), then open out piece 2 and press again to flatten. Be careful not to stretch or distort your pieces as they are very small. This is the final step, aptly entitled PRESS.
These three steps, TRIM – SEW – PRESS are the basis of all foundation piecing.
Simply put, we will repeat that for the line between 2/3, the line between 3/4 and so on for the rest of Section A.
Fold back the paper along the 2-3 line, popping the stitches that extend over the line gently through. If the paper tears, use some sellotape to stick it back together, being careful not to touch it directly with your iron down the track. Using your 1/4″ mark on your ruler, trim off the excess fabric.

Above all the same steps for piece 3 – I aligned the fabric to the edge I had just cut, using a pin to secure it. Carefully laying the fabric under the presser foot, I stitched a generous distance before and after the 2/3 line using my small stitch length. I took it to the ironing board, first pressing to set the seam, then folding it out to press the pieces flat.
TRIM, SEW, PRESS.
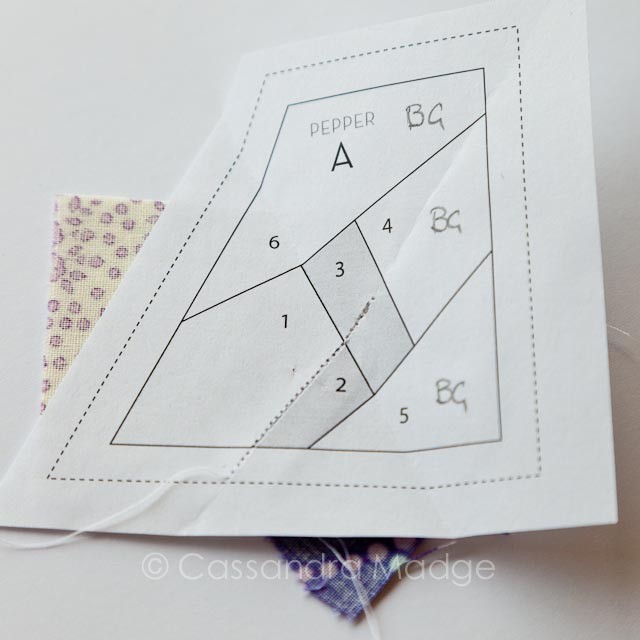
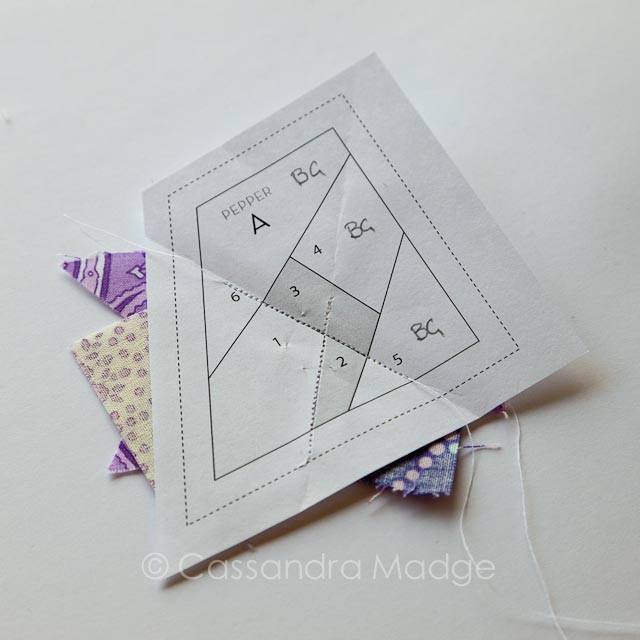
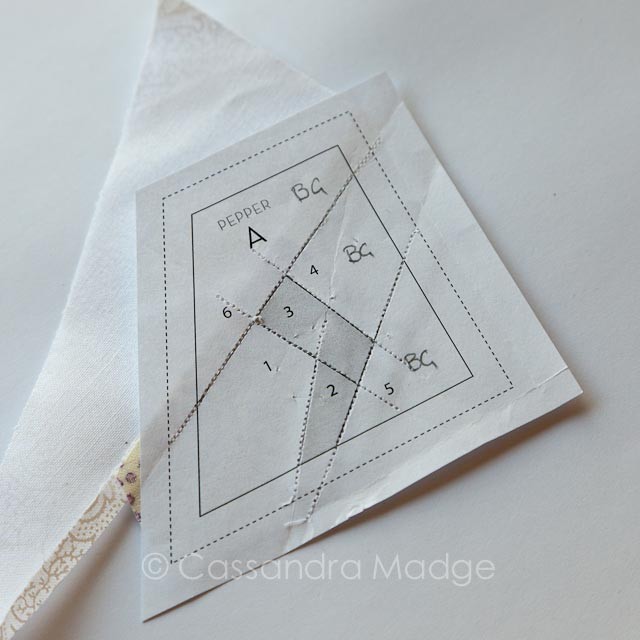
Fast forward to add the pieces 4, 5 and 6 in exactly the same manner. It is important at the end that all your sides have fabric covering up to, or over the 1/4″ line around the outside of section A, as demonstrated by the arrows above. Windows make excellent light boxes!
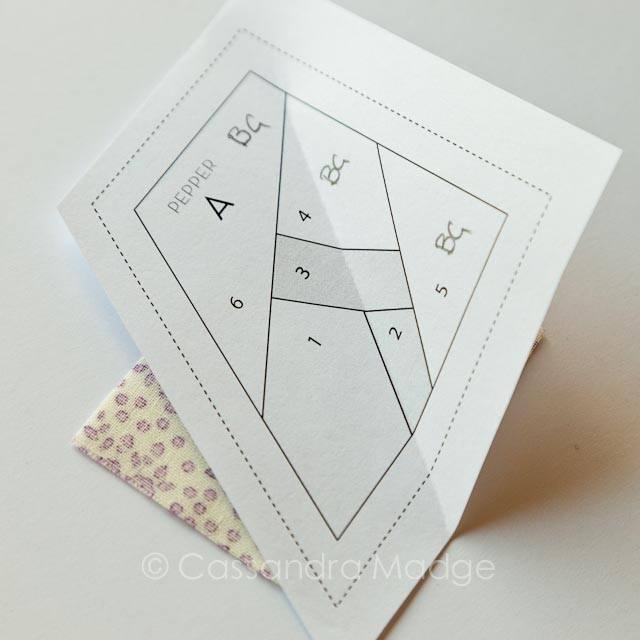
You are now ready to cut off all that excess paper and fabric. It is best to do so starting at the longest edge first. Line up the 1/4″ mark on your ruler along the solid edge line of the section. The edge of the ruler should fall along the dotted line. Cut along this edge with your rotary cutter, then rotate the piece carefully, making sure that loose edges of fabric don’t get folded up underneath your paper. Keep trimming all around the block.
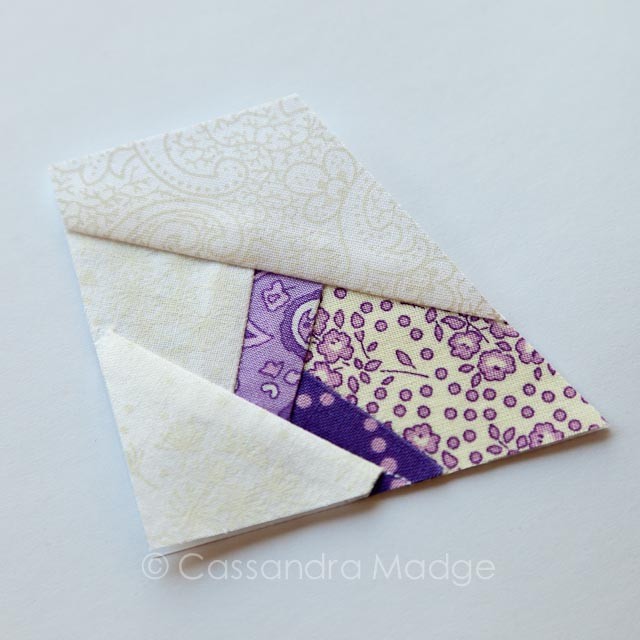
Section A is complete! Time to put it carefully aside and work our way through the rest of the block.
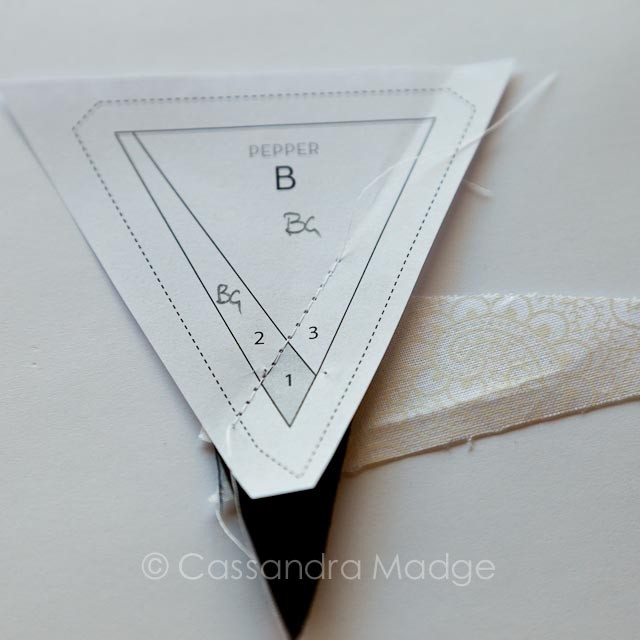
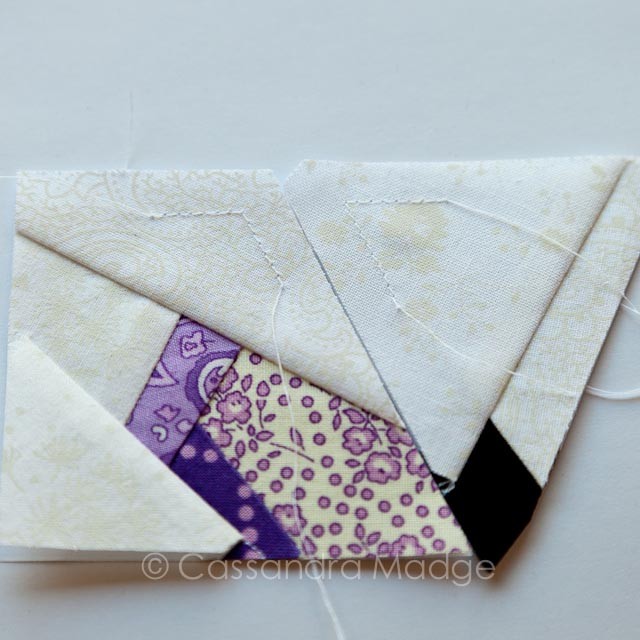
When I started Section B I noticed one of the trickiest pieces to line up, so I thought I’d show you my favourite way to make things easier.
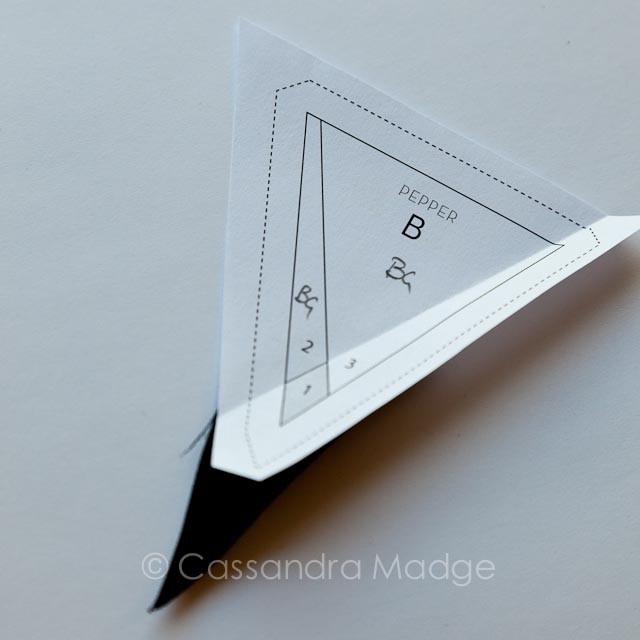
Notice how piece 2 is a long thin strip, angling away from 1?
To achieve an appropriate angle, without using a huge piece of fabric that would be mostly wasted, this was roughly the position I needed to put my fabric. However, sometimes getting the angle right can take a couple of tries, and I really REALLY hate unpicking tiny stitches.
Solution?
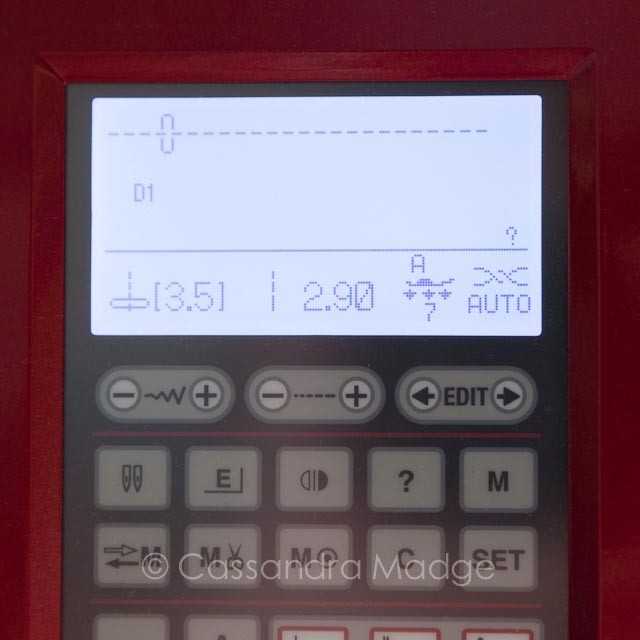
Increase your stitch length to something a lot longer – in the 2.9 to 3 length is great. That way you can securely test the seam without worrying if you get it wrong. Stitch your seam line, finger press your fabric and use your lightbox/window to check that piece 2 adequately covers over 1/4″ ALL THE WAY AROUND, including right up to the little notch in the corner. If it needs adjusting, then it is easy to pull the stitches out and try again.
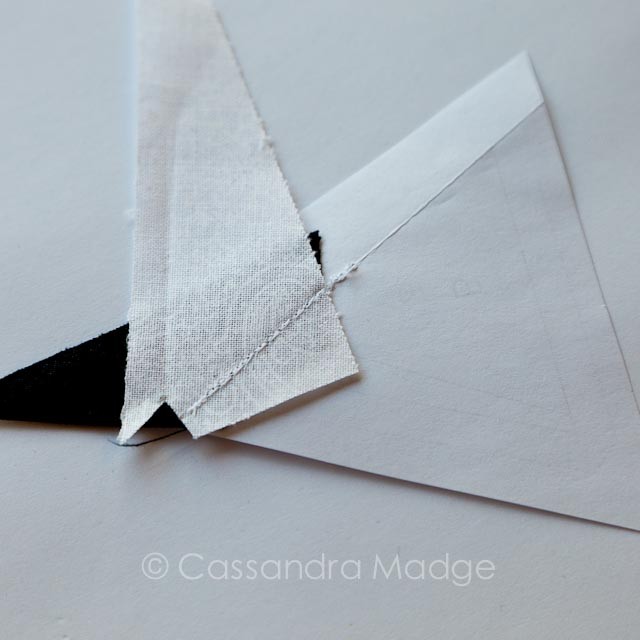
Once you are happy with the position of your fabric, simply SHORTEN your stitch length again, and sew exactly on top of the “test” stitches, no need to take them out. Press, trim and continue as usual.
What if you need to cut a piece of fabric to size before putting it in? How do you work out how big to cut it?
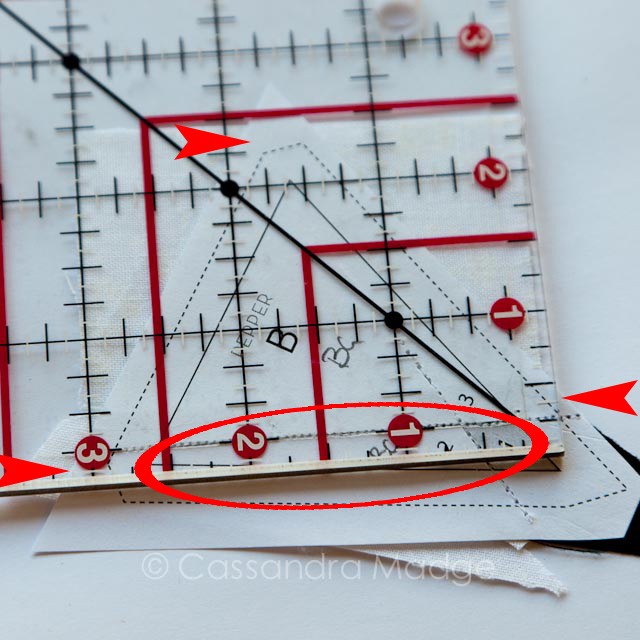
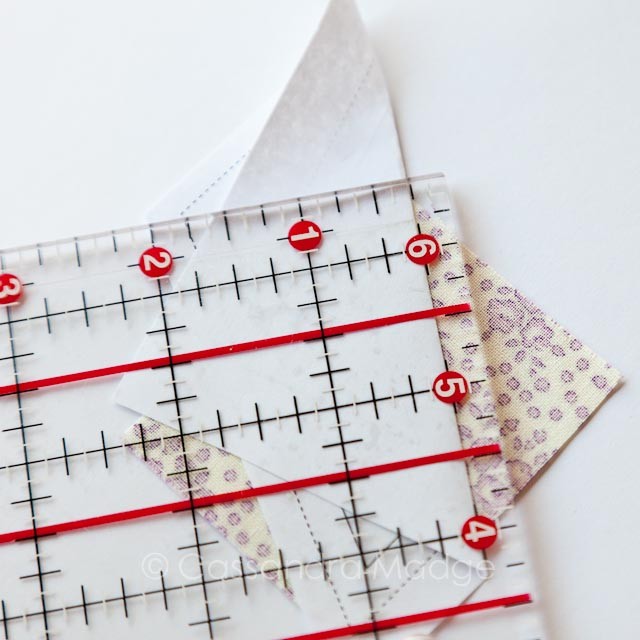
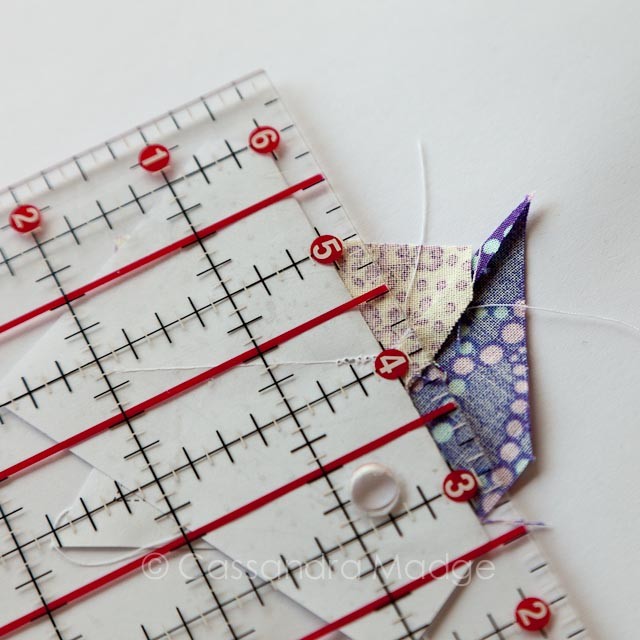
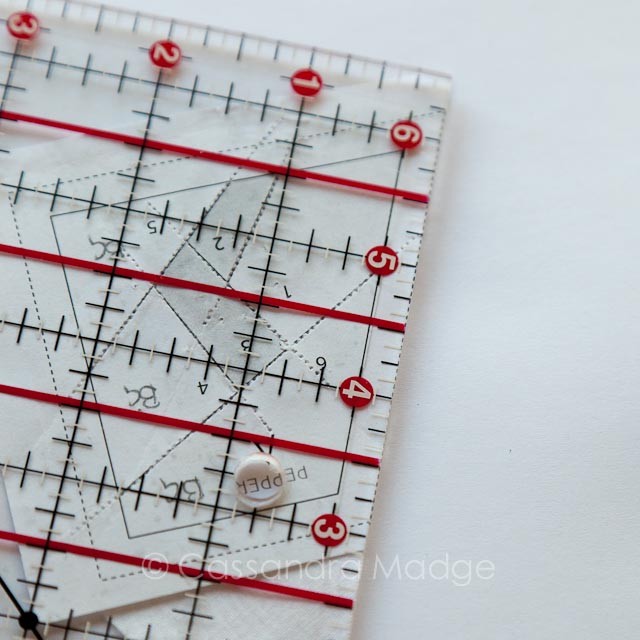
- Place your ruler with the 1/4″ mark along the line you will be stitching from, in this case the line between pieces 2 and 3. You must measure from this key line. Do not try to measure with the edge of the ruler along it, as you will not account for your seam allowance and you will be frustratingly short.
- Put the top edge of your ruler (arrow pointing on the right), to the furthest point of piece 3 including seam allowance. If the seam allowance isn’t marked, put the 1/4″ top line along the furthest point.
- Measure to the very top of the piece, including seam allowance. (Arrow pointing at top). Always round up this figure, and even add a 1/4″ if you feel necessary. In this case, the piece I used measured 2 1/2″ tall.
- Measure width by the left arrow – the point where you pass the edge of piece 3, including 1/4″ seam allowance. I used a 3″ width for this piece.
So for this triangle piece 3, you will need fabric 2 1/2″ tall by 3″ wide at a minimum.
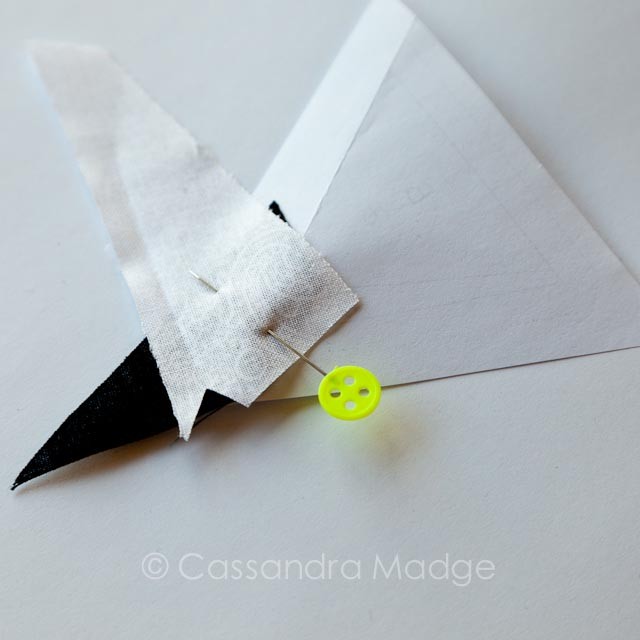
How do I deal with all the loose pieces of fabric? I’m worried they are going to shift or fold when I go to sew the sections together?
Particularly on triangle points or large background areas, it is very easy for those pieces to move fractionally, meaning your finished seams aren’t as well aligned as they could be. The solution is simple. Run a line of LONG stitches (around 2.8-3.0) inside the large pieces. Here I have put them on two corners that were bothering me. The stitching is far enough inside your seams not to bother you when joining sections, and it will only take a minute to pop them out when you are finished sewing and finally removing your papers! Just don’t forget to SHORTEN your stitch length again if you do this in the middle of your piecing session.
PART TWO – how to piece these six sections together will be published tomorrow!
Why not put me on your blog reader or pin this tutorial for future reference?

Please be aware that there may be affiliate links in this content. Your support allows me to keep creating for you!


Lindy
I found this so helpful. I’ve been thinking about trying paper piecing for a while. Now I definitely will. Thanks Cassie.
Cassandra
Thankyou so much Lindy! I’ll always be around to clarify anything. I hope that you give it a go 🙂
Marni @ HaberdasheryFun
Great info. Thanks for sharing! Tweeted and pinned 🙂 – Marni
Cassandra
Thankyou so much for the support Marni!
Farmer’s Wife 1930’s – Aimee and Nancy | Cassandra Madge
[…] Foundation Paper Piecing Part 1 […]
Lyn Crump
A useful light box is a Chinese food or Tupperware container with a clear lid and an LED torch inside it. To make sure you enough fabric when you have that long skinny piece, fold on the sewing line and place fabric on light box with foundation on top you can see then if it covers the piece.
OR if you start with your pattern and a put a piece of freezer paper shiny side up underneath it, stitch along each sewing line you then have a template of the shape each fabric piece needs to be – add 1/2″ on each side for seam allowances and wiggle room.
Cassandra
That’s a great idea Lyn, thank-you for sharing!
Farmer’s Wife 1930’s – Heather and Grandmother – Cassandra Madge
[…] Foundation Paper Piecing Part 1 […]
Two Creative Ways to Tidy your Sewing Area | Cole & Taffy
[…] I decided to use my Bonnie and Camille stash, so off I went. The tutorial was very well written, with lots of photos, and great instructions for those selvedge pockets. I had already done some paper piecing, but Nicole suggested the tutorial over at Cassandra Madge, which you can find here. […]
Michelle
This is a great tutorial. I just linked to it in my latest blog post.
Cassandra
Thanks as always for the compliments Michelle! I hope your readers find it helpful 🙂
Paper piecing Star Bee update – Cassandra Madge
[…] Foundation Paper Piecing Part 1 […]
Bittersweet Feathered Star block – Cassandra Madge
[…] Foundation Paper Piecing Part 1 […]