
Hi and welcome to part 2 of my Foundation Paper Piecing tutorial. If you missed part 1, you can find it HERE. Again I would like to gratefully acknowledge Nicole Young, of lillyella stitchery, for graciously allowing me to use her Butterfly Charm Block for this tutorial. Best of all, the pattern is FREE, so you can go and grab your own, download it and sew along with me. We will be stitching her butterfly called Pepper today. If you need help on printing your pdf out to actual size, my Mac tutorial is HERE.
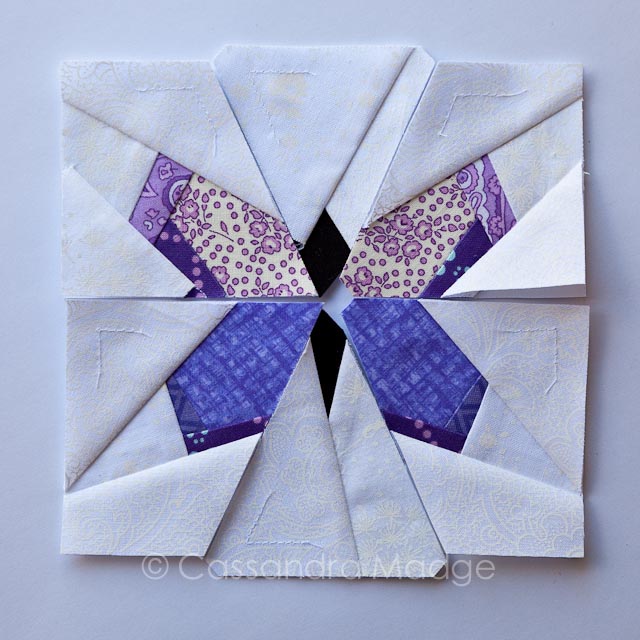
In part 1 I showed you the basics of paper piecing and we have completed sections A-F of Pepper, the Butterfly Charm Block. Today is all about joining those 6 pieces together to make a complete 5″ butterfly block.
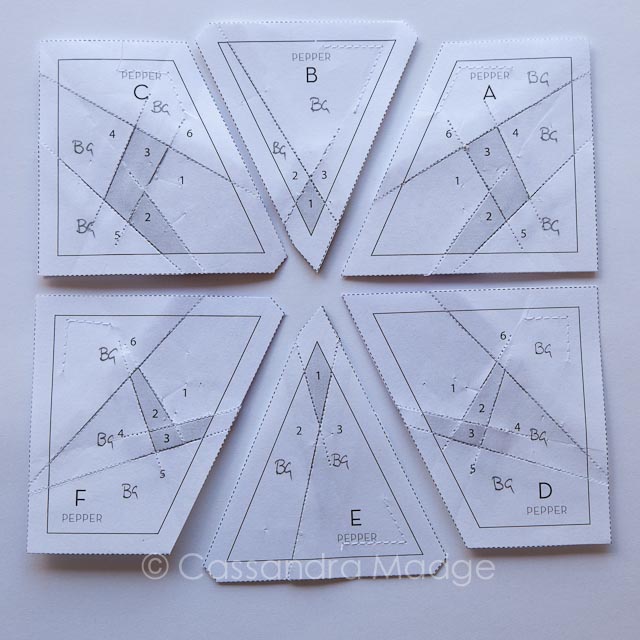
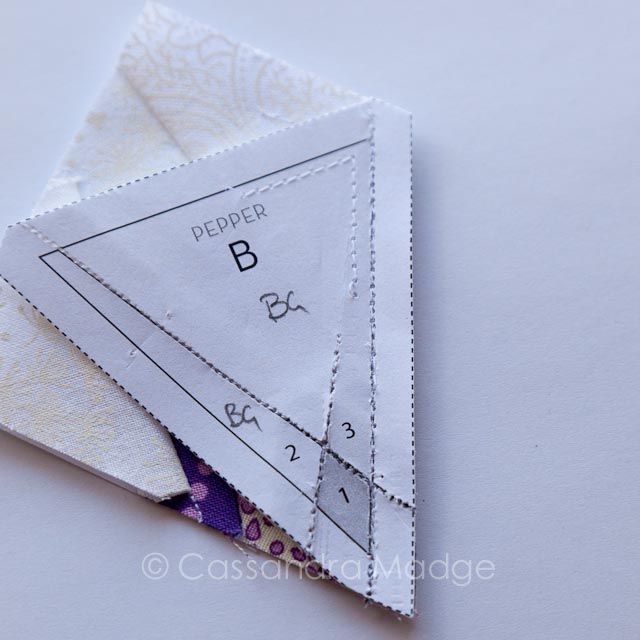
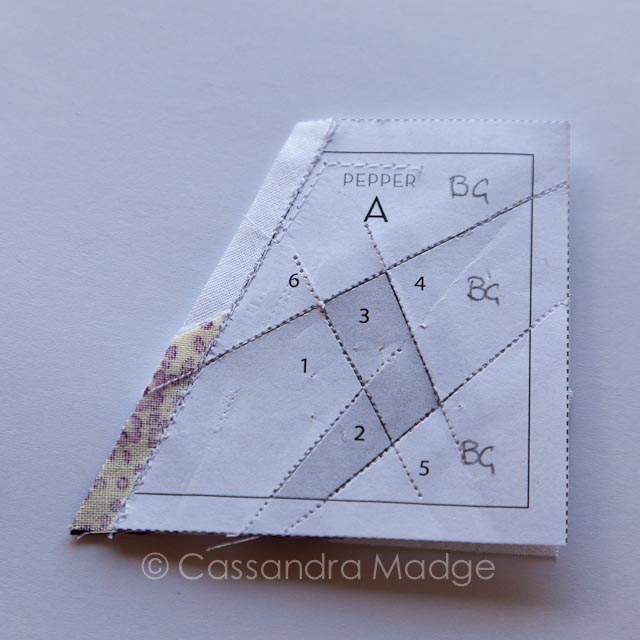
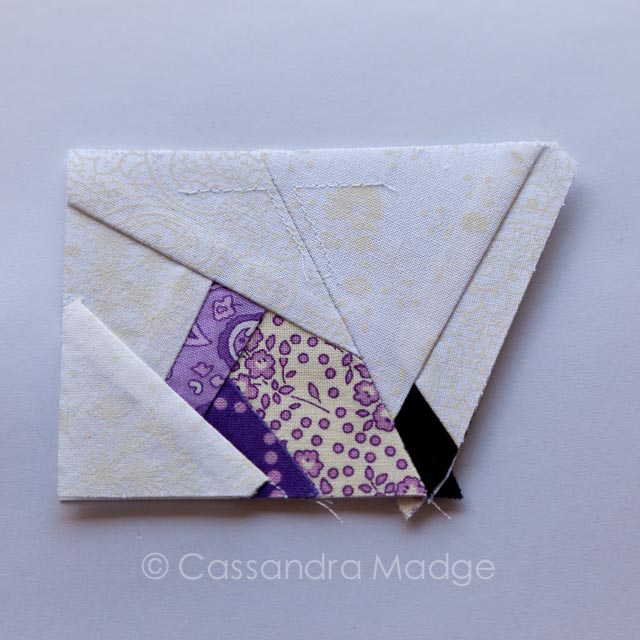
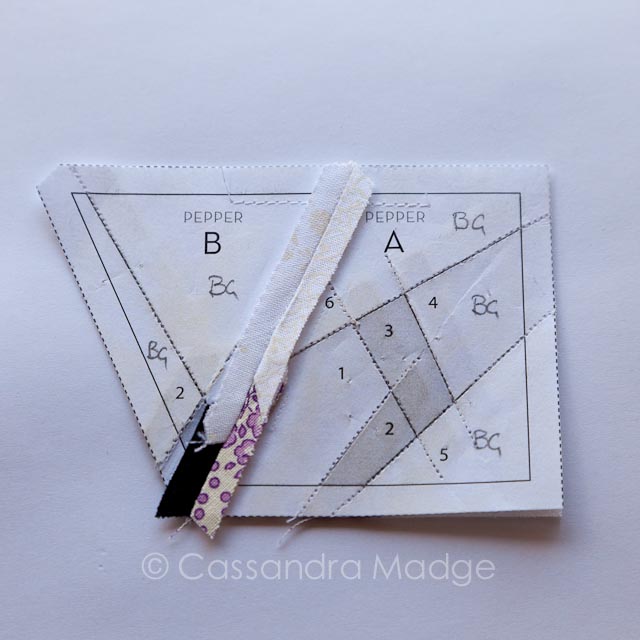
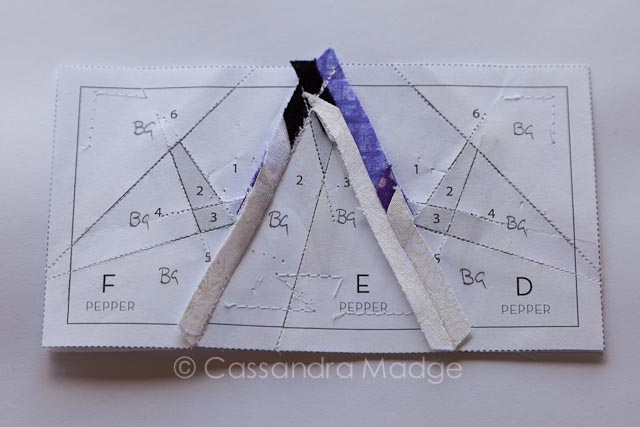
Nicole’s pattern is beautifully designed as you will see piecing these sections together. Her recommended order is simply alphabetical, so we will start by stitching A + B together.
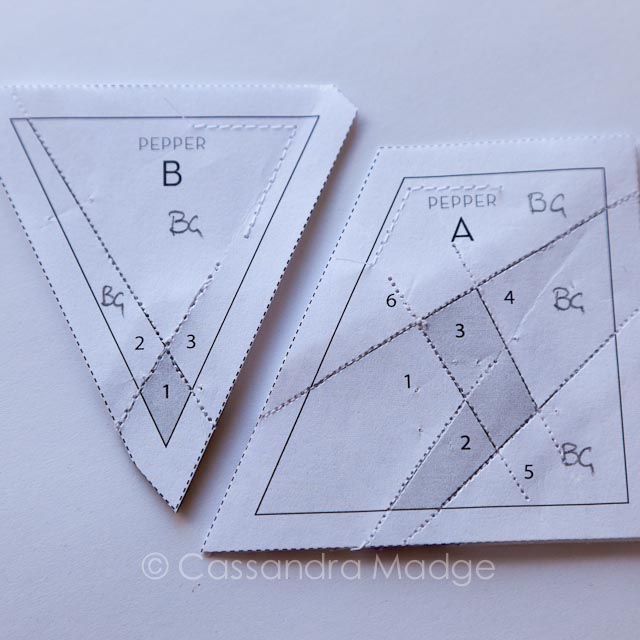
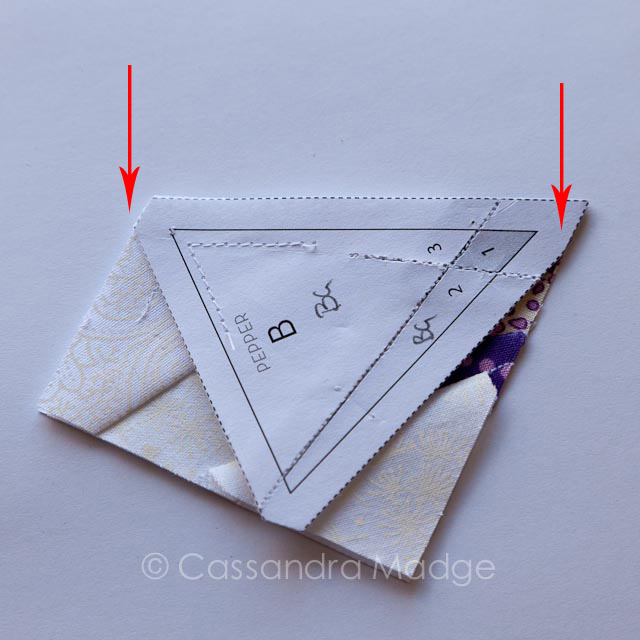
You can see by the arrows above that these two have been designed to fit perfectly together. When you align the seam edges, these flat trimmed sections will help you to match the seam up beautifully. The idea is for you to stitch along the solid line, which as we previously learnt is 1/4″ in from the trimmed edge.
Now I’m going to let you in on my dirty secret. After dozens of blocks of all shapes and sizes, I still HATE joining sections together. I can’t seem to pin them without shifting the layers out of alignment. In a larger block with more seams to match I have used glue to baste the sections together which is quite useful. What I am showing you here is MY way. Please feel free to experiment with pins, glue, clips etc and find a way that works for you.
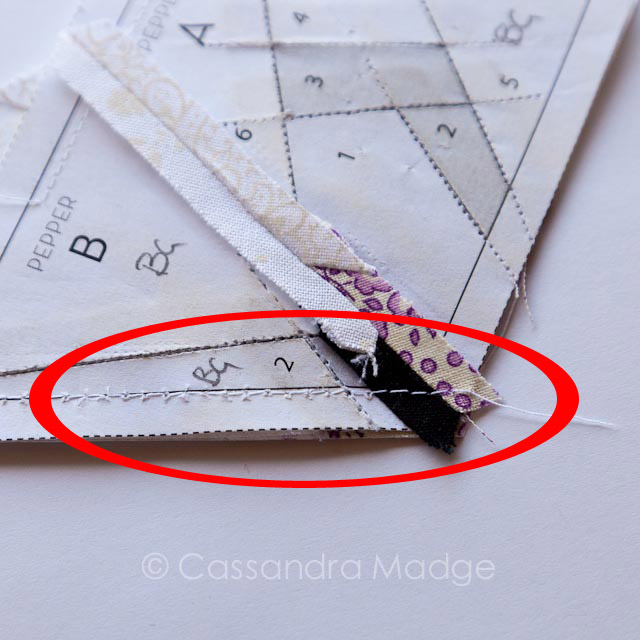
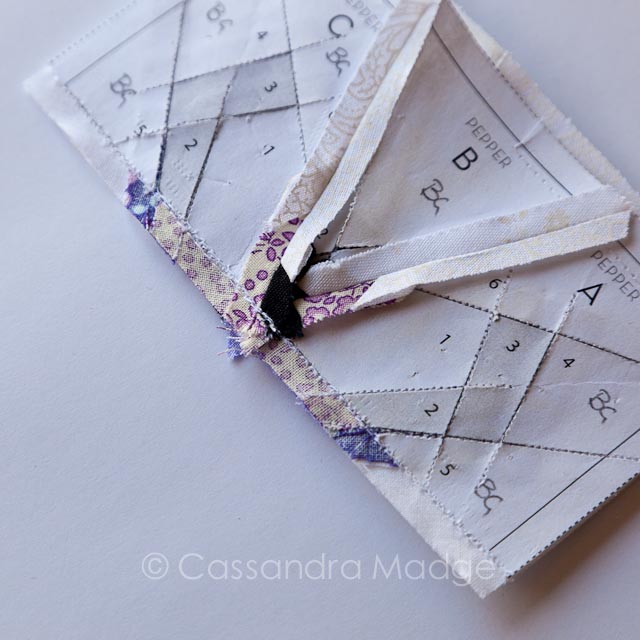
This is my “trick” to make this step as painless as possible. I use a much longer stitch length (2.9-3) and test sew each seam. I do this for three reasons. Firstly, it’s a simple way to baste the two sections together and keep them in place when I stitch them again using the necessary small stitch length. Secondly, it is a simple way to ensure that seam intersections and key points, seam allowances etc are lined up properly. Third and most important, it is a heck of a lot easier to unpick than teeny tiny stitches!

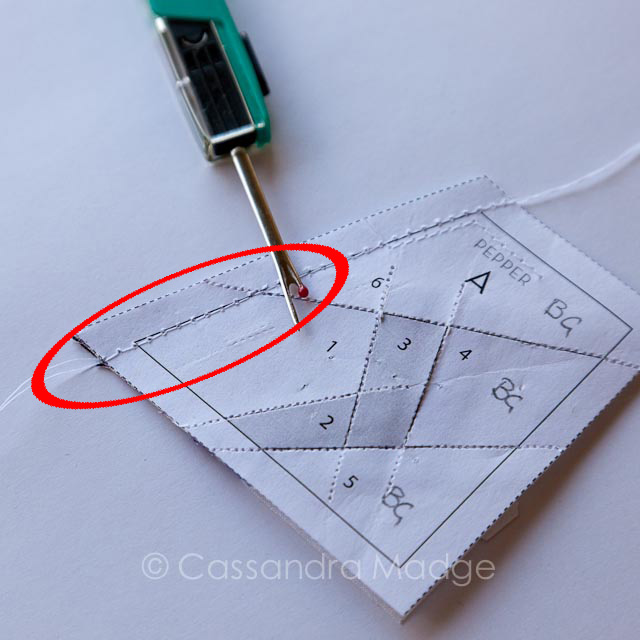
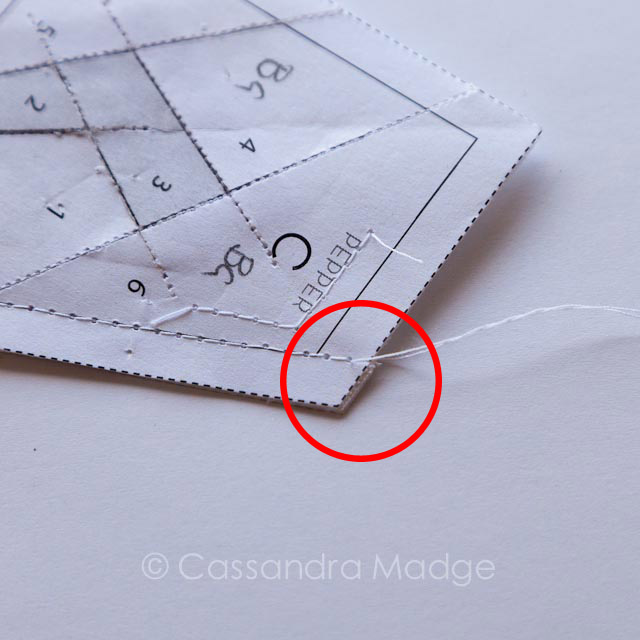
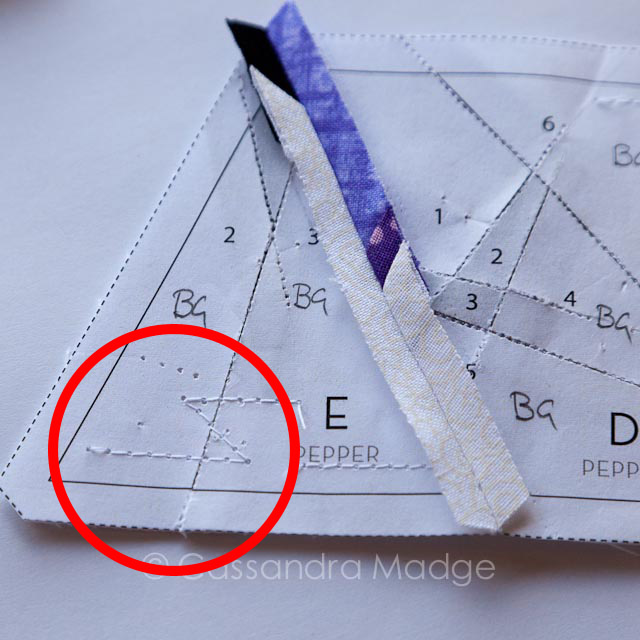
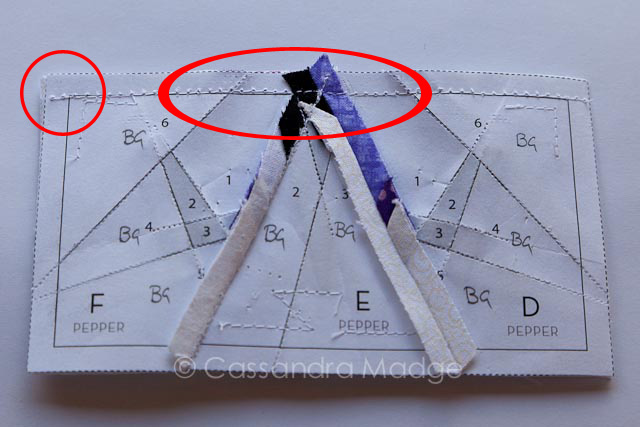
For my first seam above, you can see from the top it looked pretty well spot on, however when I flipped it over, I realised that I had missed the line enough for me to be unhappy. I highlighted it with red, just in case you missed it. I unpicked it as far as the seam ripper, and after a little bit of fabric massaging, restitched it to make sure i had it right. Don’t be afraid to try stitching a tricky seam from the other end if you are having trouble with alignment.
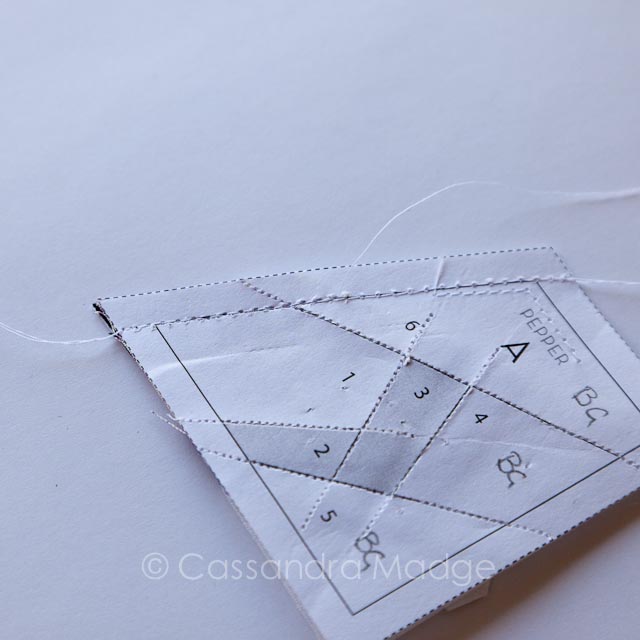
After you are happy with your how your seam has lined up, stitch exactly over the basting stitches with your shorter stitch length. There is no need to take the basting stitches out unless they have strayed into your piecing area.
Because I’m all about making things easier, I’m going to suggest you take off the paper ONLY on the seam allowance you just stitched – on both sides of the seam. Doing this makes taking the paper out at the end so much simpler. Trust me, you’ll thank me for it later. I chose to press this seam open, but that’s not compulsory. Now sit back and admire your beautifully straight top across A and B, then grab section C because that’s up next.
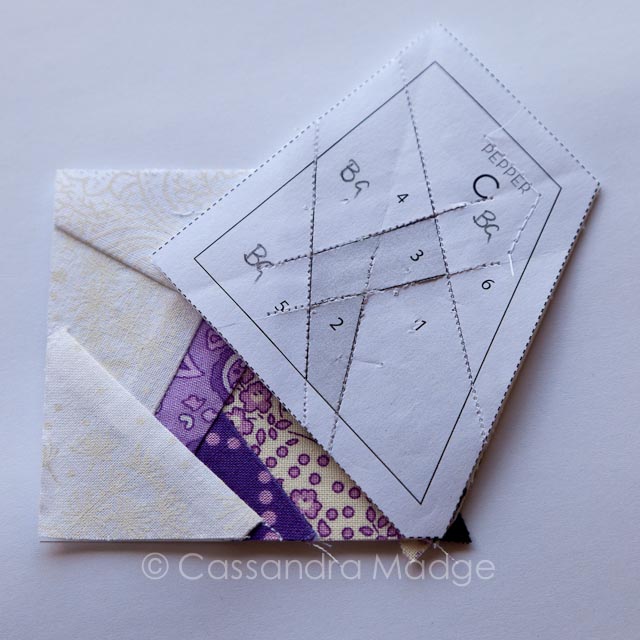
Again you can see how fabulously Nicole designed this pattern with the little cutouts that help you align each seam.
I was having a rough day I think because yet again I wasn’t happy with my basting (stitches off line and the end not lined up flat) and I ended up taking it out and completely re-stitching it. Again, I did it starting from the opposite end and it worked much better for me second time around.
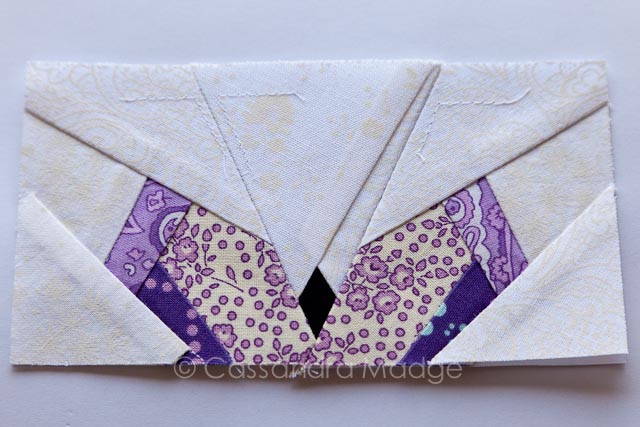

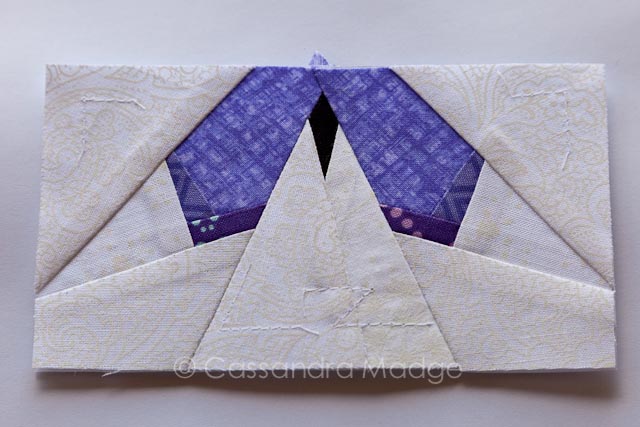
Don’t forget to tear your paper off your seam allowance again before giving the top half of your butterfly a good press.
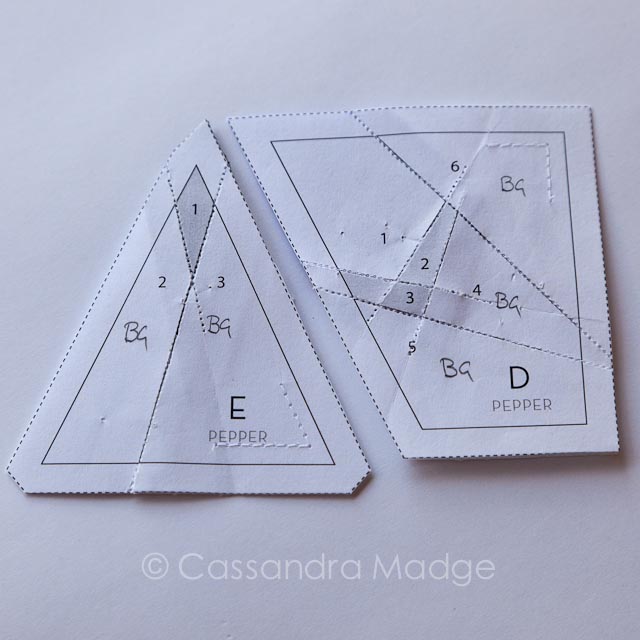

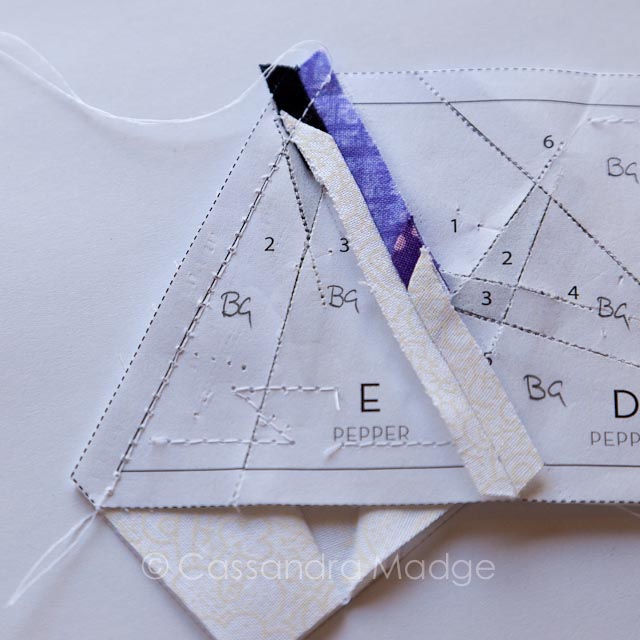
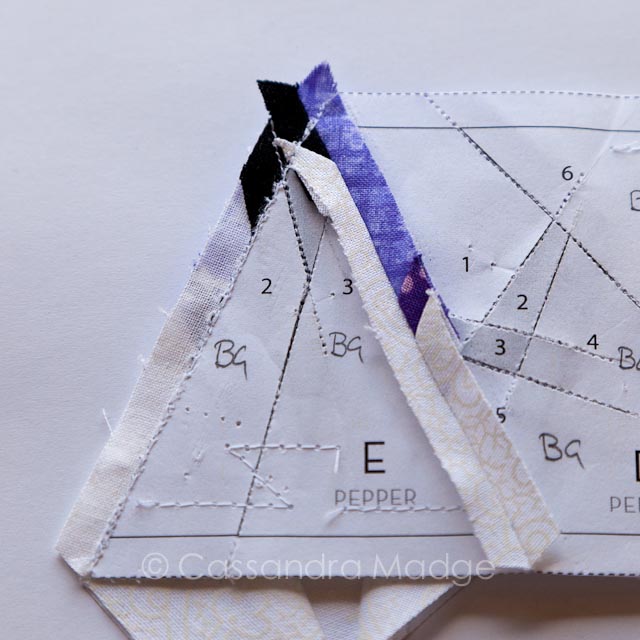
Time to join the bottom half, starting with sections D & E. Again with those sweetly aligned corners, making this pattern so simple to put together. I even managed to baste these two together first time with no need for the seam ripper! Don’t forget to keep changing your stitch length back to short (1.4-1.5) before doing the final stitch of your seam.
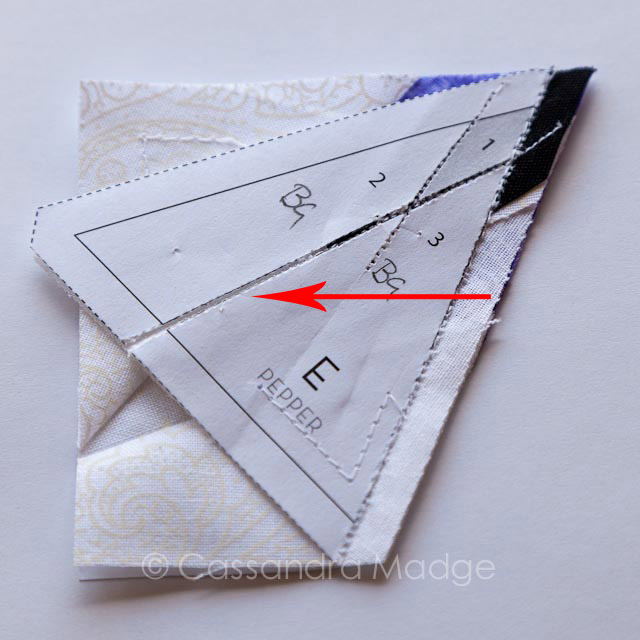
A common problem you will come across when paper piecing is the paper coming off prematurely. Without the paper, you will not be able to see the lines to ensure accuracy of your seam lines. You can use sellotape to join the pieces back together, or run some basting stitches over the seam as I did above. As I mentioned in part 1 of the tutorial, sellotape is a great fix, but just make sure that you don’t touch it directly with your iron as you will leave a gunky mess on it.
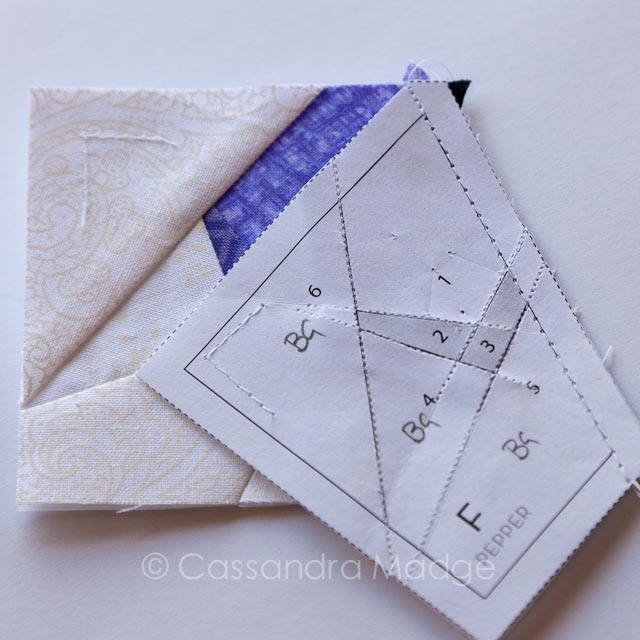
Finally, we add section F. If you look at the basting stitches above, I was slightly off the line at the back, but it was close enough for me to live with. Paper piecing, like patchwork in general is often about a personal judgement. Have you changed your stitch length back again after basting?
As usual, don’t forget to take off your paper from the seam allowance. In this case, I found it easier to press the seam to one side rather than open. Again, this is personal preference.
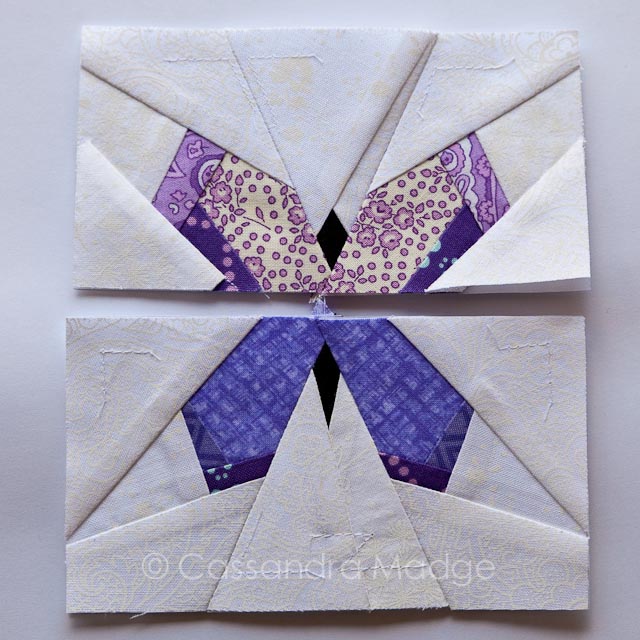
So, here we have our top and bottom halves of our butterfly, ready to join. For this design there really is only a couple of key areas – most important to align is the body join.
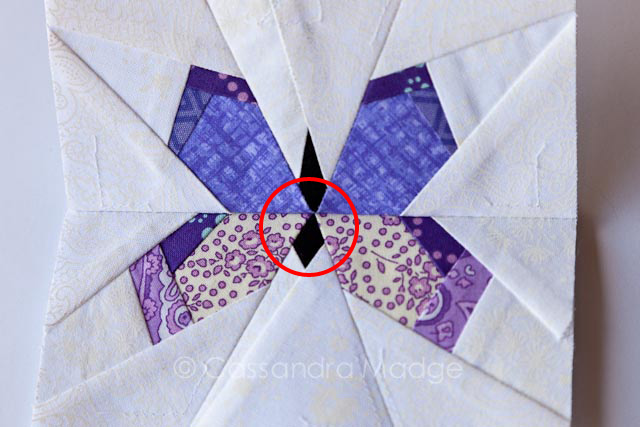
As you can see, my alignment first time was an epic fail! My seam was so far out that it wasn’t salvageable, so I seam ripped the whole thing and started again, this time starting from the centre and working first in one direction, then the other.
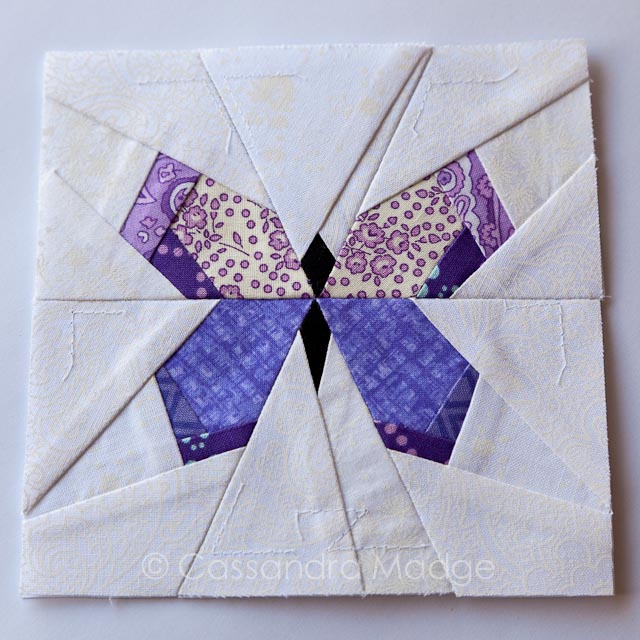
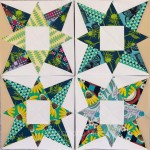
I will admit that my final seam wasn’t perfect, but I still am really happy with my little butterfly. I took the paper off the final seam, then pressed it open, giving all of the block a thorough press at the same time.
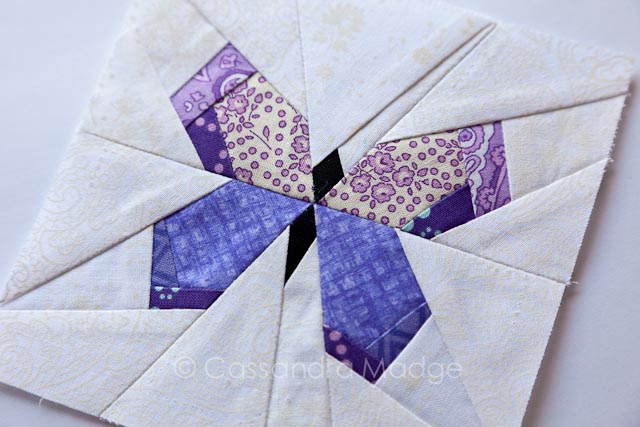
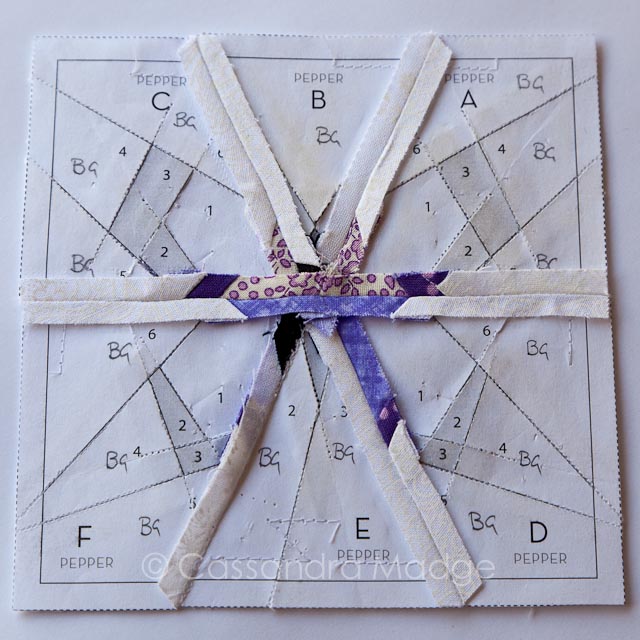
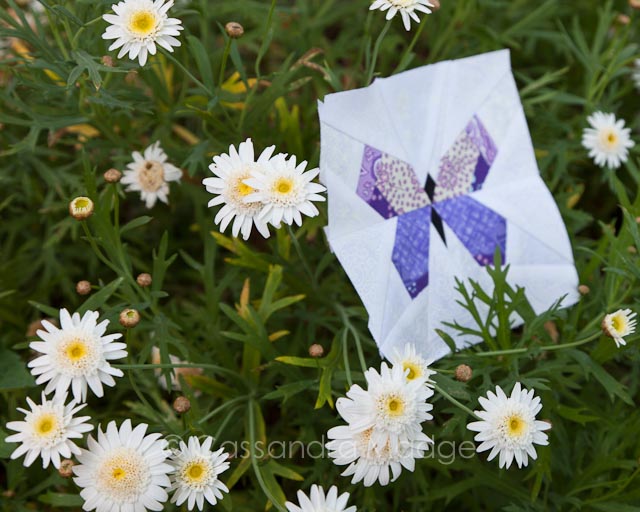
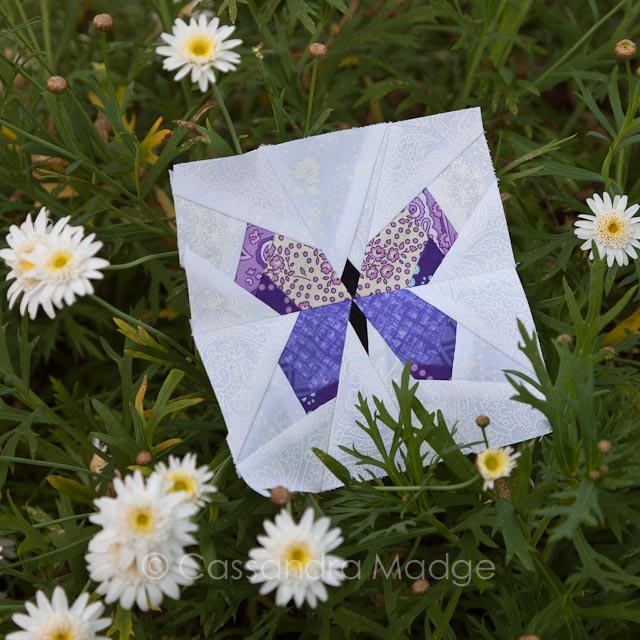
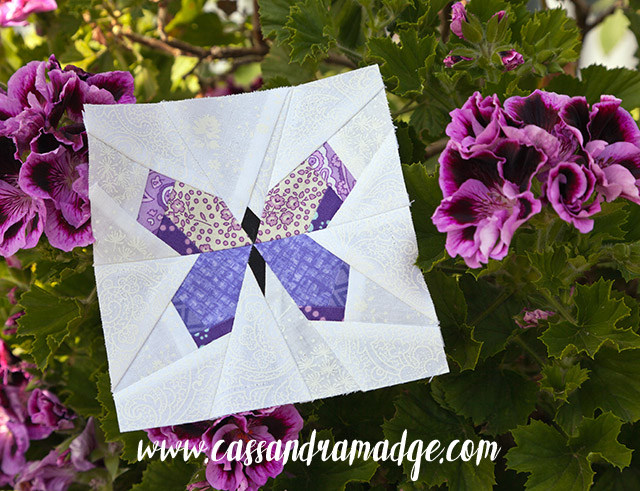
Now for the most satisfying part, which is taking all the paper off the back. Your little butterfly is finished and ready to be set free into whichever project you like… although you might want to take it for some fresh air first!
I do hope that you have enjoyed this two-part tutorial on foundation paper piecing. If you have any specific issues or requests for future tutorials or even just if you’ve made a butterfly block, I’d love you to leave a comment.
Links to some of my other tutorials are HERE. Nicole is going to be posting some of her favourite paper piecing tips on her blog, so make sure you check those out as well. Once you have some confidence with paper piecing, she has some beautiful patterns for you to try – including my favourite, the Take Wing butterfly.
Please feel free to pin this tutorial for future reference, or subscribe to my blog or newsletter if you want to be kept updated regarding my crafting adventures, occasional lame jokes and quilting shenanigans.

Please be aware that there may be affiliate links in this content. Your support allows me to keep creating for you!

Foundation Paper Piecing Tutorial – Part 1 | Cassandra Madge
[…] step how to start foundation paper piecing and some tricks that I’ve learnt along the way. Part 2 tomorrow will teach you how to join up your pieces to make a complete 5″ (finished size) […]
Want to know what me and Harper Lee have in common? - GnomeAngel
[…] If you’d like to give foundation paper piecing a go, then why not check out this two part tutorial on how to. Click here for part 1 and click here for part 2. […]
misty babcock
Thank you so much for sharing. I looked at the pattern and even slept on it and still couldn’t figure it out. You were so much help.
Cassandra
Misty, thank you so much for your comment! I am really happy to hear that it helped you.
Dorcas Rodriguez
thank you!
Sherry
Thank you!!! I am attempting to make this butterfly block and had no idea how to attach the pieces. Your tutorial was very clear and I am grateful I found it. I also appreciated that you shared little tips such as basting to help fabric stay in place. Many thanks!!!
Sheryl
I recently became interested in foundation paper piecing and downloaded the butterfly pattern from lillyella. I pieced my first ‘Pepper’ but my seams did not match. After searching for a tutorial I discovered yours and now realize I did not sew the pieces together correctly to get a square. I am pleased with my second attempt.
Thanks for taking the time to create and share your tutorial.
Lorraine
Although I have sewn for years, I have never tried any form of quilting. Your tutorial was very helpful. Thank you so much for putting so much detail in the instructions
Chrysta
Cassandra,
Thank you so much for this thorough walk though. This was my first time attempting a paper piece square and your direction made it so easy.
Katrina Lee
I enjoyed this so much and my butterfly is gorgeous! Except for one thing. If you use an ink jet printer, don’t soak the paper to make it easier to get off! The ink lines transferred right to the fabric. (Laser printers will not do this) Live and learn! Any suggestions on getting the ink out? I tried Castile soap and water. Tomorrow (after it’s dry) I am going to try isopropyl alcohol. Unless someone has a better idea!
Cassandra
Katrina, I’m so sorry to hear about the transfer of ink on your block! I actually had to go back and re-read my tutorial to see where I might have suggested using water – I always only use seam rippers and tweezers to get piece out of the tiny seam intersections. Water would just make the paper disintegrate and less easy to remove. How did you go getting the ink marks out?
Frances scherbakov
Hello Cassandra I really want to do this paper piece if but I don’t no where to get it and to print it I got no printer so I was wanting to no if I can buy it or order it is even better
thank u.
Feryall Rahman
Hi, Frances! Is it possible for you to take the pattern pdf file to your local printer/copy service on a flashdrive/thumbdrive? They can print out several copies. I usually ask for lighter weight copy paper, as those are easier to tear out without disturbing the stitches. The smaller stitch length is used so that the patter paper is perforated as the seams are sewn, for easier removal. Standard weight copy paper is harder to tear out. My personal favorite is a kind of vellum or translucent paper called Golden Threads paper. It is sturdy enough to handle quilting and piecing, but tears out like a dream. I just trace the printed pattern on to the translucent paper by hand, using a sharp pencil and ruler for straight lines.
Catherine Pettigrew
Hi Cassandra, thank you so much for this tutorial. It’s the first time I have tried paper piecing and it has taken me forever but I enjoyed it and my little butterfly has turned out lovely but slightly wonky but practice makes perfect! The only issue I had was that even when I printed the patterns ‘actual size’, the bottom solid line was still only 2.25″ instead of 2.5″ so my finished piece has ended up being 5.25″ square. I didn’t worry too much as this was just a practice one to begin with but I would like to get it right in future. I am using a Dell laptop rather than Mac. Any advice would be much appreciated! Thank you <3
Cassandra
Hi Catherine, thanks for your compliments and question. Yes, because the “test square” was the wrong size, the entire butterfly will follow. You have two options, playing with your settings and also, leaving excess fabric all around the outside background pieces and then cutting the whole block to 5.5″ using a square ruler, centering the butterfly in the composition. This will work ok, except your butterfly will look a little small if you put it next to a regular size version.
When printing, look for a setting under properties where you select “print full size”, alternatively if that option isn’t available, select 100% scale whenever the option is available. For our printer, I need to select “Print using system dialogue”, followed by printer “Preferences”, the layout screen, then click “Reduce/Enlarge” and enter 100% in the box. Please let me know if this helps, you may have to experiment and print out a couple of sheets to make sure you’ve gotten the right setting.
clara jaramillo
Thank you very much!!!