
Thread is one of the key ingredients in sewing, it can be a factor that makes or breaks your project. Think about it – the sturdiness of a seam, whether in a garment or quilt, will depend on the thread that makes up the stitching (also vital is thread tension, but that’s a story for another time).
When you are talking about hand sewing, specifically in this instance English Paper Piecing (EPP), that truth is no different. Every stitch you take into your project is another chance to improve the durability of your piecing and the finished look of your quilt.
When I first started EPP I wasn’t as concerned about my thread choice. I preferred to use Rasant thread – I still use it for many applications now. It is cotton wrapped, so it has a nice feel to it, but has a polyester core which means that it is less likely to snap compared to regular cotton thread. Two major considerations in choosing the type of thread you use is strength, but also how fine the thread is.
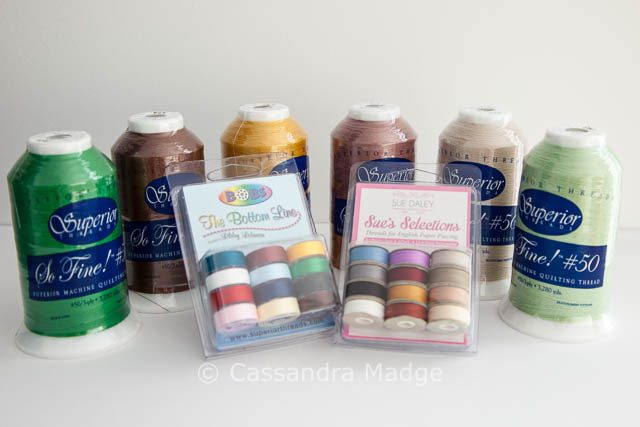
Here are a selection of my own stash of threads – the Superior So Fine #50 cones up the back are mainly used for my longarming. The Bottom Line and Sue’s Selections of prewound bobbins at the front are a polyester #60 weight thread which is ideal for using in EPP and similar applications – think invisible hand applique for one.
If you haven’t ever done so, I highly recommend doing some research with the thread manufacturers regarding their products, and the way thread is labelled. For reference, HERE is an article regarding piecing thread from the Superior site. They also supply information with each different type of thread regarding the thread makeup, application, and recommended needle size (for a sewing machine). The BOB’s on the left are shown on this page HERE and the Sue’s Selections bobbins on the right are HERE.
So, what do those #50 and #60 numbers mean? In this case, it is the weight, or thickness of the thread. This number goes UP as the thread gets thinner – so a #40 weight thread is coarser than a #60 weight thread. Why should you care about this? Firstly, because the thickness of the thread actually effects how neat and flat your seams are able to lay, which makes your piecing and seam allowance more accurate. Secondly, the finer the thread, the more invisible you can make your stitches. If you have a very fine thread and needle, you can pick up genuinely tiny amounts of fabric and by blending colours your stitching can almost disappear.
Don’t believe me?
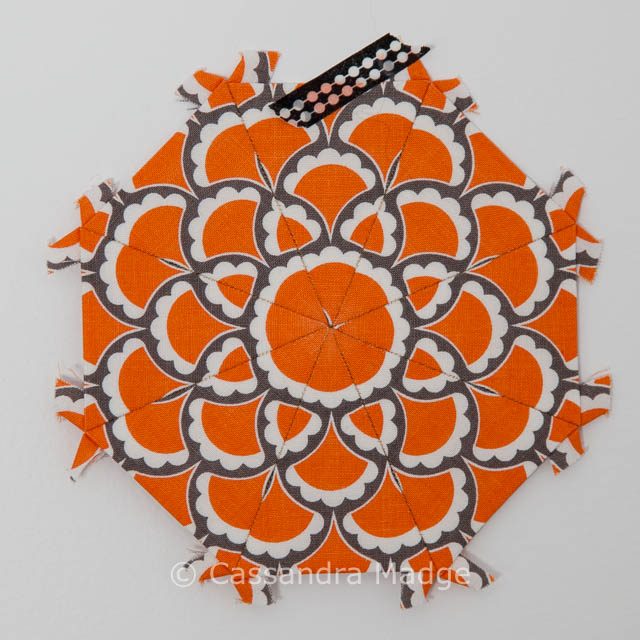
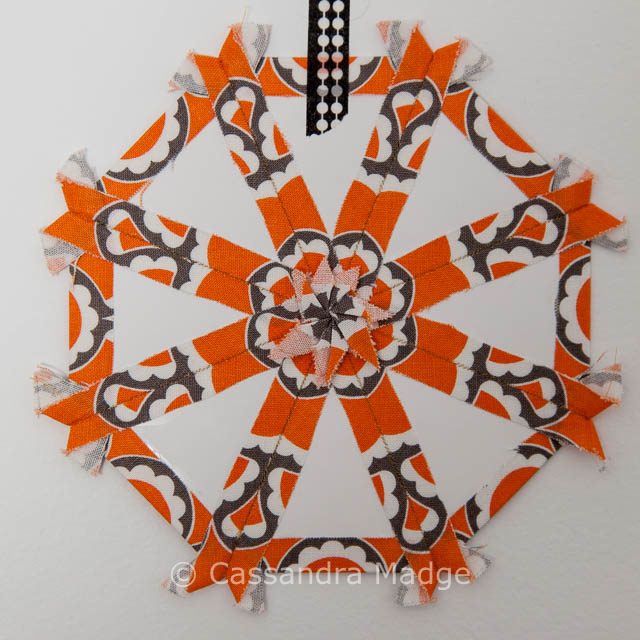
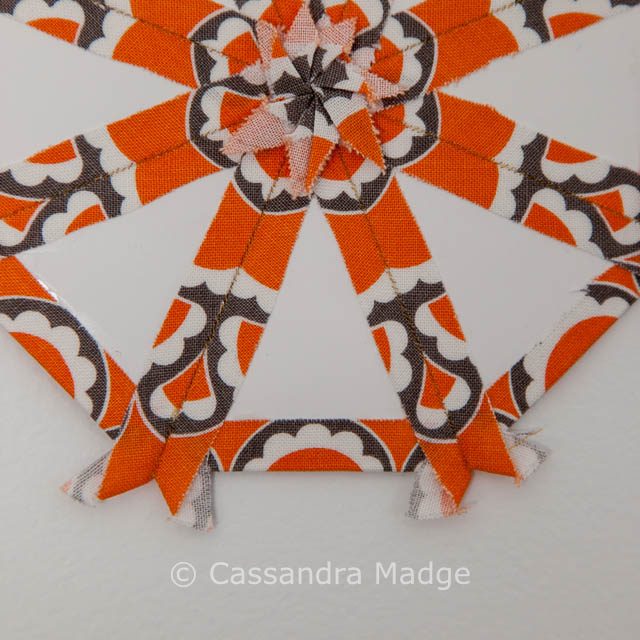
Hopefully in the third photo you can see my stitches – although I used an orange thread it wasn’t a perfect match to the fabric. I am not a magician, and I genuinely don’t take hours over each seam. I have simply found the RIGHT TOOLS for the job, which then makes the job easier and the finished product a heck of a lot better looking than when I first started!
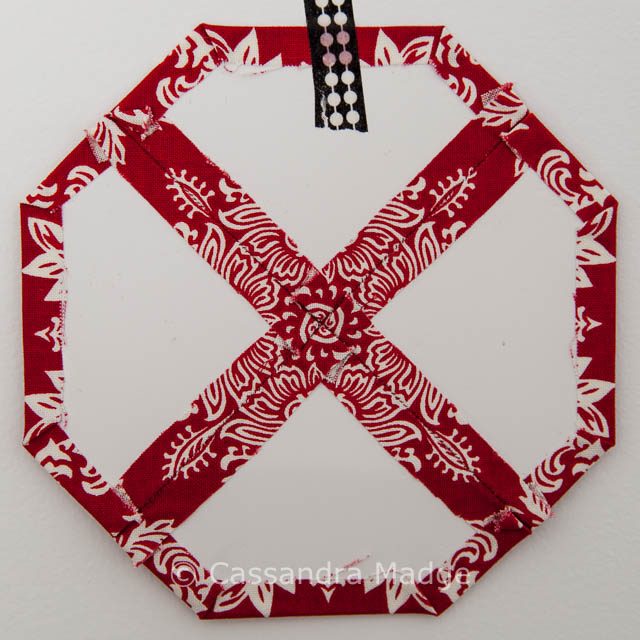
Here’s another example for you. You can probably see the stitching more easily when you focus on the white print areas, because of the high contrast between the fabric and the red thread. When you have a seam that covers such a high contrast, my personal bet is always to go for the darker of the two colours – in this case the red. Unless there was significantly more lighter print than dark, when you might have to make a judgement call.
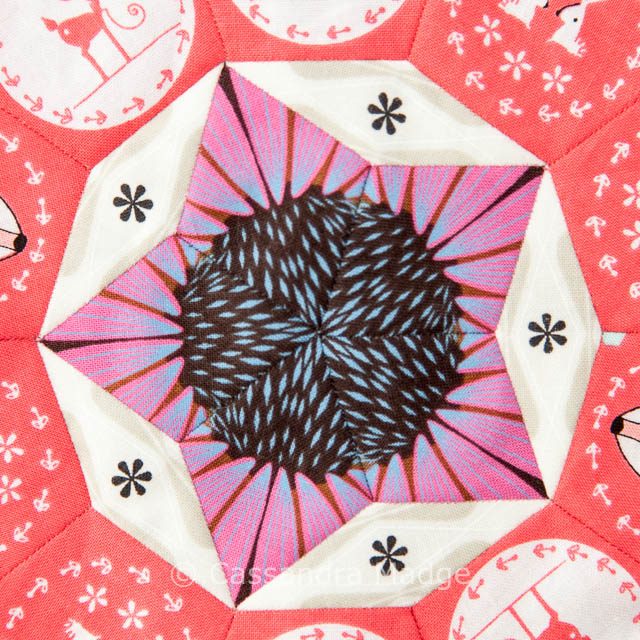
In the extreme La Passacaglia closeup above, focus on the outer row of pentagons – the pink ones. You can probably see the tiny stitches between each one of those. Now can you tell me which colour I used for the seam between the pink pentagons and the cream diamonds? Believe it or not, I used the exact same shade of pink. The darker thread is lost in the join between the two pieces, whereas a white or cream thread would show up in high contrast where it passes into the pink side of the seam.
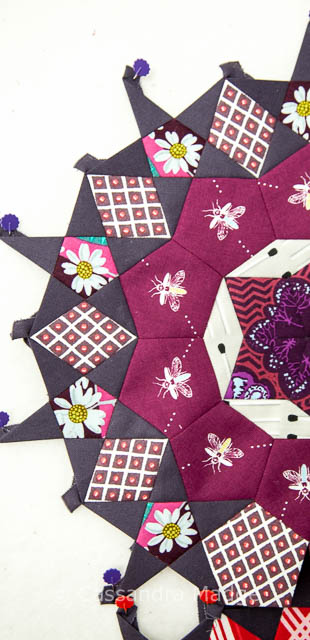
For the plum coloured rosette above, the majority of the centre was stitched in a deep burgundy thread – as each bee pentagon was stitched together and then around the inner diamonds. However, once I moved onto the outer row of charcoal stars, I only use a dark grey thread. The reason being, all of those seams join a print fabric onto a grey triangle, so that means that the grey is consistently the darkest colour. It saves me a lot of time by not having to change my thread colour, and it means that the stitching just vanishes into the stars and the shadows thrown by the seams.
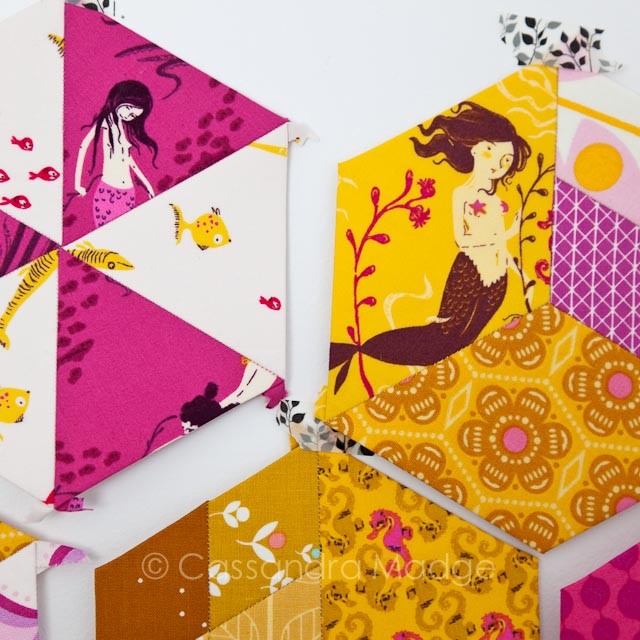
The stitching in the above Hexagons is a little more obvious in sections, but the same principle was followed. For all these blocks I only chose from a selection of three threads (50# Rasant, hence the slightly more obvious stitches). My selection, which covered all contrasts, was between a dark pink, a mid pink/salmon and a light gold. So for the triangles on the top left, all the seams were sewn with the dark pink thread, because that was always the darkest colour available.
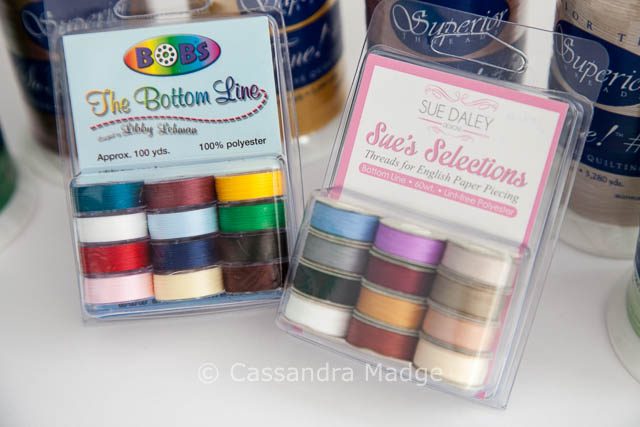
I purchased these two sets of bobbins because they covered a huge range of tones and colour families. I don’t think there are a lot of fabrics that I couldn’t manage to find a match with here. You will notice that I am not a thread snob. These threads are polyester, which isn’t a poor cousin to cotton thread anymore. A high quality super fine polyester such as these will give you less trouble sewing, less lint, and smoother more invisible seams than any cotton thread.
If you want some more information on how to stitch your EPP shapes together in order to get the tiniest, most invisible stitches, I couldn’t recommend more highly Sue Daley’s site, Patchwork with Busyfingers, and her selection of videos on the basics of EPP. This is how I learnt 18 months ago, and I still stitch exactly the same way today. You can also purchase her tools, including bobbins, needles and paper shapes through her site. I recommend the Milliners needles for helping to keep your stitching neat and even, my personal sweet spot is the size 10, however due to the fineness, be warned that all my needles end up with a bow in them. I find this doesn’t affect their usefulness in any way, it’s just simply something to be aware of.
As a bonus question, do you know why sometimes your thread seems to be possessed and knots and twists the whole length, and yet the next length from the same spool behaves perfectly? I will share the super secret trick for beating it with you next week!

Please be aware that there may be affiliate links in this content. Your support allows me to keep creating for you!

Robby H
This is really helpful info. I decided I needed to try EPP after seeing your Summer Rain project. Just gorgeous! I’ll be interested to see what your answer is to the question about the mis-behaving thread. I was taught that you neeed to thread the end that comes off the spool first so you’re pulling the thread in that same direction, but maybe you’ve got another clever trick for me. All clever ideas graciously accepted here.
Cassandra
I am so glad that you love my Summer Rain quilt – it is about to go on the quilting frame and I am very excited to reveal the finished product! EPP is certainly addictive, I can’t believe I held out as long as I did before trying it. You are on the right track with your answer, but I was going to take it a few steps further. I hope that it helps you with your sewing, and thanks for commenting!
Suzy Whitten
Hi Cassandra! I’m a knitter/crocheter who just found your site and am now adding EPP to my hobbies. I love the contemporary designs and appreciate your tips and tricks as hobbies can be expensive – especially if you purchase products that frustrate or just aren’t the best. Thank you!
Cassandra
Suzy, I really appreciate you taking the time to comment and your kind words! I’m really glad that I have helped to inspire you – there’s so much technical knowledge that goes into making these things look both beautiful and effortless. If you have any more questions, please let me know as I can often help address them after my hundreds of hours of EPP work.