If the number of projects on Instagram is anything to go by, the Triangle Pouch tutorial by A Spoonful Of Sugar is a major hit. I made one myself earlier this year, but I found the unfinished seams and the zipper end troublesome, so I left it for a while. Lisa and Sarah, the duo behind the design suggest that you could cover the seams with bias binding, but that simply seemed to add bulk and an extra fiddly step or three.
Last Saturday I decided to see if I could make one, with completely enclosed seams. It should theoretically be possible, my crazy brain thought. And then I made a second. In less than an hour. A request was made for a tutorial, so here it is….

Please see A Spoonful of Sugar for the basic tutorial and measurements. I am not trying to copy or infringe their instructions, just taking their pattern another step further.
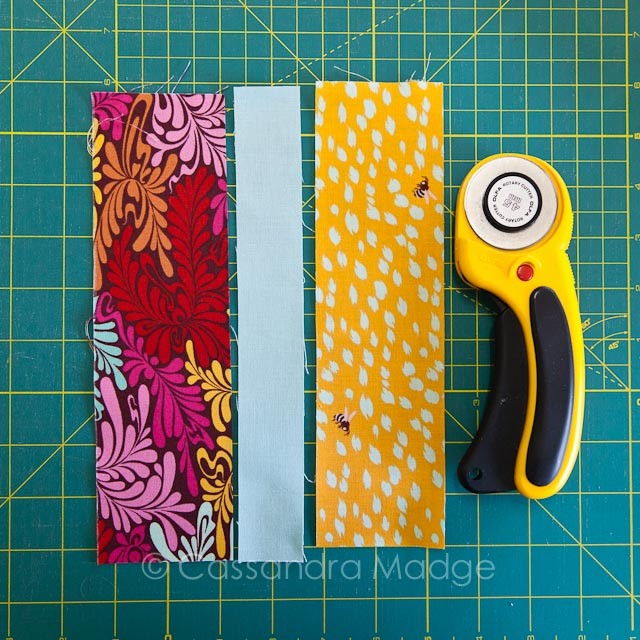
I prefer larger strips for my pouches, so that more of the fabulous Tula Pink fabric is shown.
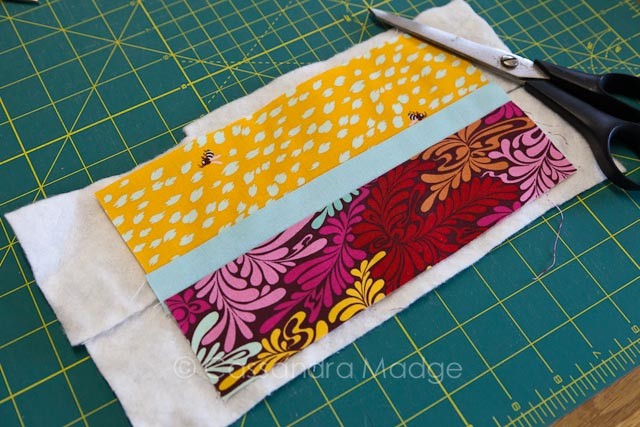
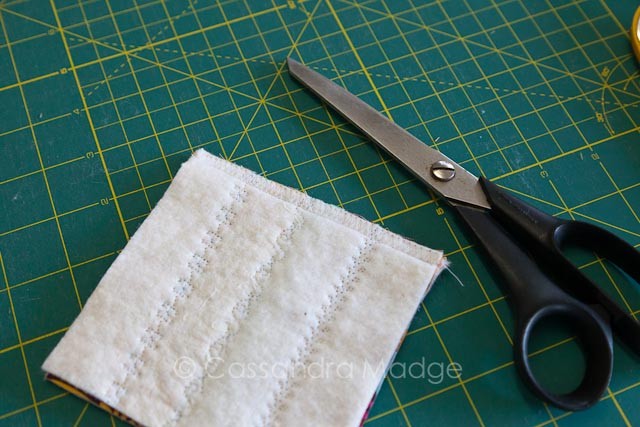
Quick and easy tip – cut your batting oversized, then trim it all down after you have finished quilting. This is the perfect project to use up the leftover strips of batting that you trim off your quilts.
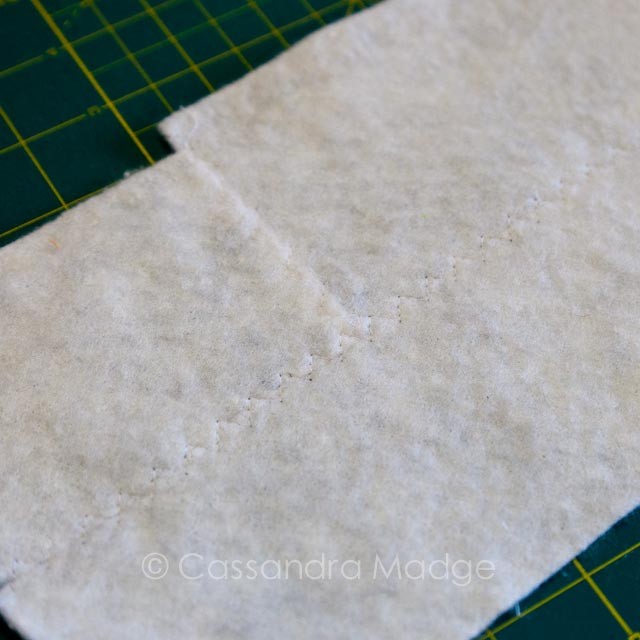
Batting strips not wide enough? Butt them together tightly then stitch with your widest 3 step zig-zag stitch. You will never know the difference in the finished product.

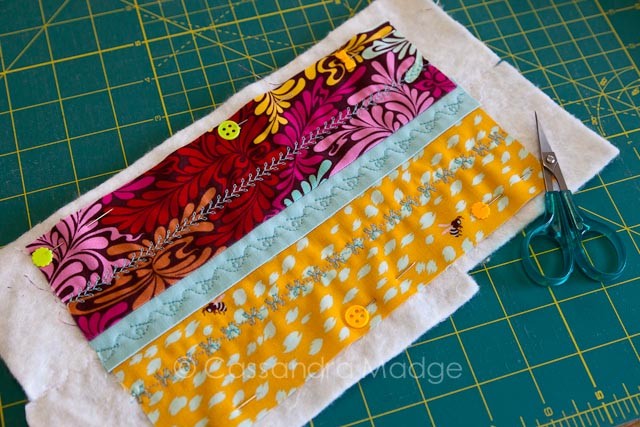
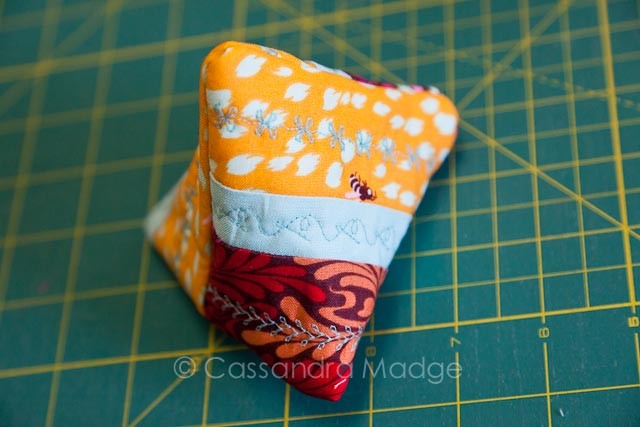
No need for fancy basting, just a few pins along the edge to hold things nice and flat. For fun I was trying out a lot of the decorative stitches available on my Janome 7700 – they look great on little mini projects like this!
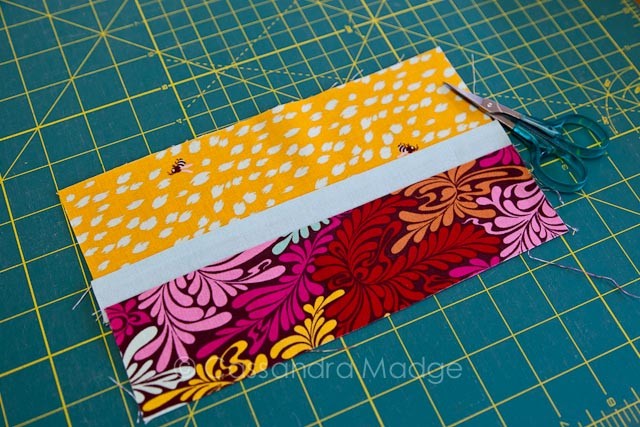
After cutting and rotating my patchwork panel, I zig-zag the joined edge to protect from fraying. It gives a nice neat finish inside.
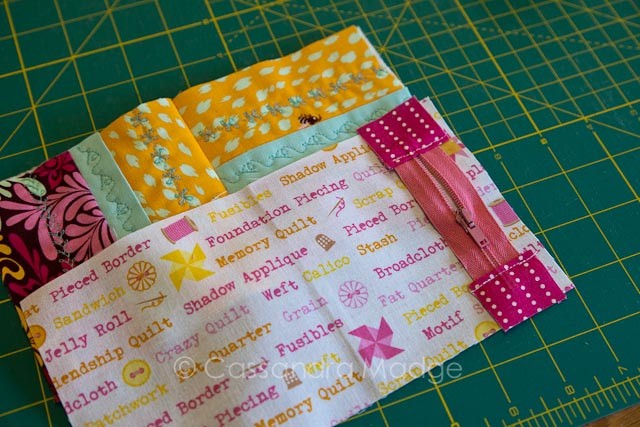
I follow the basic steps to insert the zipper – here I added a substantial end to it to protect/conceal the zip ends and make for a neater finished product.
Now for when the directions from the original tutorial start to change…..
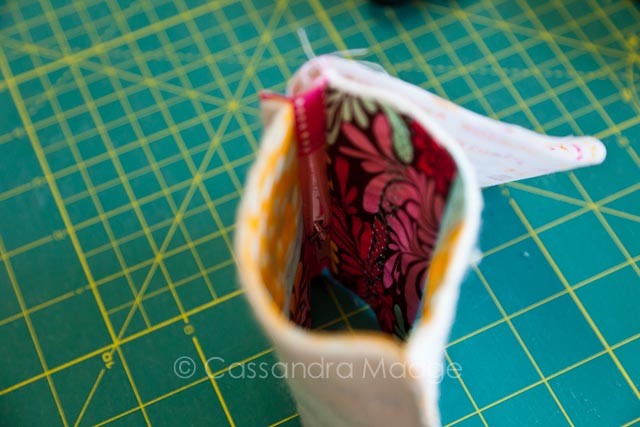
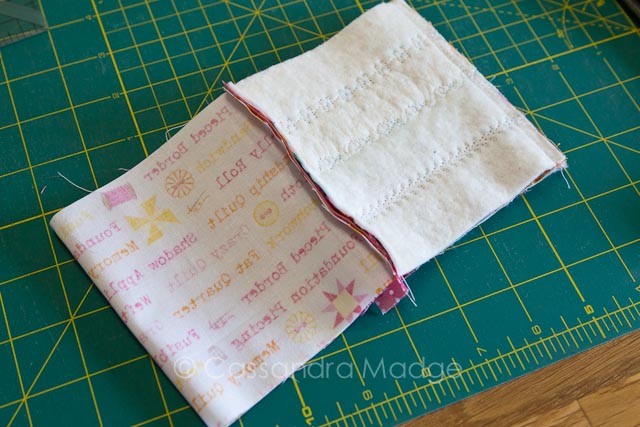
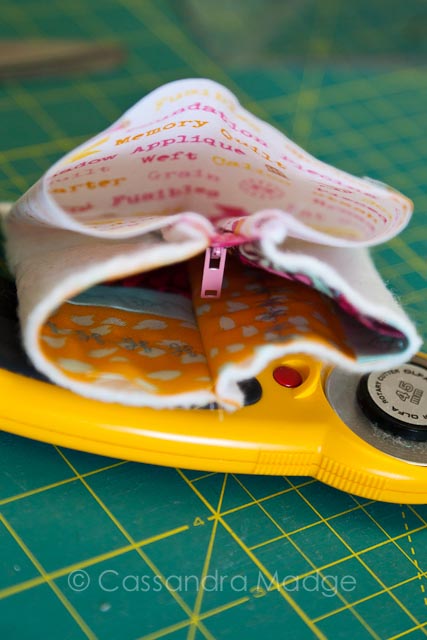
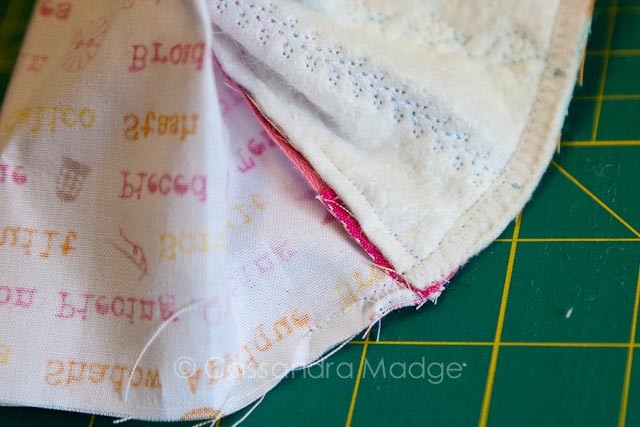
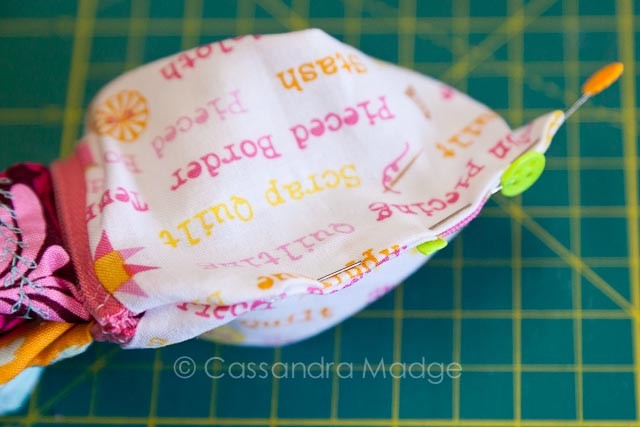
As you can see at the top, you have two “loops” of fabric – one lining and one outer, joined at the zipper.
IMPORTANT NOTE – THIS IS AT THE BOTTOM (CLOSED) END OF THE ZIPPER
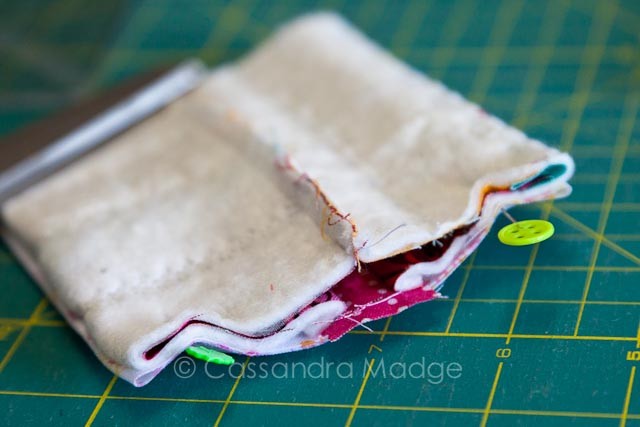
You need to lay them both flat, centering the outer seam over the middle of the zipper. Pin ALL the layers flat together, outer and lining, straight over the zipper tabs. To make it easier to stitch, I wiggle my fingers inside and do the zipper up at this stage only. You will need to undo it later.
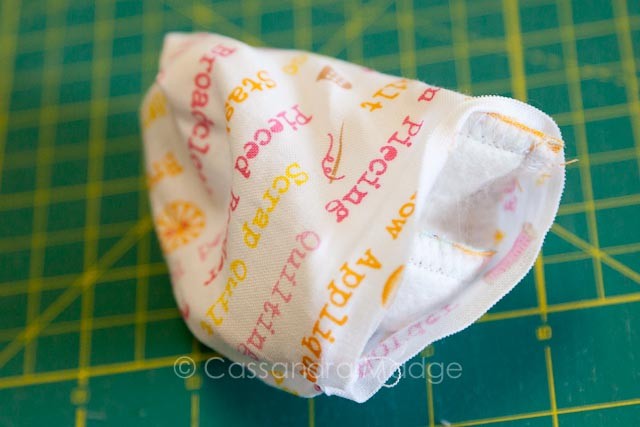
Stitch straight across, taking your time over the seam intersections and especially over the zipper teeth if you aren’t using tabs as I did. Then zig-zag stitch the edge of your seam for fray protection.
Doesn’t that look nice and neat?
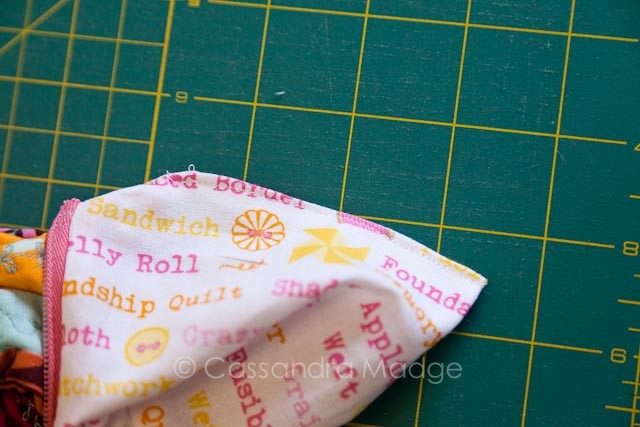
Here is what the other end looks like – 2 little bags, both right sides in. See that zipper? Now is the time to reach in and wiggle it ALL THE WAY DOWN.
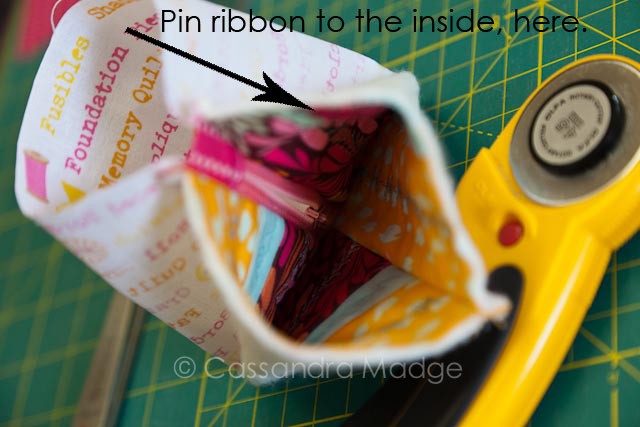
If you want a little ribbon tab on top of your pouch (I forgot omitted this step), you would pin or baste it to the top of the outer, right where my arrow is pointing. Make sure it reaches all the way to the top of the fabric, you want to stitch it in nice and securely.
Now is where the steps start to look a bit crazy and like fabric origami. Don’t panic, take it nice and slow, and it will work out fine.
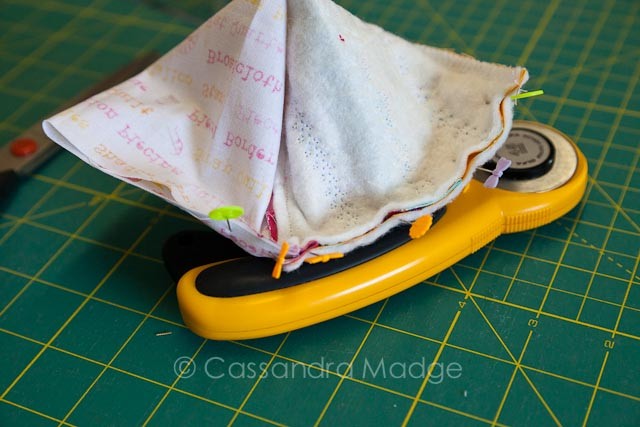
DOUBLE CHECK YOU OPENED YOUR ZIPPER ALL THE WAY. LAST CHANCE!
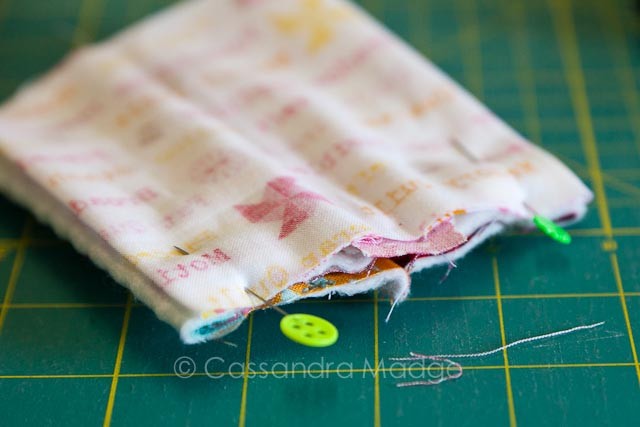
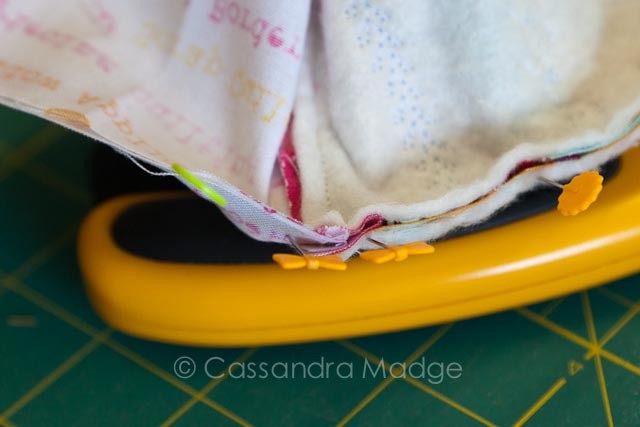
You need to pin closed your outer, right over the zip and to about an inch past the seam into the lining. I have taken a close up of the zipper tabs to show you how to position it all for a neat finish – seams pointing to the inside/lining, tab up to the outer. You will notice that the top edge seems to curve from outer to lining. That’s ok, just take it easy and match up all the seams and you will be fine.

Carefully stitch a 1/4″ seam, starting at the top of the outer and sewing all the way into the lining, about an inch past the zipper. Back stitch here to secure your stitching. Zig-zag the edge to keep everything nice and neat.
Now for the origami part. Put your hand into the lining, and wriggle it back over the outer, like a pillowcase.
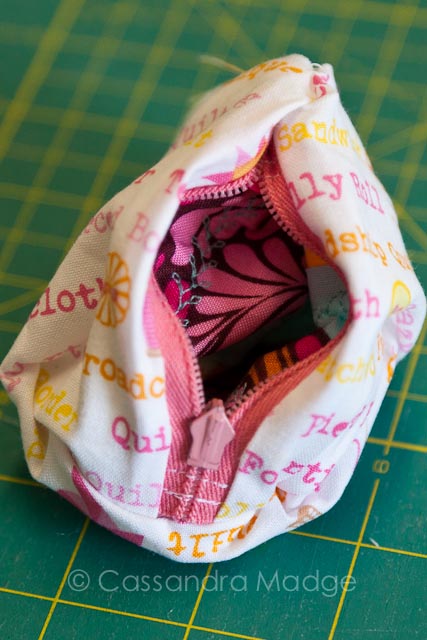
Here is the wrong side of your OPEN zipper, the right side of your lining, and you can see the right side of your outer peeking through. All is well.
Reach into that zipper and wriggle out as much of the outer as you can, WITHOUT turning the lining through yet. We still have to sew up the gap we just left. So all you are trying to do here is get everything out the way of that seam, so that you won’t accidentally catch any of it.
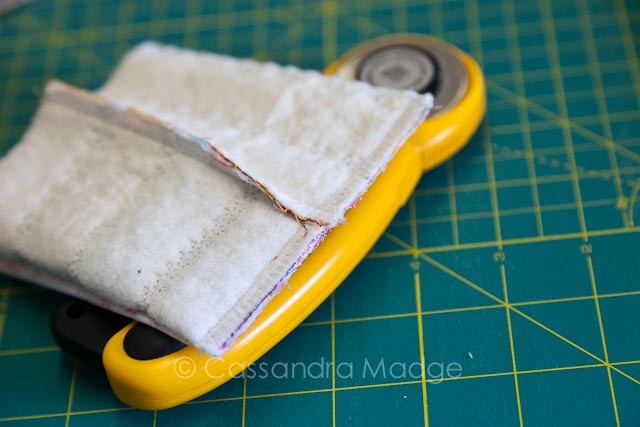
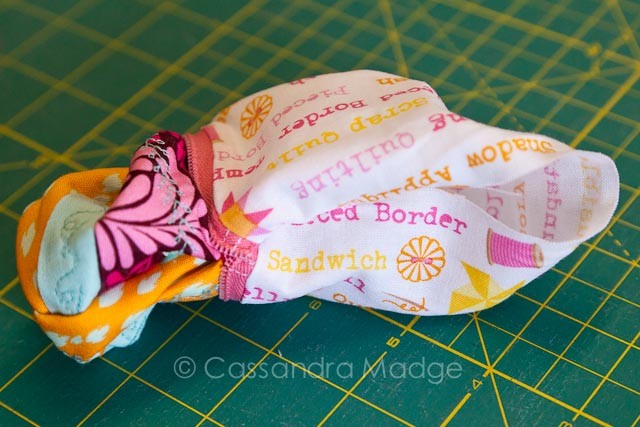
Gently fold the raw edge of the lining inwards, using the fold line at the end and the seam you just sewed as a guide. It should flip down fairly easily. Pin it tight, with the pin points towards the zip, so you can pull them out as you are stitching.
Starting at the zip end, carefully straight stitch just inside the edge all the way to the end, backstitching start and finish, removing the pins as you go.
All that remains now is to completely turn it all the way out, through the zipper and pushing the lining back firmly into place. I used a blunt point to poke out all my corners, which despite the bulky seams, came out very well.
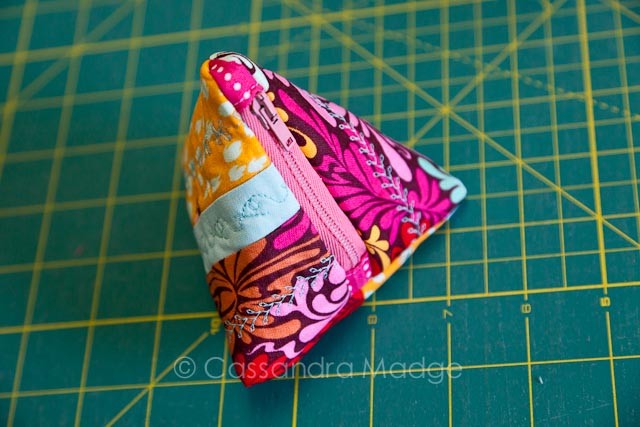
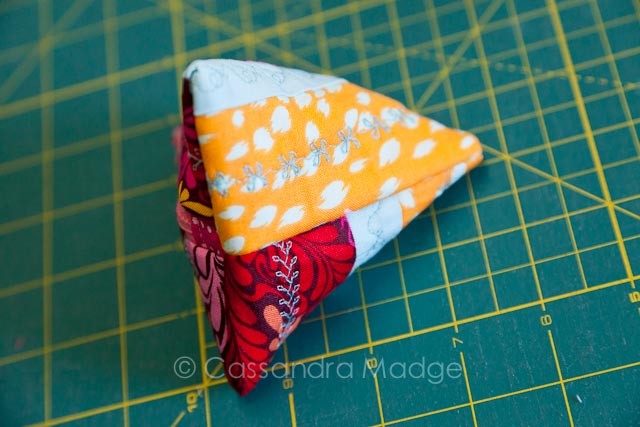
And here you can see my zipper tabs and the lining, all neatly inside with no seams.
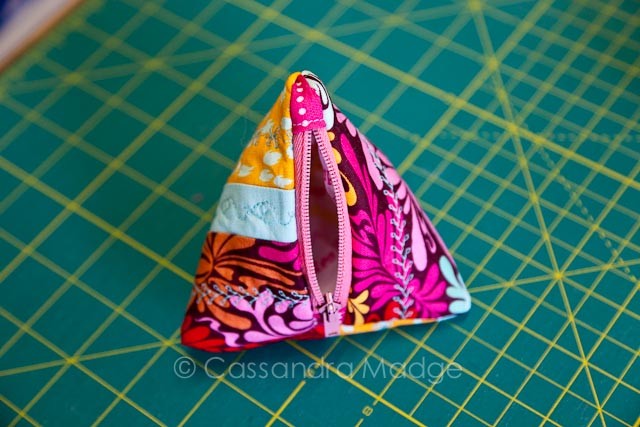
Go ahead, just try to stop at one!!
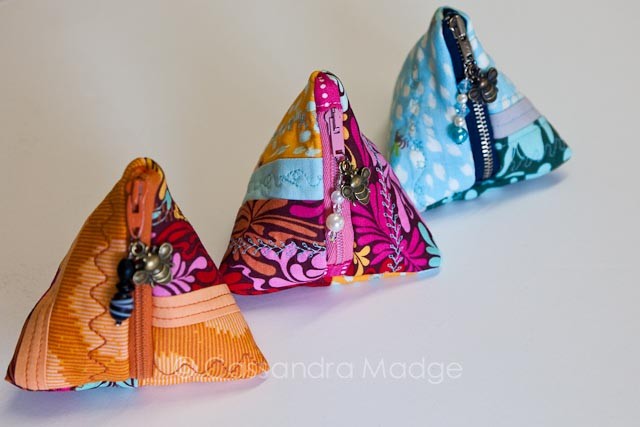
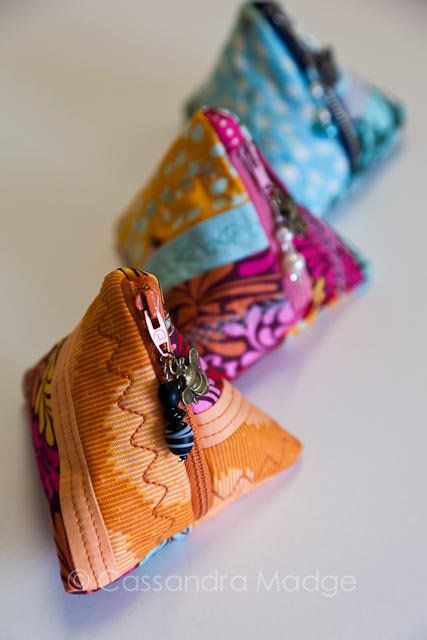

As these are for gifts, I added a little decorative beaded pull and bee to the zippers, but you can jazz them up anyway you wish! Once you have the basic construction down, you could change up the size or the fabric mix as I have done here. Think teacher gifts, swap extras, hostess gifts – these little pouches could have a dozen different uses.
Hope that this tutorial has helped you. As always, if you have any questions, shout them out in the comments and I will try to answer as soon as possible.

Please be aware that there may be affiliate links in this content. Your support allows me to keep creating for you!


Lisa
Your pouches look super cute! Love the enclosed seam variation. Will have to try this next time.
Cassandra
Thanks Lisa. I hope you show me when you’re done!
Jess
They look so cute and fiddly! Wanna make me one? Hehe
Cassandra
Purple one perhaps? 😉
Kerry
Thankyou! I made one from another tutorial which I loved, but had the same thoughts. I really do like to have the seams hidden! I’ll try this on my next one. Zips have just arrived from Etsy 😉.
Cassandra
Thanks for your comment Kerry! You have been busy sewing. Let me know how you get on once your zipper order arrives!
Kerry
I forgot to include my blog address….
Mary Kate Wilde
Just the tutorial I was looking for!
Teresa
This tutorial worked perfectly for me! Thank you so much!
Cassandra
Hi Teresa, thanks so much for your feedback! Always great to hear I am helping out other sewists!
lynnie
i made a bunch for Christmas gifts. Wish i saw this before i had to zig zag all those loose open seams. the next one i make, i’ll use your technique. thank you.
Michelle
Love your variation with the hidden seams. I hate hate hate raw edges! Thank you for figuring this out, I was melting my brain trying to figure this one out. 🙂
Cassandra
No more brain melting for you Michelle! I have to admit, it took a little bit of work to figure it out, but I knew I wasn’t alone in my utter loathing for raw edges shedding lint everywhere. Thanks for commenting 🙂
Janette Hall
Hi there. Many thanks for this post. I’ve been experimenting with the Spoonfull of Sugar pouches too, taking the initial idea a bit further. They make neat little gifts for my daughter’s teenage chums. Like you, I’ve added zipper tabs. I’ve tried out different types of batting and interfacing, with varied success. Thank you so much for working out how to hide those inner seams!
Cassandra
Hi Janette, thankyou so much for your comment. It really makes me glad to hear that other people find useful all the things I work out. Hope you will visit again 🙂
Marsha Gibson
I have a vintage pyramid bag from Japanese kimono that I’ve been wanting to copy, as I find the shape and size just perfect for evenings out! I’ve looked it all over, inside and out and though I’ve been sewing for years, could not wrap my brain around how they lined the bag with finished seams. I could see where the lining had been stitched together in one small spot, which I figured had something to do with turning it right side out.
THANK YOU SO MUCH FOR YOUR TUTORIAL!!!! Now I know I can make myself another bag.
Here is the link to the exact purse that I own and want to make more of:
https://www.etsy.com/listing/690151526/vintage-90s-tcamey-festival-floral?ga_order=most_relevant&ga_search_type=all&ga_view_type=gallery&ga_search_query=pyramid+bag+pattern&ref=sr_gallery-1-27&referring_page_type=market&pro=1
Beth L Bilous
where did you get the cute little beaded pulls for the zippers please? What should i look for?
Cassandra
Beth,
This email replay is about 12 months too late, my apologies. I used my beading supplies to make the beaded pulls – Starting with a long head pin, I add a few different beads, then use round pliers to make a loop and wrap a couple of times to secure it. I attach it to the zipper pull using a simple jump ring.
Happy Sewing!
Joyce
Great picture and text. Easy to follow instructions! Thanks!
Pam
Thank you so much! I have made these triangle pouches before with disappointment about the raw seams inside. Now, this project will look so much cleaner!
Michele T
I made two of these bags many, many, many years ago when I was just discovering sewing and quilting. I have no idea where I found the pattern for enclosed seams but it certainly was an excellent tutorial and I can remember how confusing it was to make for a newbie! But I did it and my tiny Pyramid bags turned out perfectly! Thanks for putting this together because I really want to make some more now!