Greetings happy house swappers!! I am, of course, referring to the Gnomeangel House Block Swap, as detailed on Angie’s blog, here. On Monday she posted a pattern on how to make a basic patchwork house, and today I’m here to show you how to add a chimney to that house. Because, let’s face it, winter is here in Australia and a wood fire would be nice to keep us warm, right?
Here is the block that I made when I tested her original pattern.
 I mean, it’s the smallest piecing I’ve ever done, and the first time I’ve really tried any sort of “fussy cutting” to make the cool door, the chimney and roof and the cute doggy…. It was lots of fun! Best of all, the whole thing was made up out of my scrap box, and that’s just fantastic.
To convert the flying geese roof into a chimney is pretty simple. You just have to keep remembering that you lose a lot more in seam allowance at this tiny size.
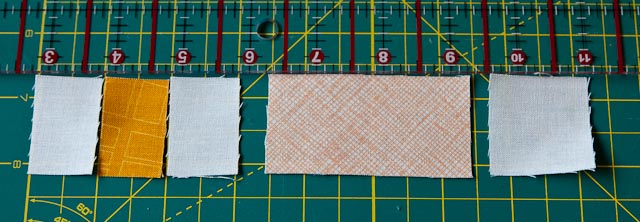
For my sample, I cut 1 roof and 1 right-hand background piece, as sized in the pattern. Then I cut out 3 pieces (two background and 1 chimney) all 1 1/2 inches high, same as the pattern, but all 1 inch wide, to make a left-hand background unit. Keep the chimney unit at least 3/4″ wide if possible, otherwise it will be too thin to really stand out in the finished block.
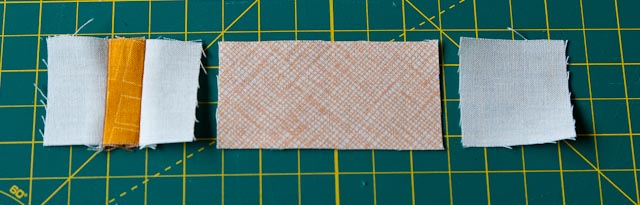
 Seaming the three chimney pieces together, with a short stitch and a scant 1/4 inch seam gives me the following unit. I pressed the seams open on this, to reduce the bulk for the future seams.
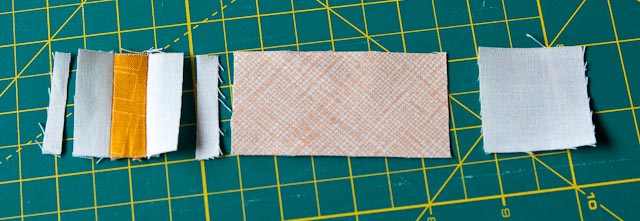
 You can now selectively trim this unit down to a 1 1/2 inch square. Keep at least 1/2 an inch of background white on either side of the chimney if possible, otherwise the chimney will be falling off the roof, or very tiny at the very top. For this sample, I trimmed 1/4 an inch off each side, keeping the chimney centred.
 Now, following the standard process for making flying geese units, draw a line diagonally across your right-hand background piece, stitch carefully and trim the outside corner off leaving 1/4 inch seam allowance.
 Carefully place your chimney unit horizontally across the roof. This seems to be counter-intuitive, but wait! Draw your diagonal line from bottom left to the top, and stitch carefully along that line, making sure that your seams lay nice and flat under your stitching.
 After that you can trim the seam allowance down to 1/4 inch, just as you did for the right side.
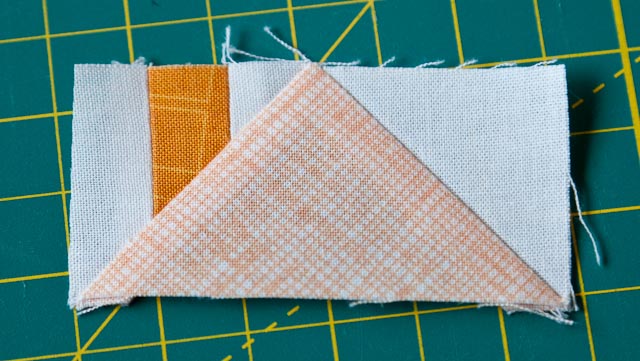
 Press carefully. With these units I press seams to the roof side. If your seam allowances are accurate they nest quite neatly next to each other on the back. And there is your new roof unit! At this stage, you can trim back to 3″ by 1 1/2″ if you have gotten a little out of whack.
 When choosing how to position your chimney inside that 3 piece block, keep in mind that you will now lose 1/4 of an inch to the left of that block, and also at the top, as follows.
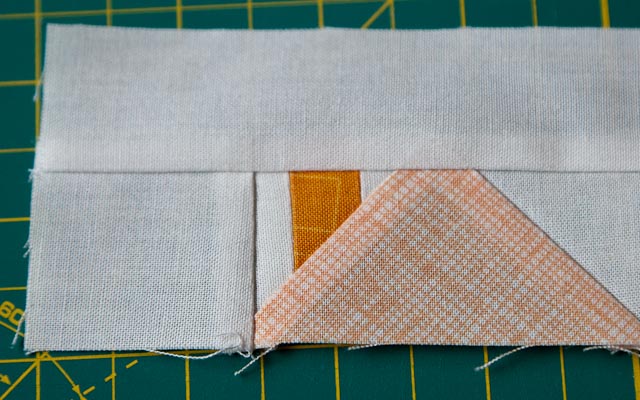 So what appears to be a large gap, suddenly gets very small! In fact the finished triangle piece is only 1″ by 1″.
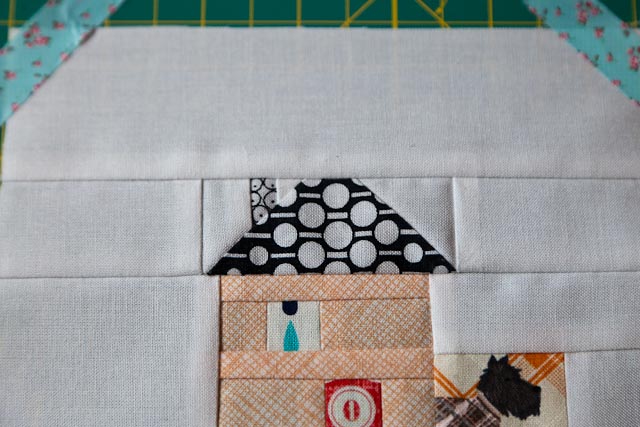
In my previous example, you can see that the chimney actually ended up only 1/4″ wide, by starting with a 3/4″ strip. I also positioned it much closer to one side than the other, which put the chimney higher up on the roofline. You are welcome to play around with these measurements as much as you like, as you can vary the look quite dramatically from one block to the next.
I love my little dotty chimney….
 I hope that you find this little tutorial helpful, please sing out if you have any questions about the process. If you haven’t already, head on over and sign up for the swap, and you can have a whole quilt of cute little houses, just like this!

Please be aware that there may be affiliate links in this content. Your support allows me to keep creating for you!


Angie @ GnomeAngel.com
This is awesome – totally going to add a chimney to my next go at making a house block.
Thanks for sharing 🙂
Cassandra
Glad you like it! Can’t wait to see everyone’s creations 🙂