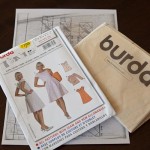
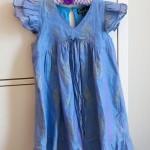
You might remember a few posts ago I mentioned that I was trying out some sewing patterns. Well the skirt one was more a guideline than a pattern, and I then proceeded to totally disregard it. Thank goodness for growing up at my mother’s knee – she was a master of the art of sewing.
My girlfriend sent me the measurements of her two daughters – twins as you would have it, but not even close to the same size. And a bit different in tastes as well. So armed with measurements, my seam unripper and my rotary cutter, I went to town on 2 vintage pillowcases I got for the princely sum of 20c each from the op shop. It’s a good op shop that.
Insert here the pictures of the pillowcases before I washed and unripped and washed and ironed and ironed them. That would have been a useful thing to document, but I’m sure we’ve all seen pillowcases before.
The easy part was that these pillowcases were all the same fabric, so by the time I unripped the seams, I had one lovely long strip of fabric to work with. I simply used the full height of the fabric, and measured along the strip until I had enough for the hip measurement of my little girls, plus a little bit extra. Only a centre back seam was required, saving even more precious sewing time!
I find it so much easier to work on the ruffle when the whole thing is still flat, then join it together at the seam afterwards. None of that tricky sewing in part. And using my Babylock with it’s gorgeous ruffling foot, it was gathered, attached, and overlocked in one swoop. Although I chose to topstitch it in the end for a bit of seam security. The ruffle is made from a single bed sheet – also from the op shop, costing a whole dollar. Again, out with the Babylock for the rolled hem along the ruffle.
For the second skirt, I didn’t have anything matching to make a ruffle with, so I opted for zigzagging a simple ribbon along the edge – which I simply overlocked first. Thinking about it, I probably should have folded up some sort of hem, but I was pushing it for length, so I didn’t want to lose any more.
And a trick that I learned after years of making elastic waisted pants for my boys – inserting elastic into the waistband casing is tedious, cumbersome, and for people who have heaps more time than me. Fold your casing over, press it, sew your elastic into a circle, then insert under the folded edge. Now simply sew the casing down over the top of the elastic, making sure not to catch it in your seam. Keep turning the waist, moving the fabric and stretching out the elastic as you are going, until you get back to the beginning. There – 3 steps all completed in one go. Wasn’t that easier?? Works for anytime you are encasing something in elastic.
Aren’t they just completely adorable? I couldn’t believe I made these, and in less than a day too. And Mum is really happy too – it’s so hard to find clothes for girls around the 7-10 age that aren’t wildly inappropriate, covered in characters or just plain ugly. Now she’s hunting through her cupboards for lots of other things for me to alter as well…. I came home with 3 out-grown dresses, so stay tuned!!
Meanwhile, if you haven’t already, please feel free to have a look at my Etsy shop. I’ve put a few new prints in there and will keep adding to them over the next couple of weeks.
Please be aware that there may be affiliate links in this content. Your support allows me to keep creating for you!


Jenny
great idea! : )
More girls skirt refashioning! | Hands, Heart, Passion
[…] Easy skirts from vintage pillowcases (cassandramadge.wordpress.com) […]
Peasant Dress pattern review | Hands, Heart, Passion
[…] a while ago I posted that I had bought a couple of sewing patterns from a shop (also on etsy) called 5Berries. I bought the patterns for a few reasons, namely I […]